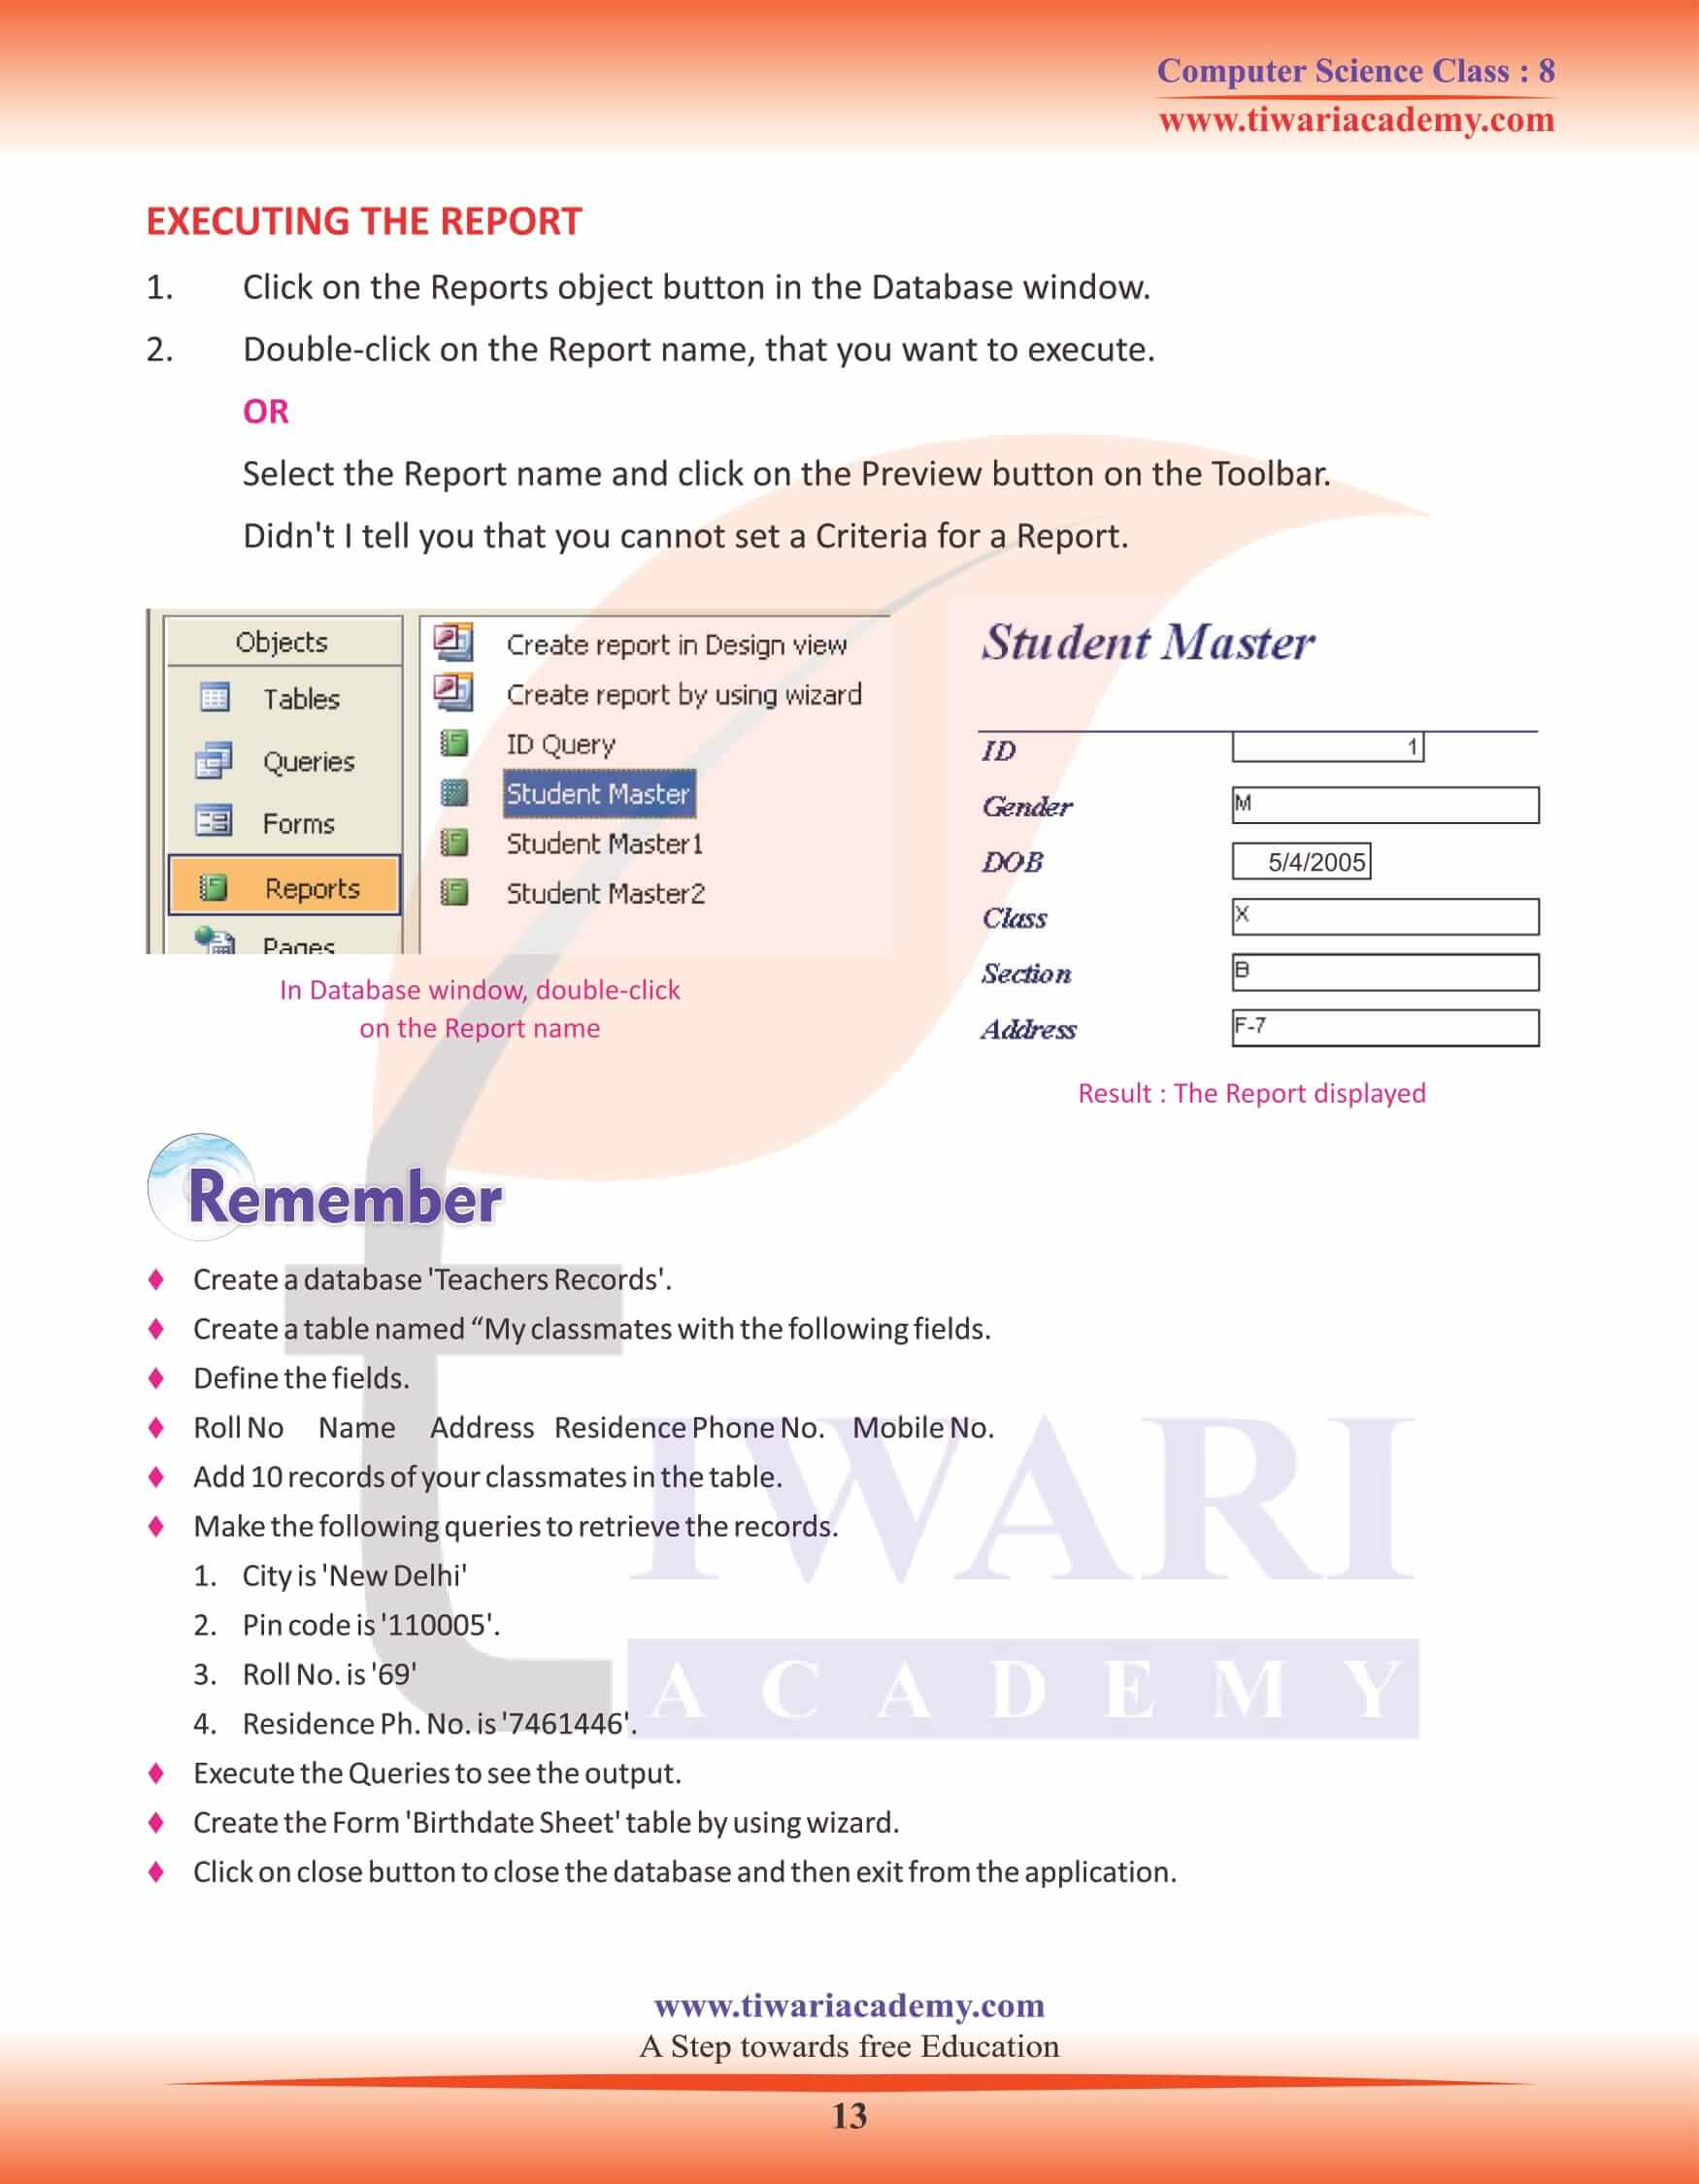
NCERT Solutions for Class 8 Computer Science Chapter 7 Forms, Queries and Reports in English Medium updated for CBSE and state board academic session 2025-26. Here students of grade 8 computer science will learn about the components of database like Forms, Reports and Quires.
Class 8 Computer Science Chapter 7 Forms, Quires and Reports
Forms, Queries and Reports
You have studied about database. A database is a collection of logically related data designed to meet the information needs of one or more users. Reports and Queries help to retrieve the required information in a quick and formatted manner. These Reports and queries can be generated from the input data.
WHAT IS A FORM
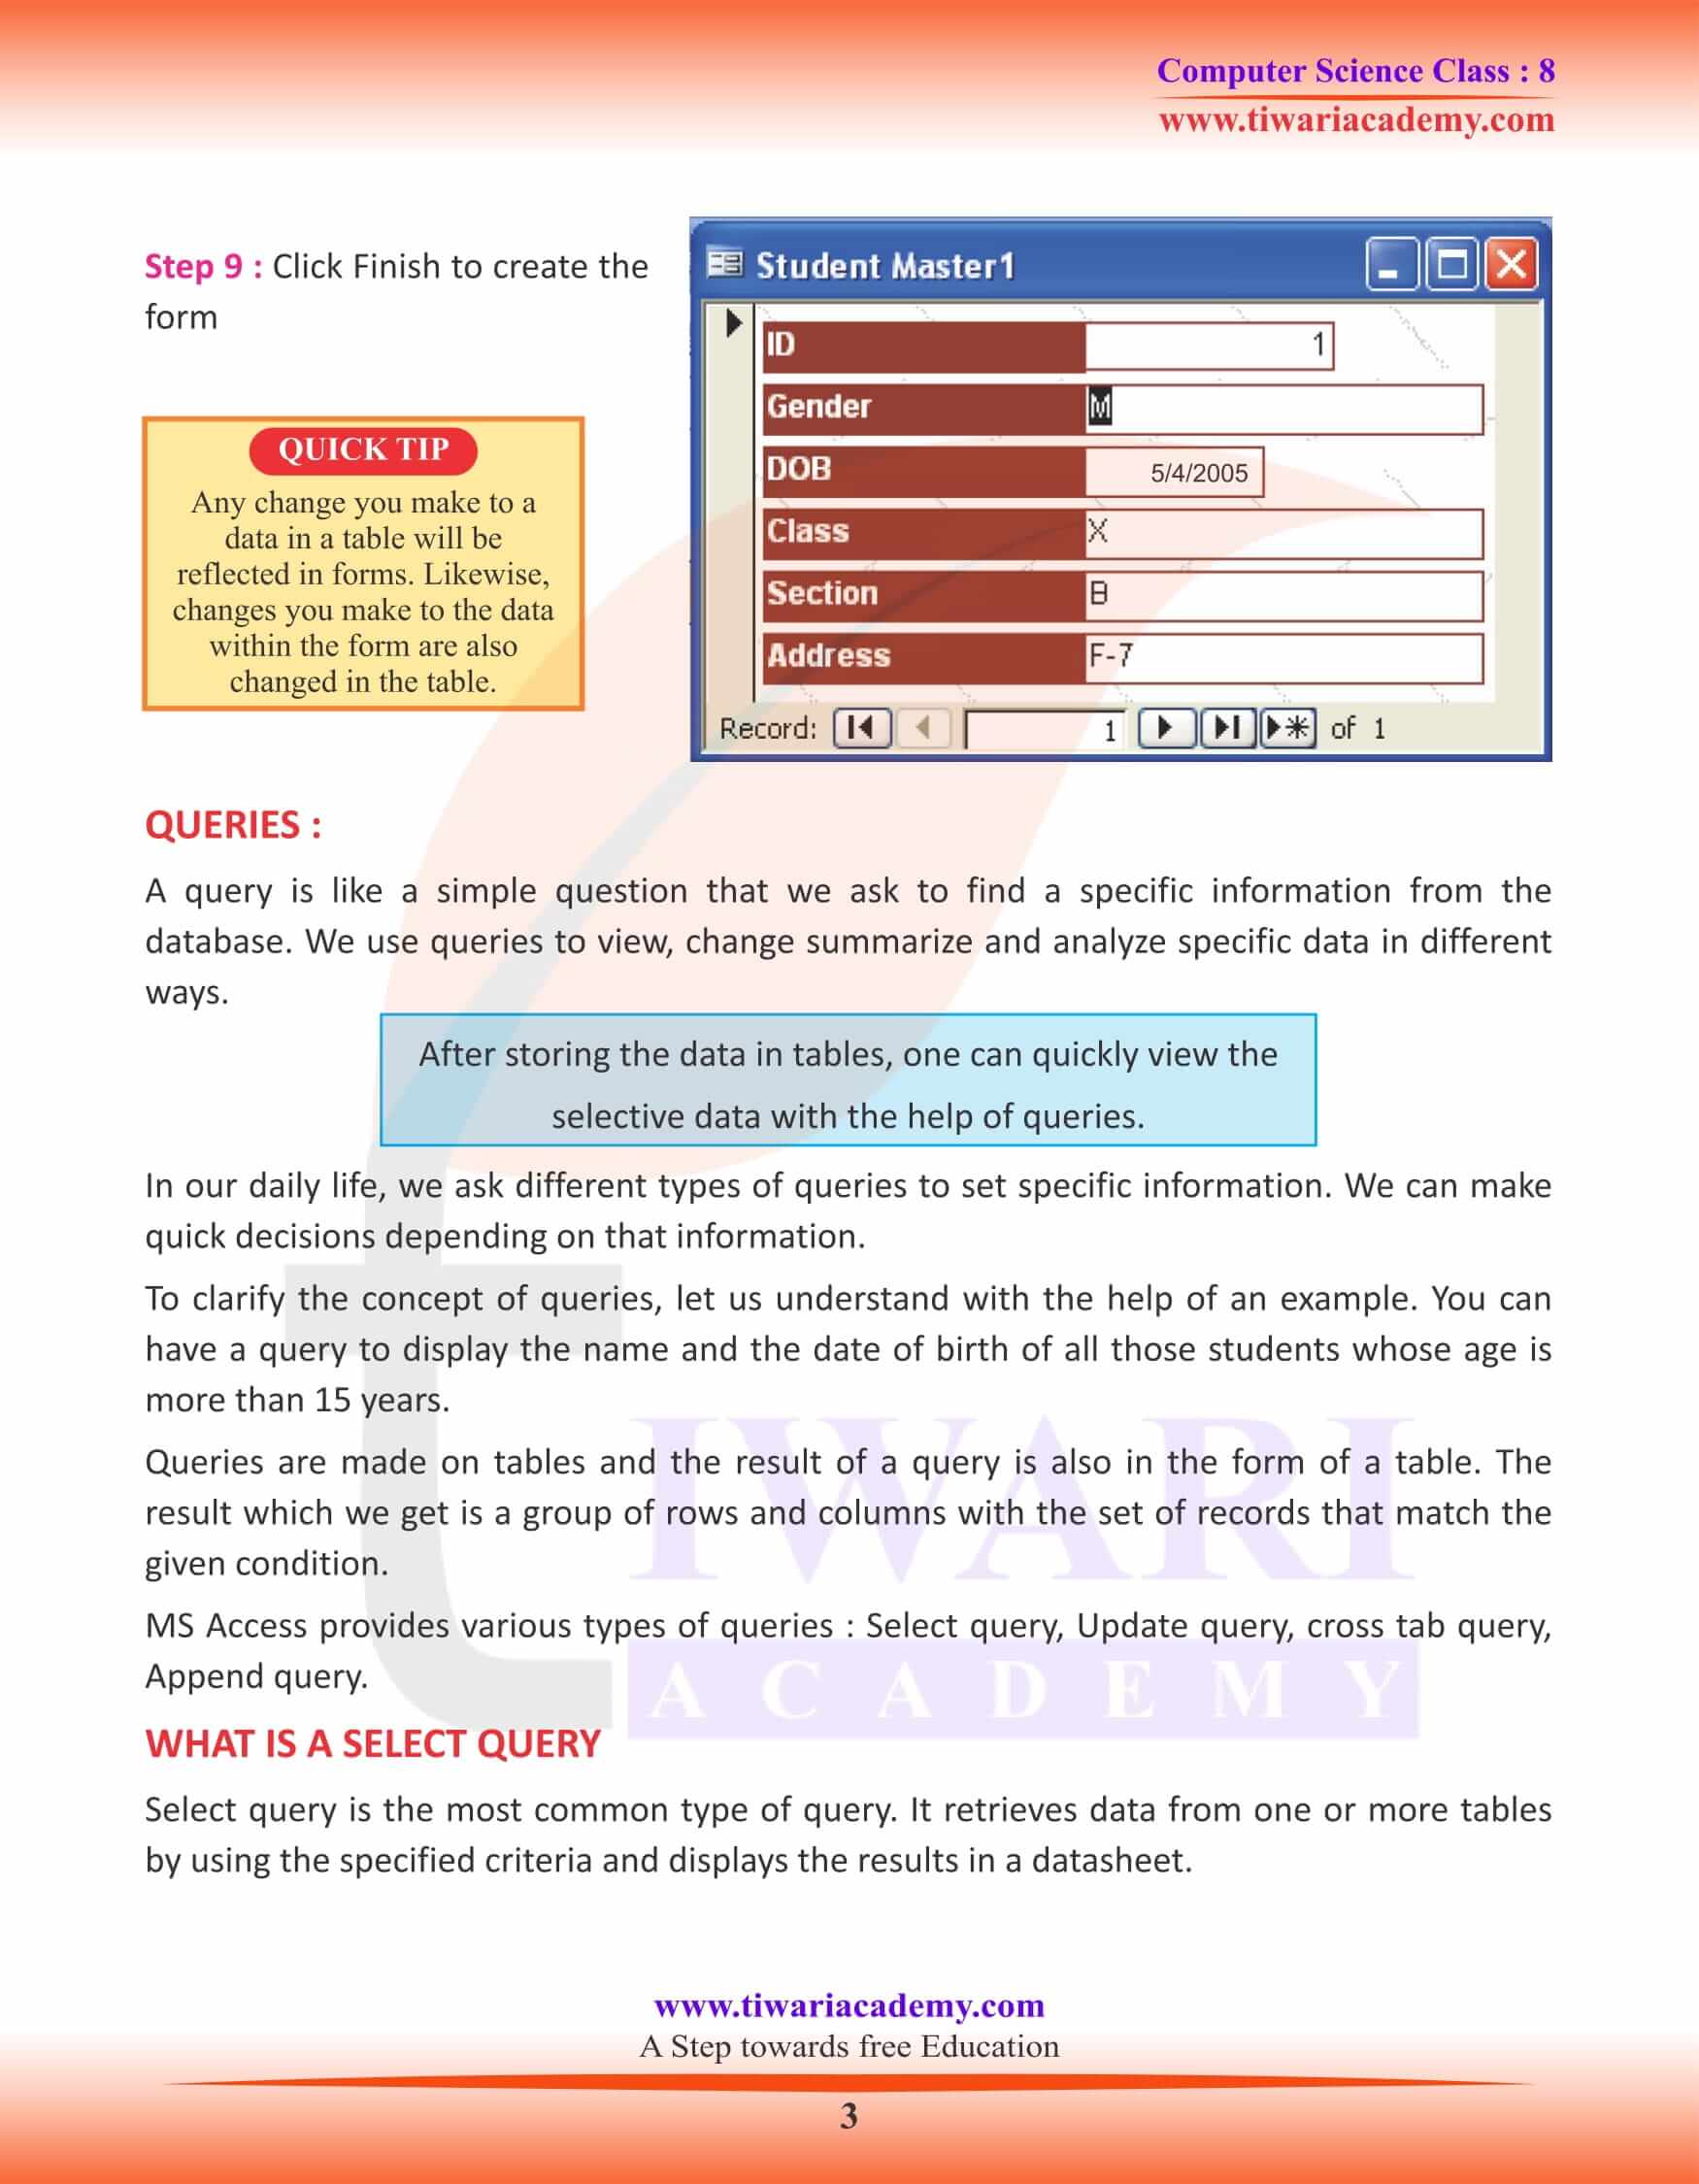
Forms are the easiest way to enter data into a database. Forms are used for entering, displaying and editing data in fields. They make data entry easier and also prevent mistakes. You can create forms so that data can be entered conveniently in a formatted manner.
TO CREATE A FORM TO ENTER DATA
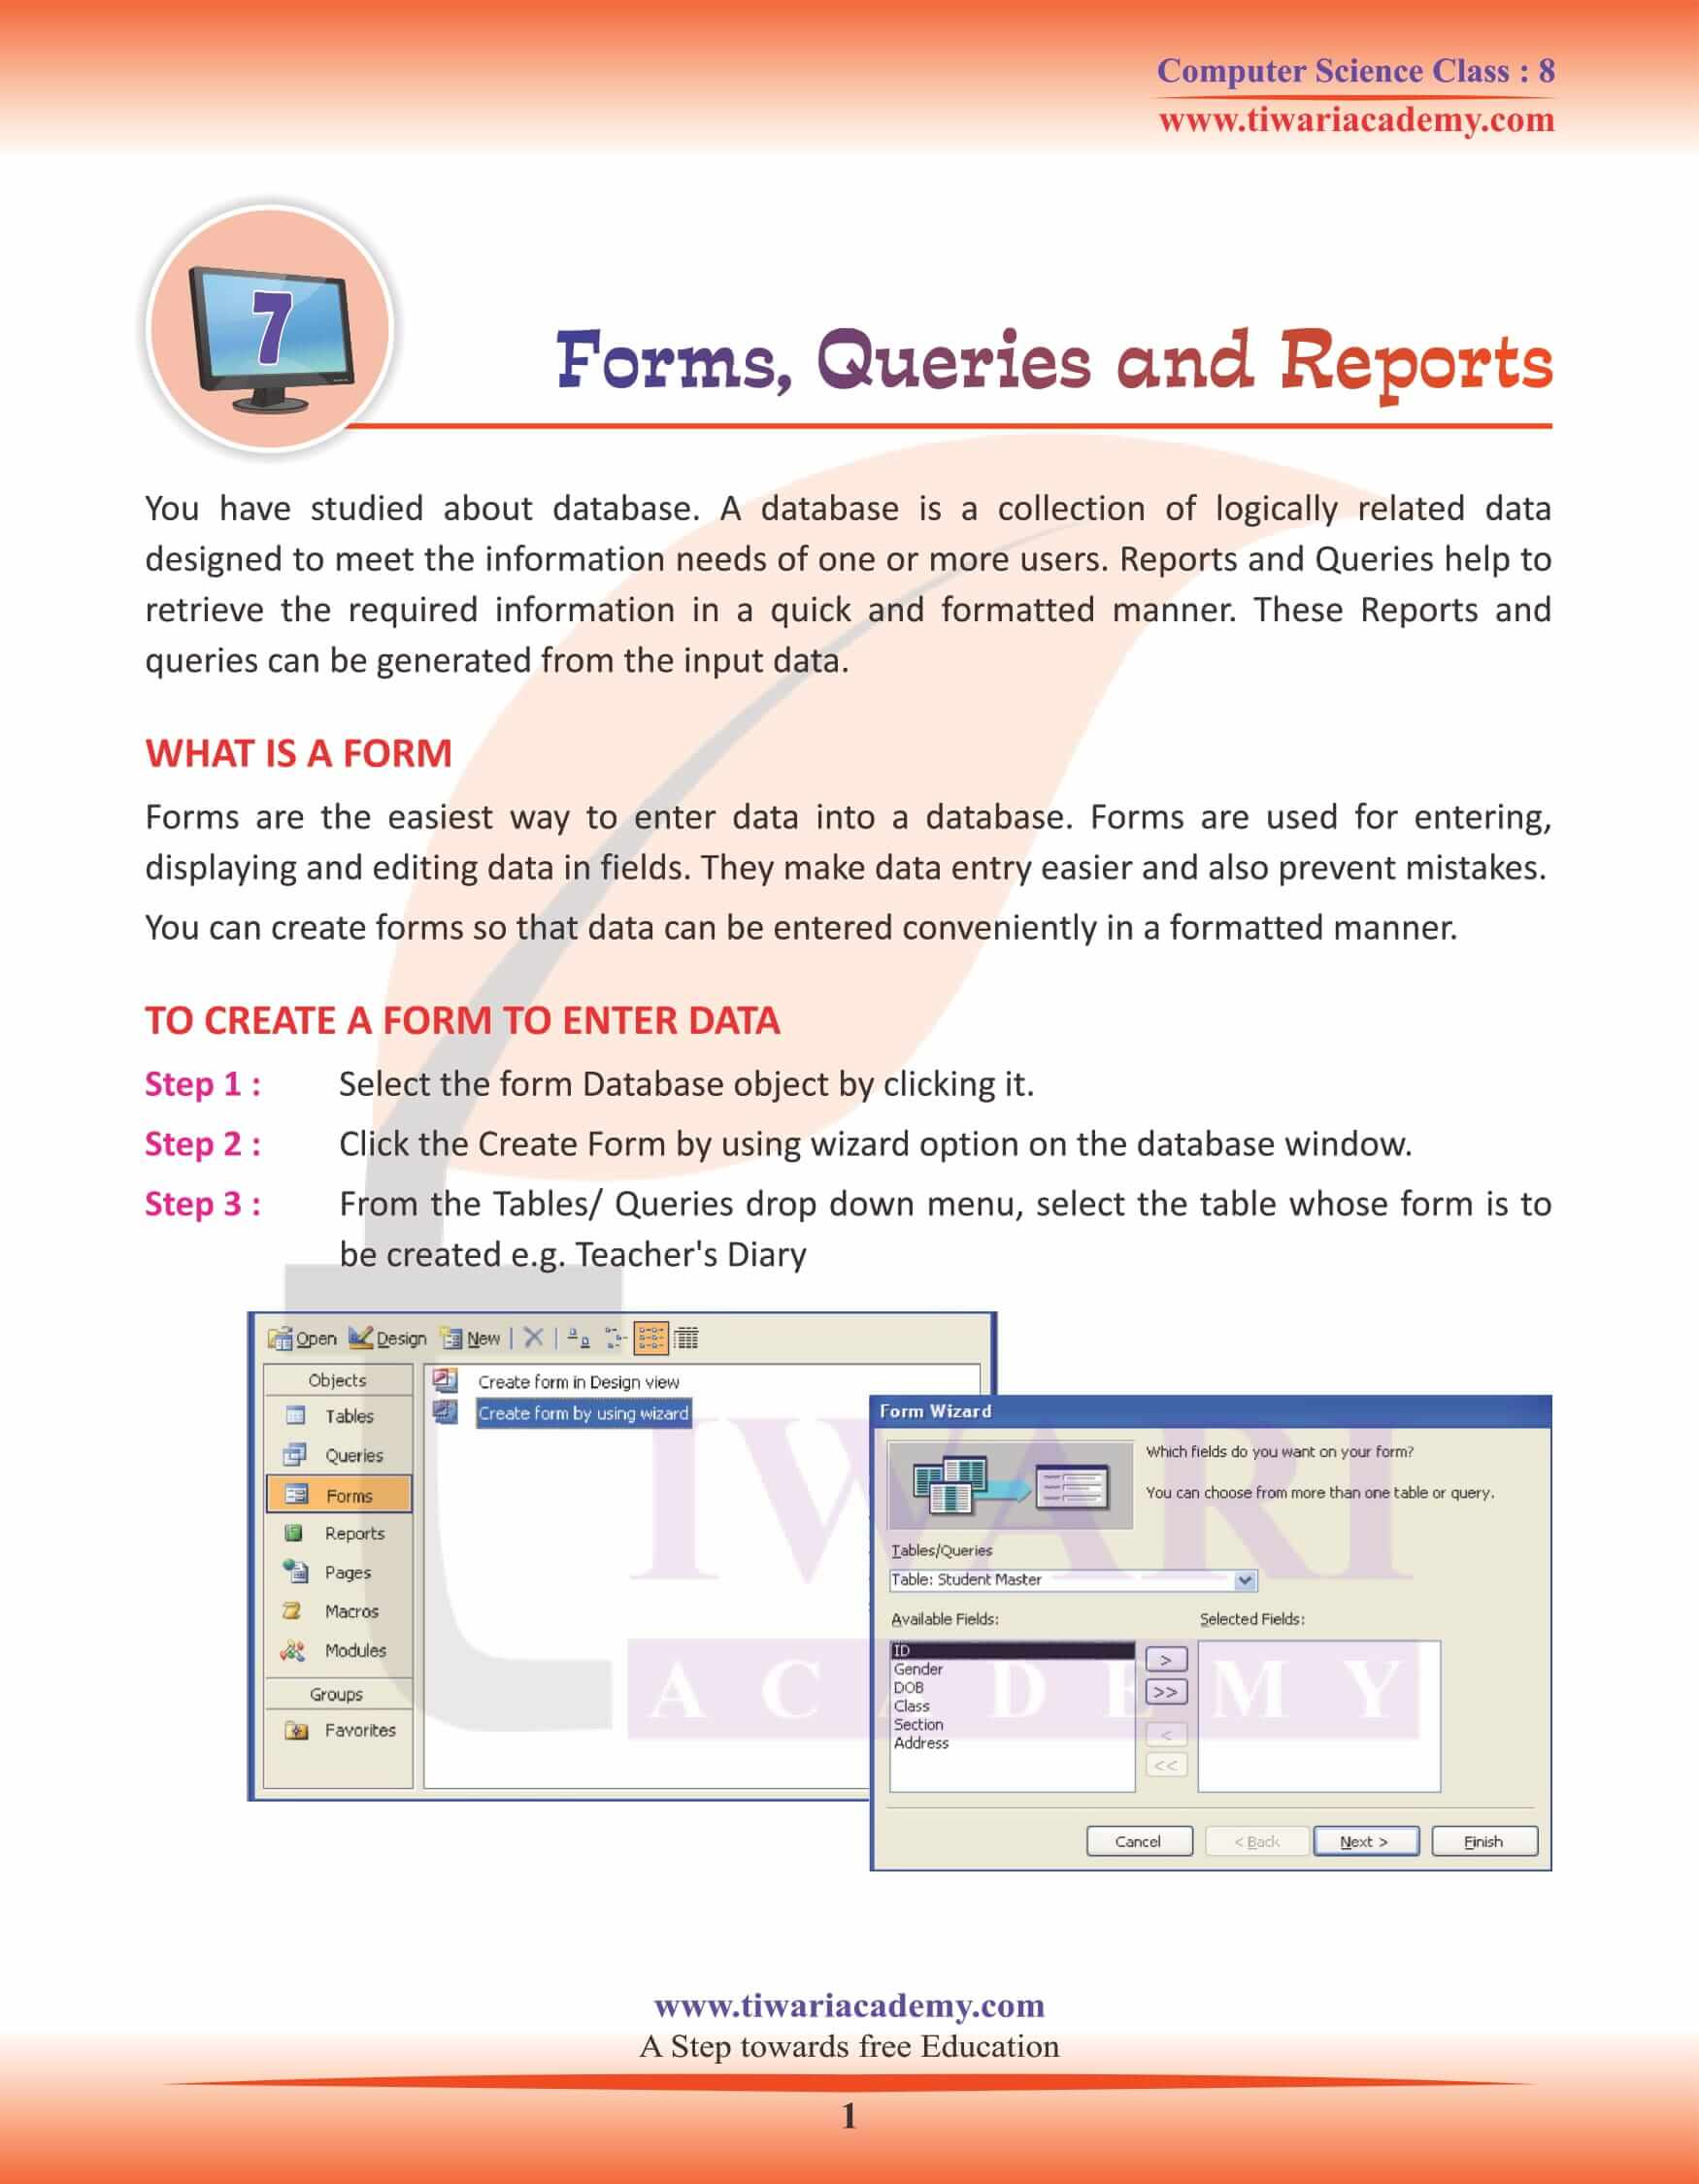
Step 1: Select the form Database object by clicking it.
Step 2: Click the Create Form by using wizard option on the database window.
Step 3: From the Tables/ Queries drop down menu, select the table whose form is to be created e.g. Teacher’s Diary
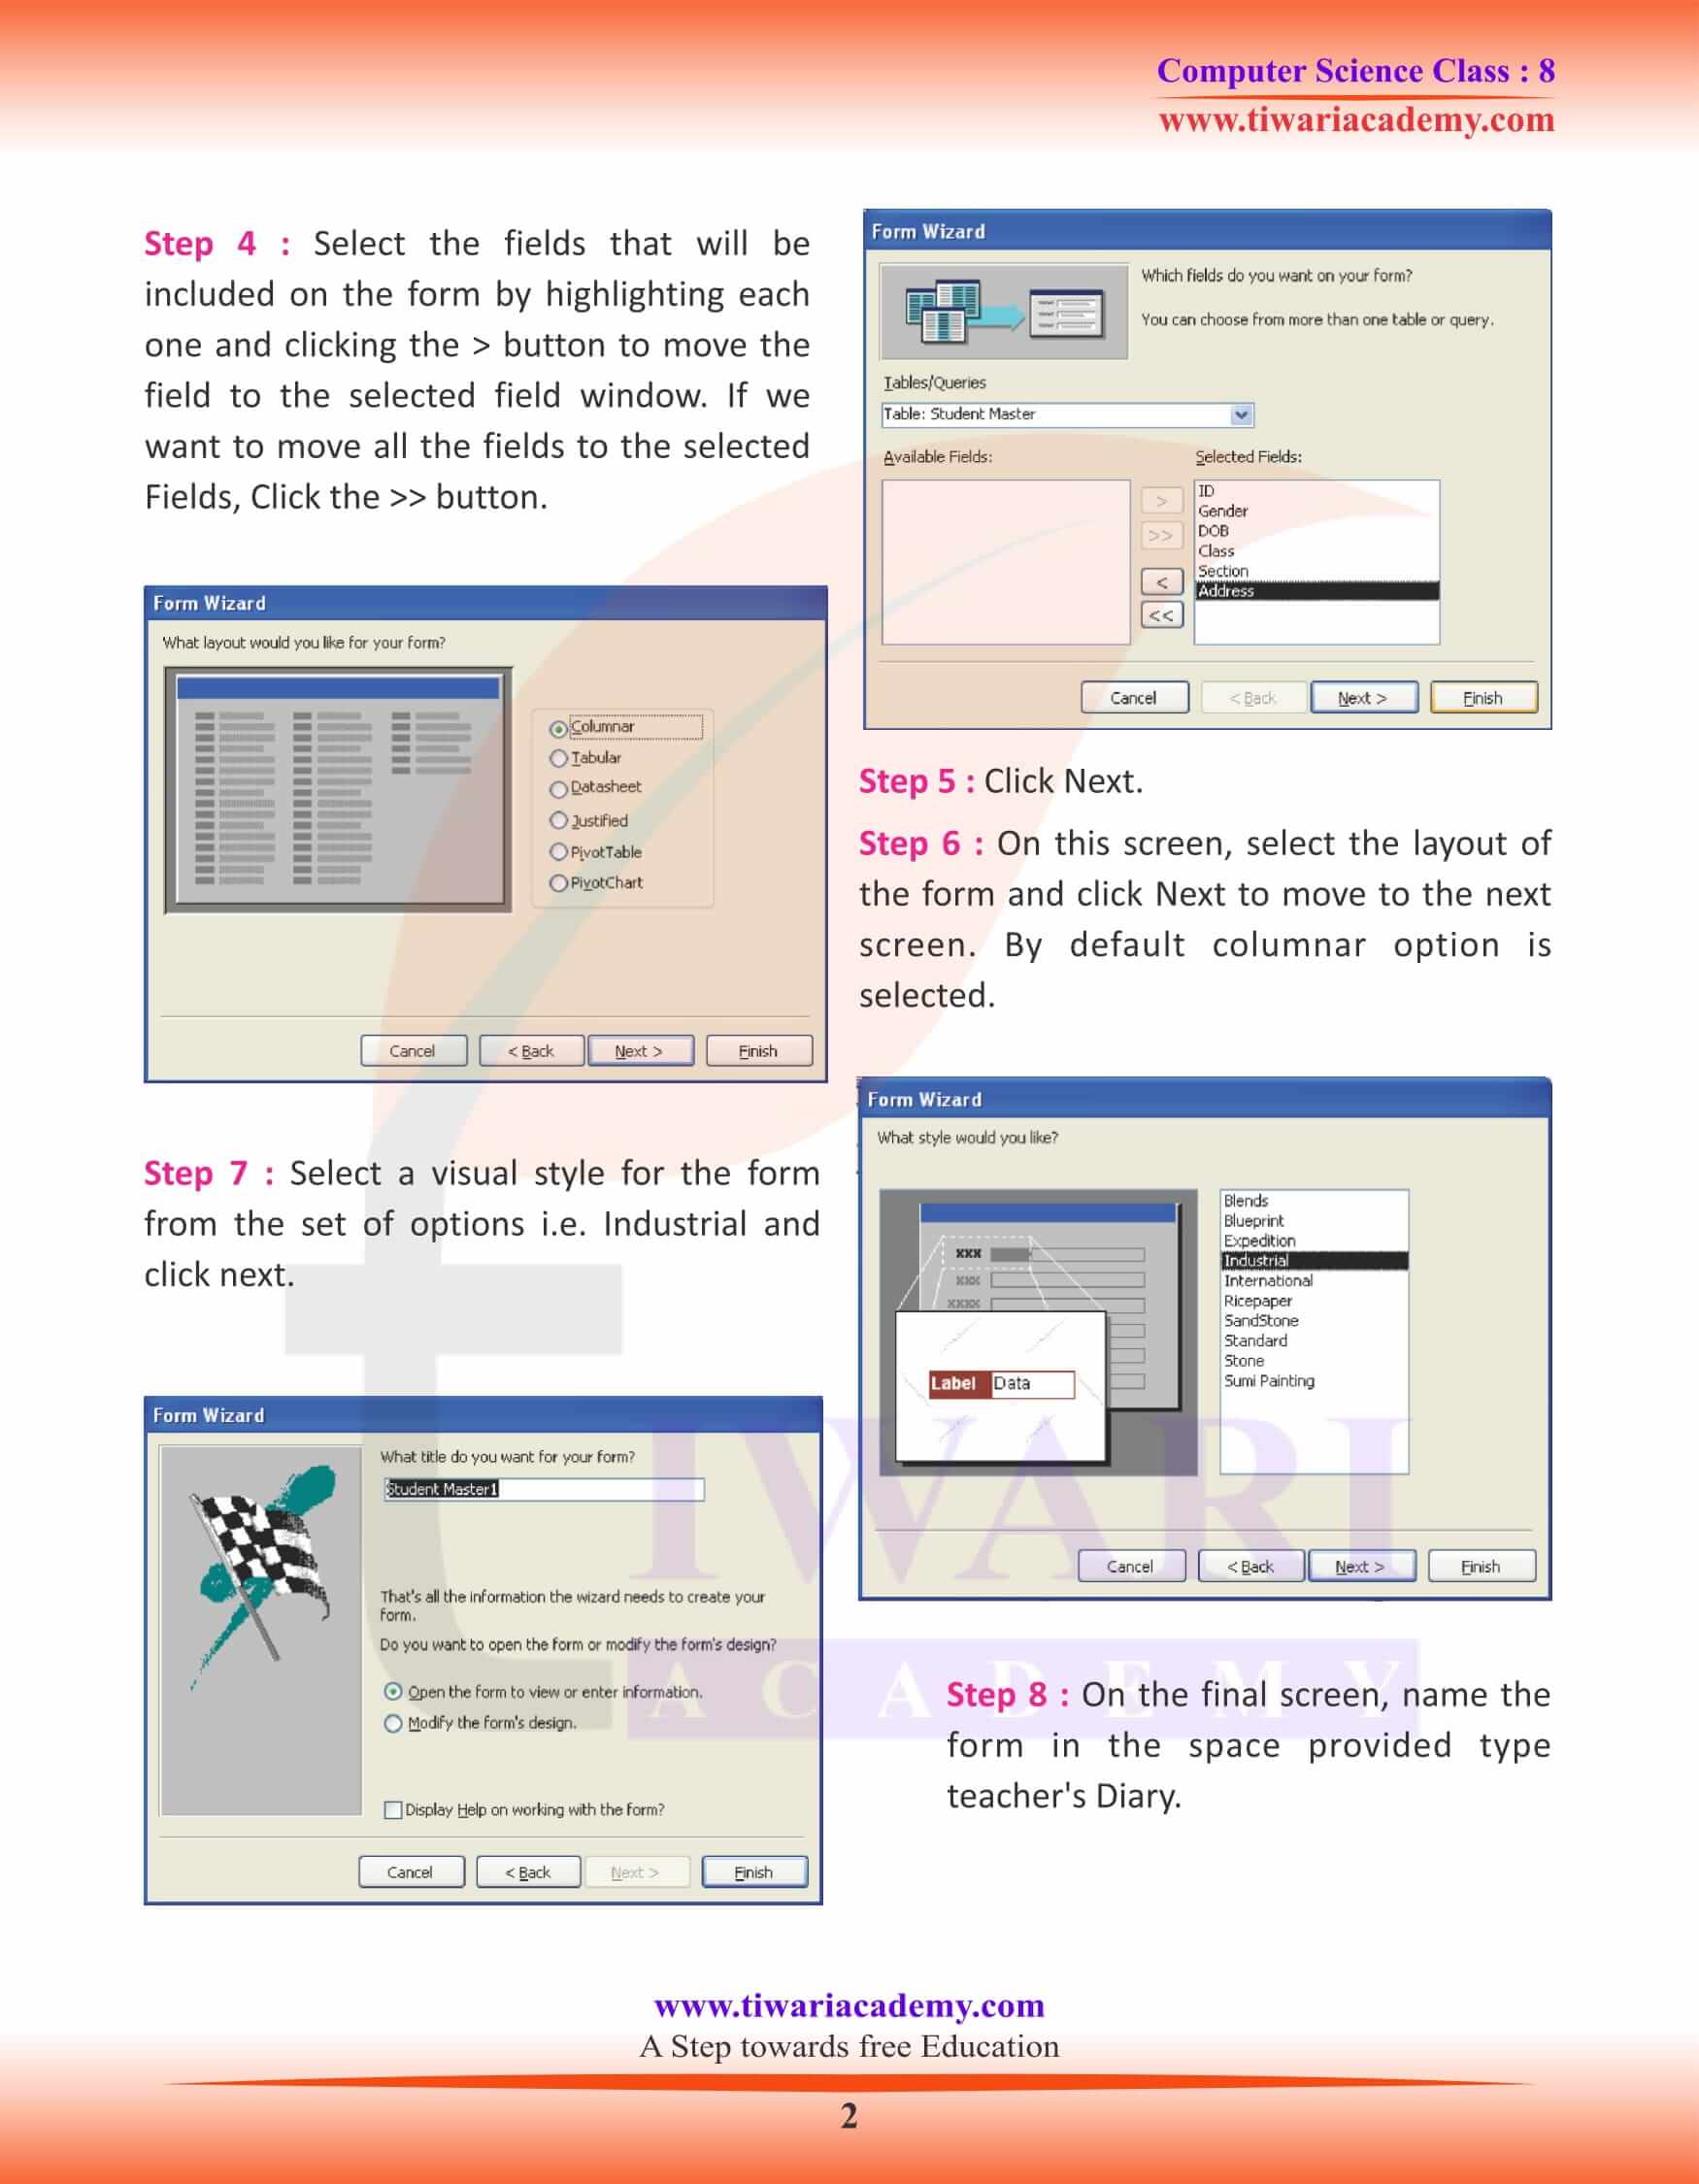
Step 4: Select the fields that will be included on the form by highlighting each one and clicking the > button to move the field to the selected field window. If we want to move all the fields to the selected Fields, Click the >> button.
Step 5: Click Next.
Step 6: On this screen, select the layout of the form and click Next to move to the next screen. By default columnar option is selected.
Step 7: Select a visual style for the form from the set of options i.e. industrial and click next.
Step 8: On the final screen, name the form in the space provided type teacher’s Diary.
QUERIES
A query is like a simple question that we ask to find a specific information from the database. We use queries to view, change summarize and analyze specific data in different ways. After storing the data in tables, one can quickly view the selective data with the help of queries. In our daily life, we ask different types of queries to set specific information. We can make quick decisions depending on that information. To clarify the concept of queries, let us understand with the help of an example. You can have a query to display the name and the date of birth of all those students whose age is more than 15 years.
Queries are made on tables and the result of a query is also in the form of a table. The result which we get is a group of rows and columns with the set of records that match the given condition. MS Access provides various types of queries: Select query, Update query, cross tab query, Append query.
WHAT IS A SELECT QUERY
Select query is the most common type of query. It retrieves data from one or more tables by using the specified criteria and displays the results in a datasheet.
CREATING A SIMPLE QUERY
To create a simple query follow the given steps:
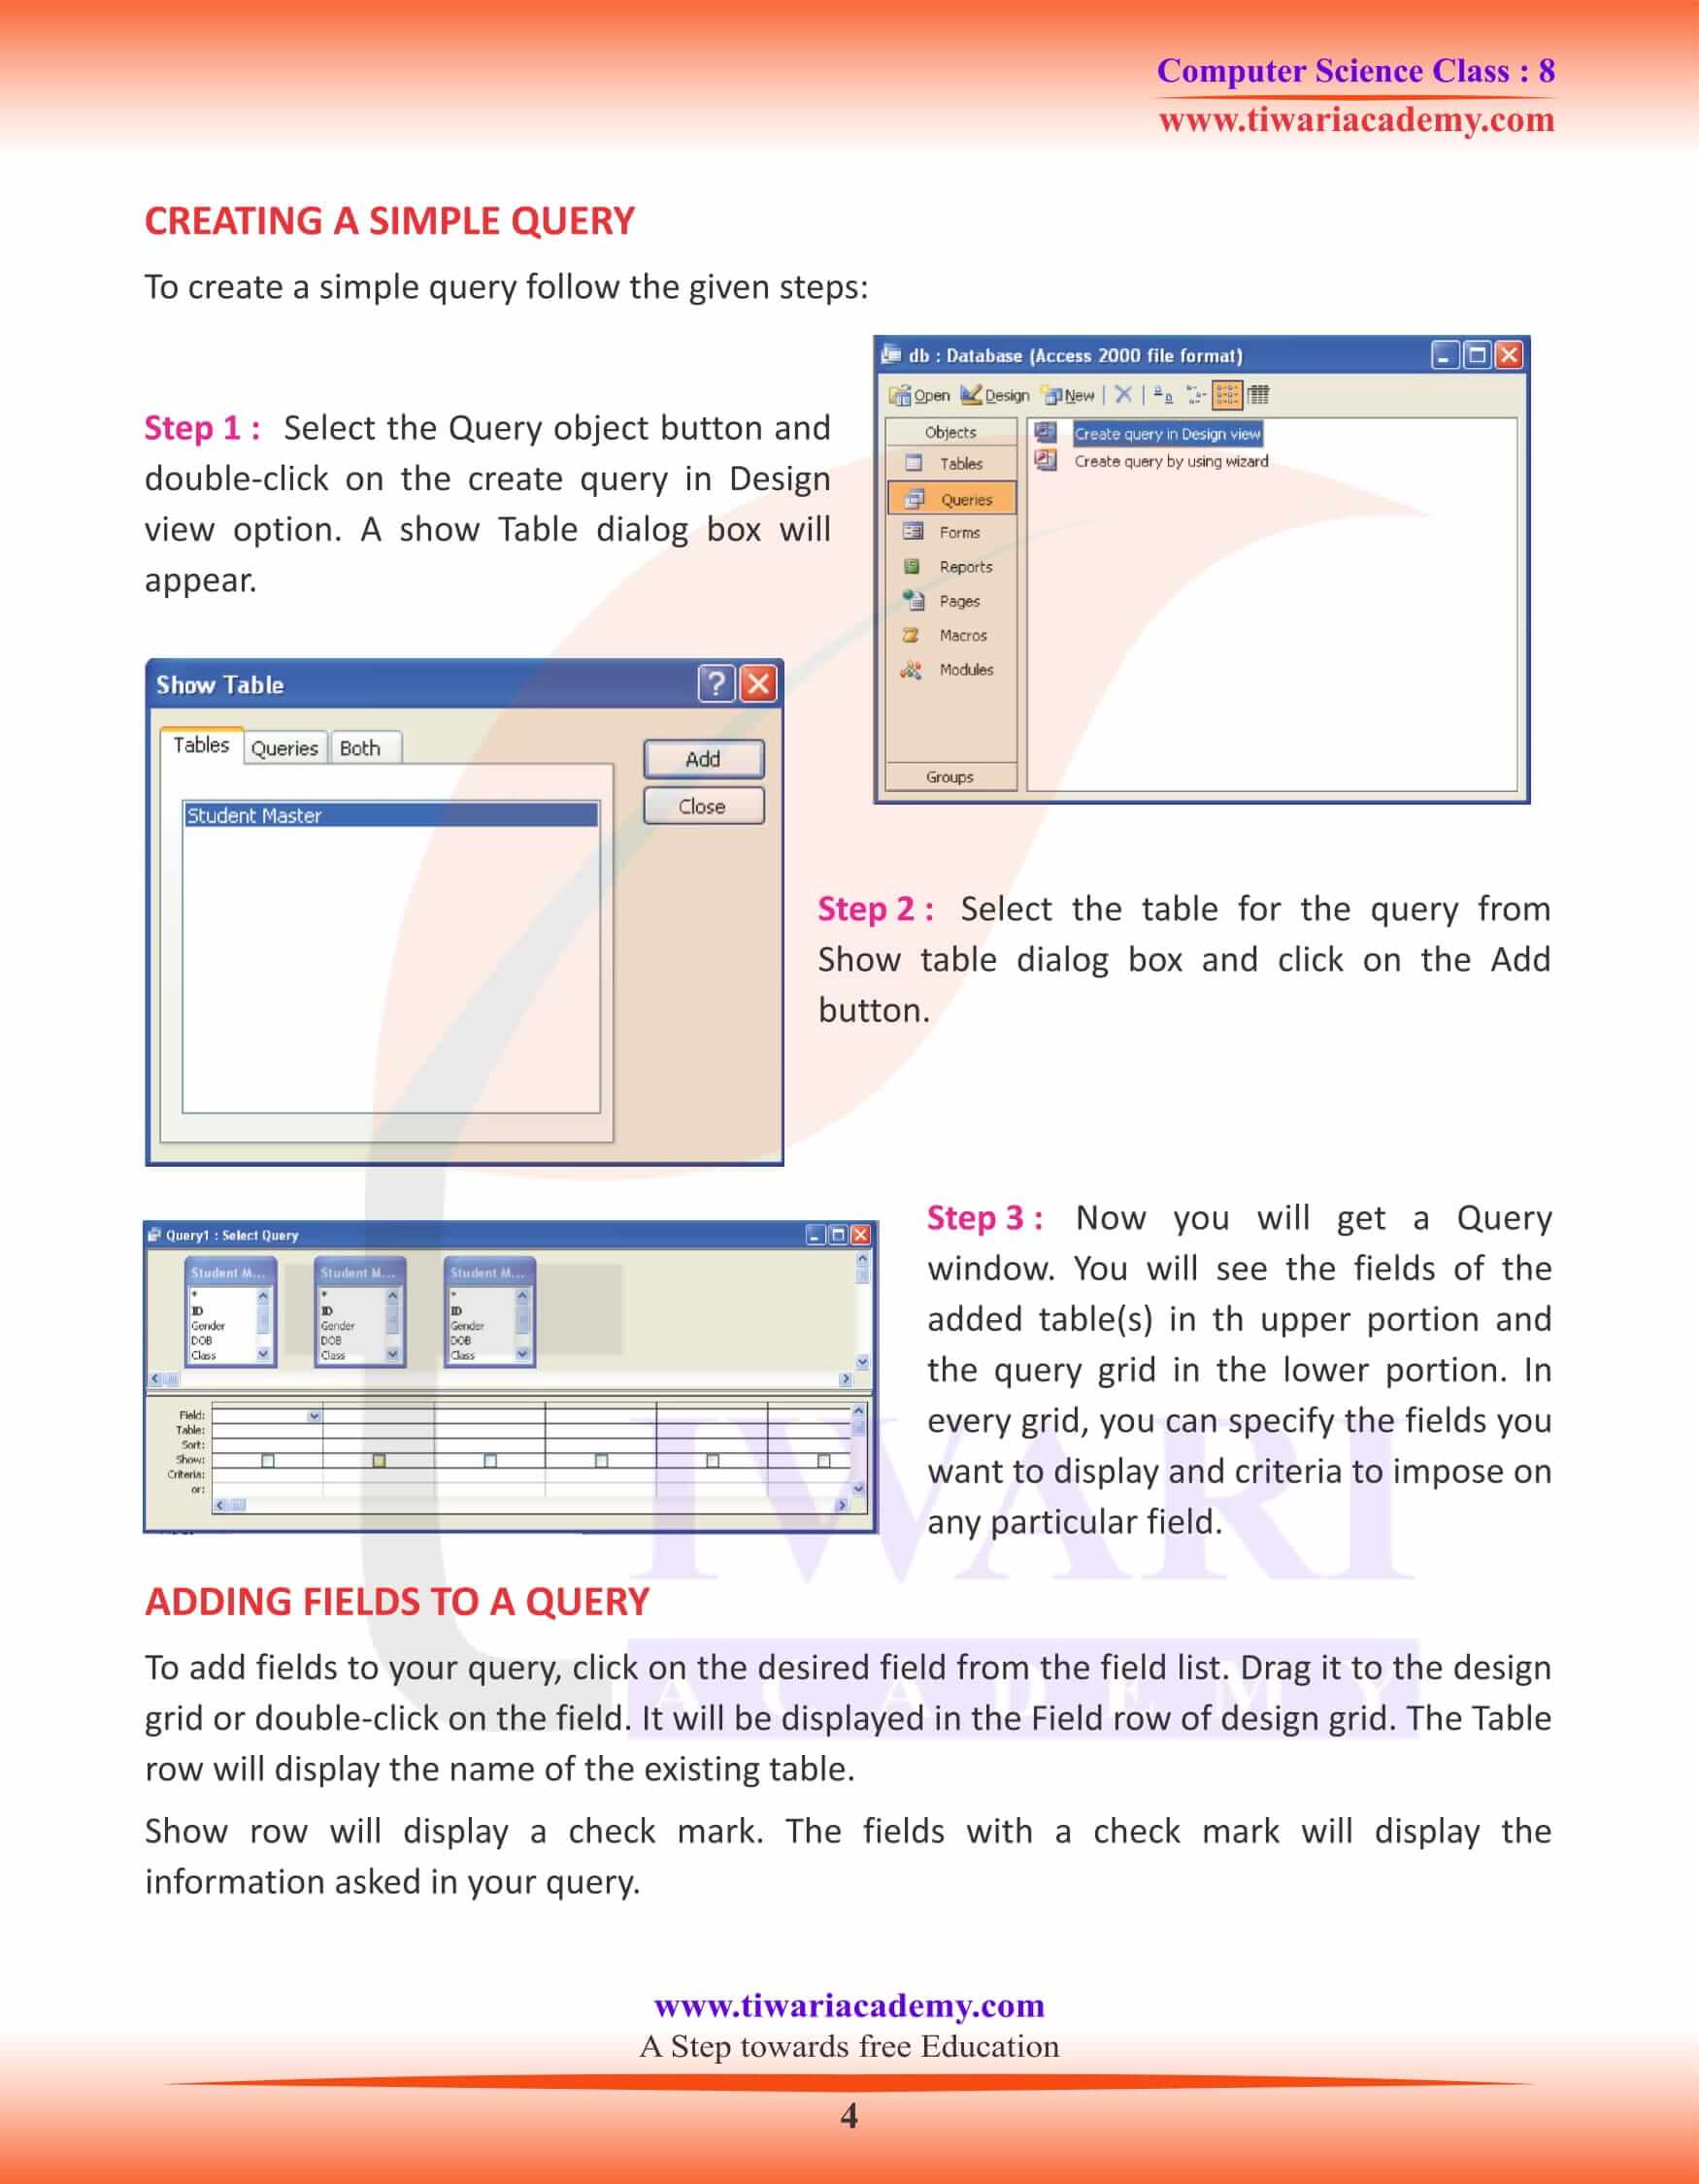
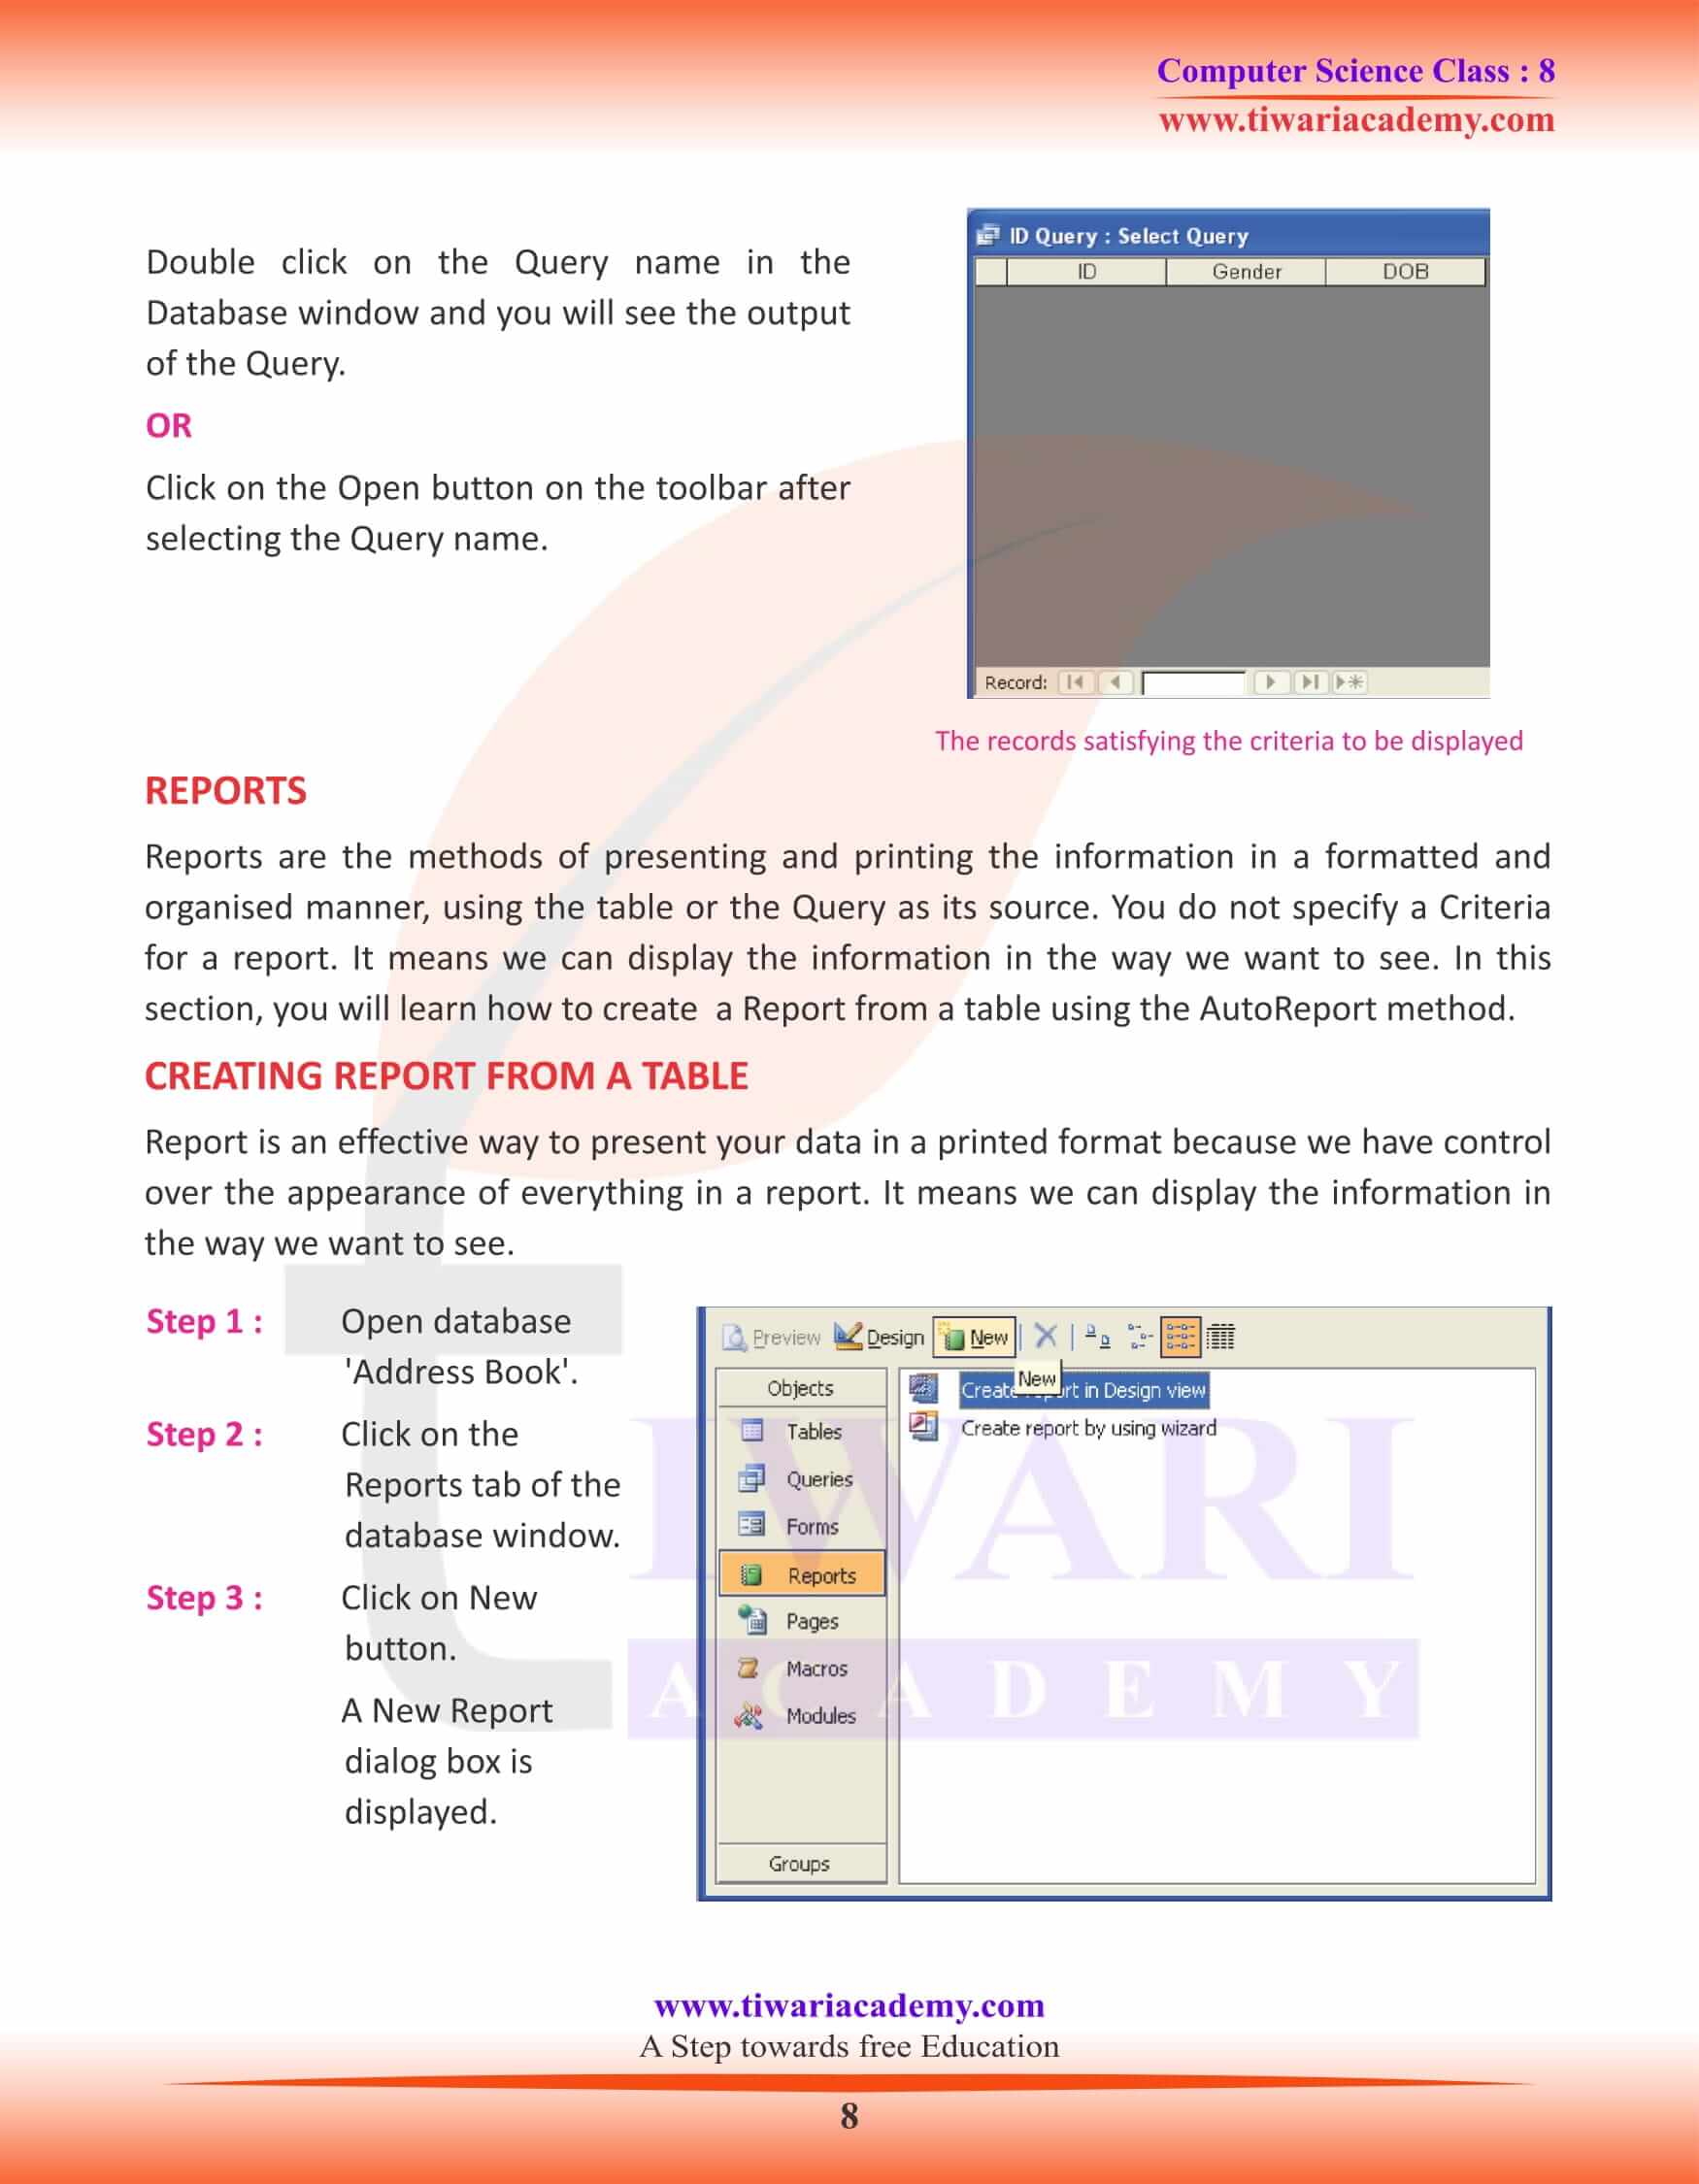
- Step 1: Select the Query object button and double-click on the create query in Design view option. A show Table dialog box will appear.
- Step 2: Select the table for the query from Show table dialog box and click on the Add button.
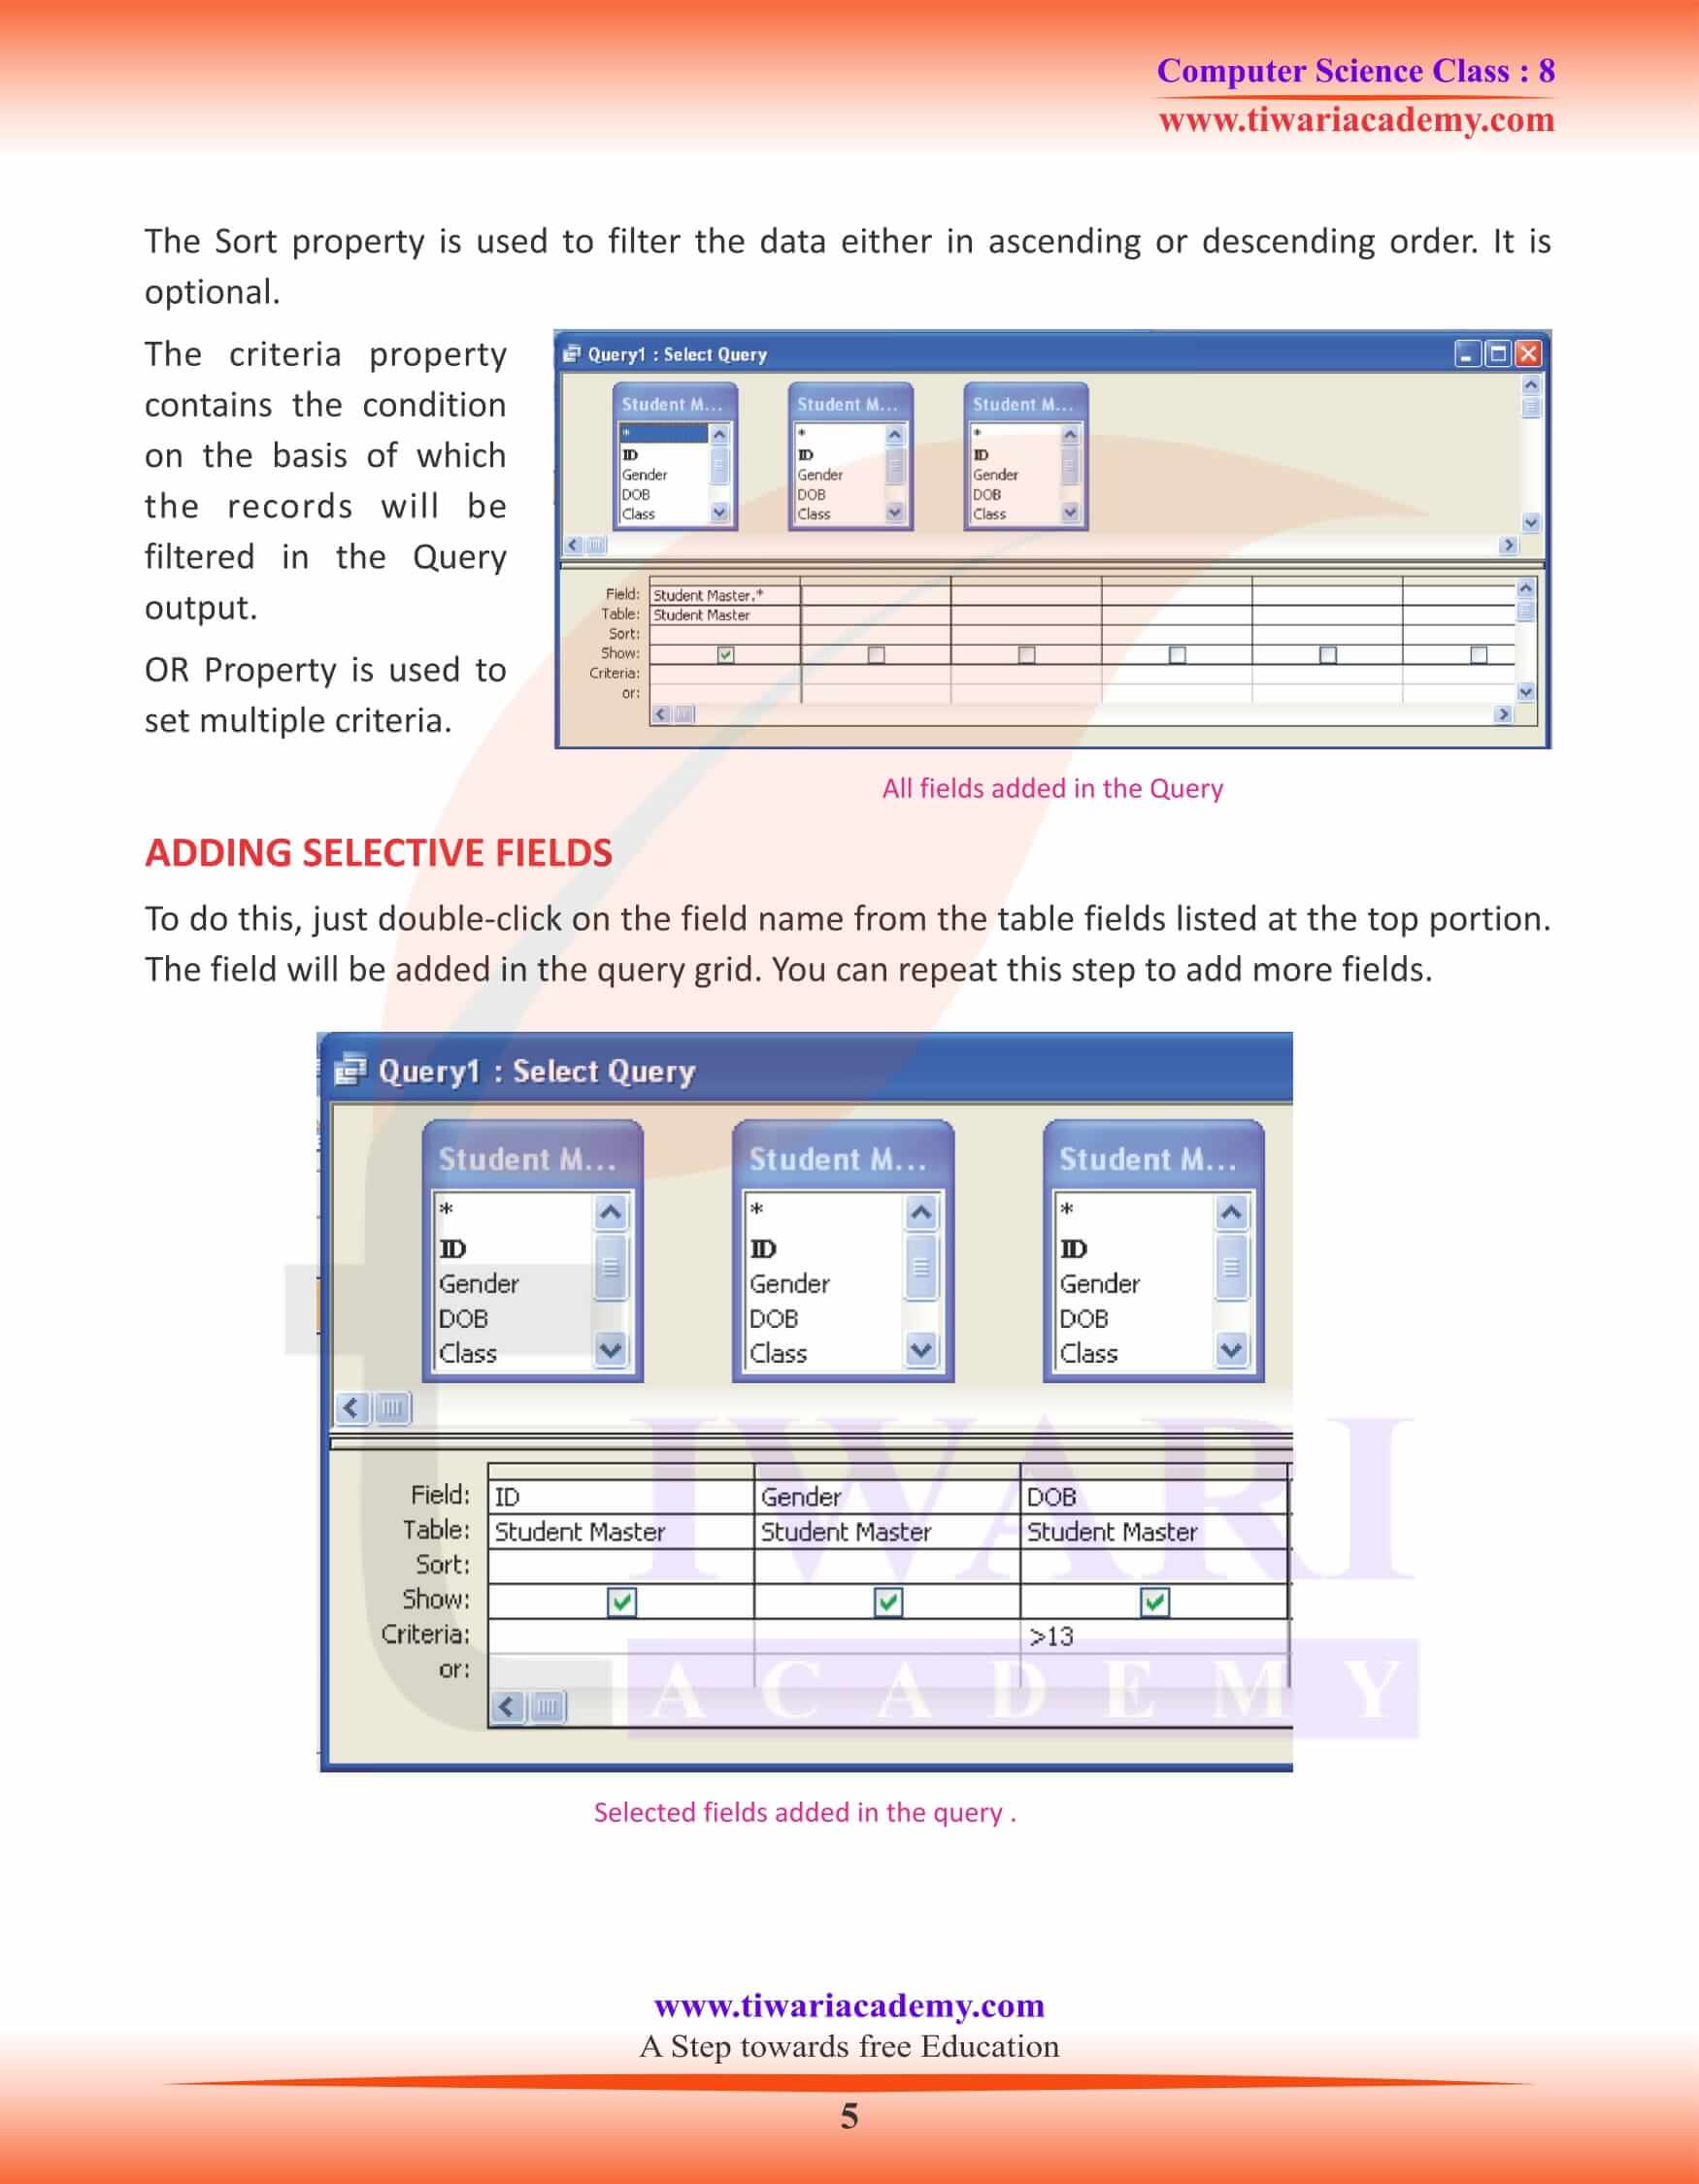
- Step 3: Now you will get a Query window. You will see the fields of the added table(s) in the upper portion and the query grid in the lower portion. In every grid, you can specify the fields you want to display and criteria to impose on any particular field.
ADDING FIELDS TO A QUERY
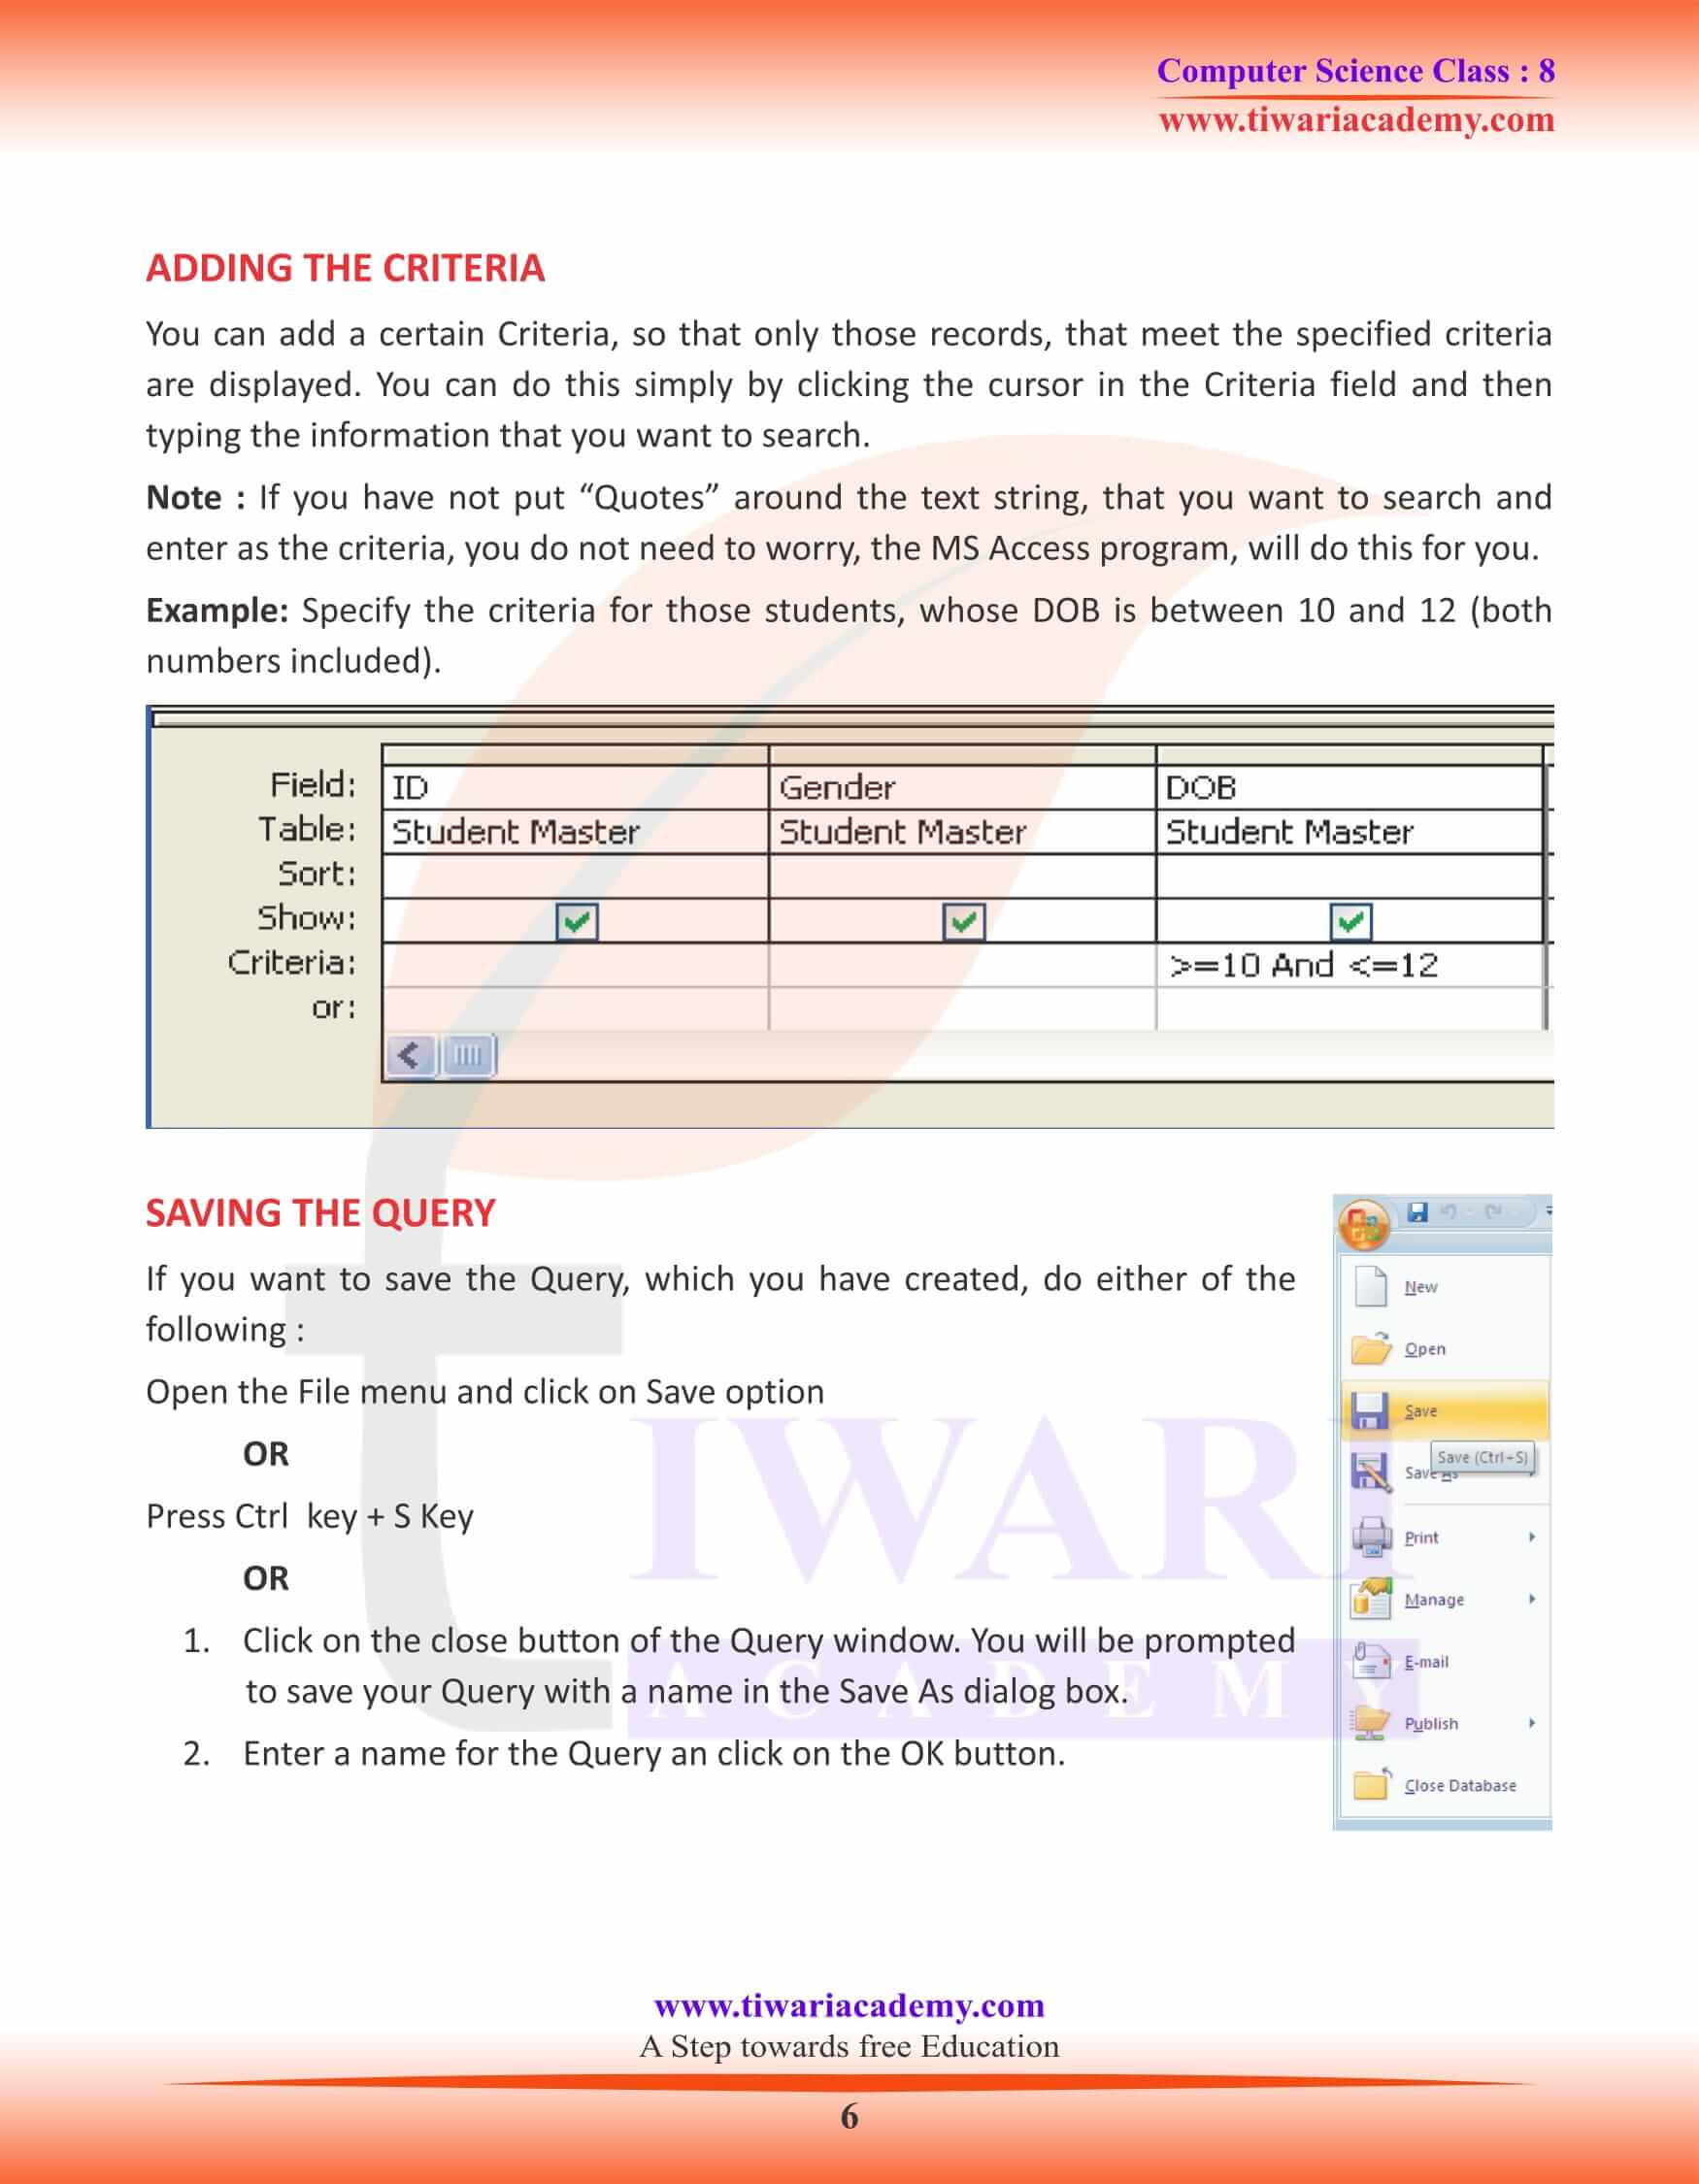
To add fields to your query, click on the desired field from the field list. Drag it to the design grid or double-click on the field. It will be displayed in the Field row of design grid. The Table row will display the name of the existing table. Show row will display a check mark. The fields with a check mark will display the information asked in your query.
ADDING SELECTIVE FIELDS
To do this, just double-click on the field name from the table fields listed at the top portion. The field will be added in the query grid. You can repeat this step to add more fields.
ADDING THE CRITERIA
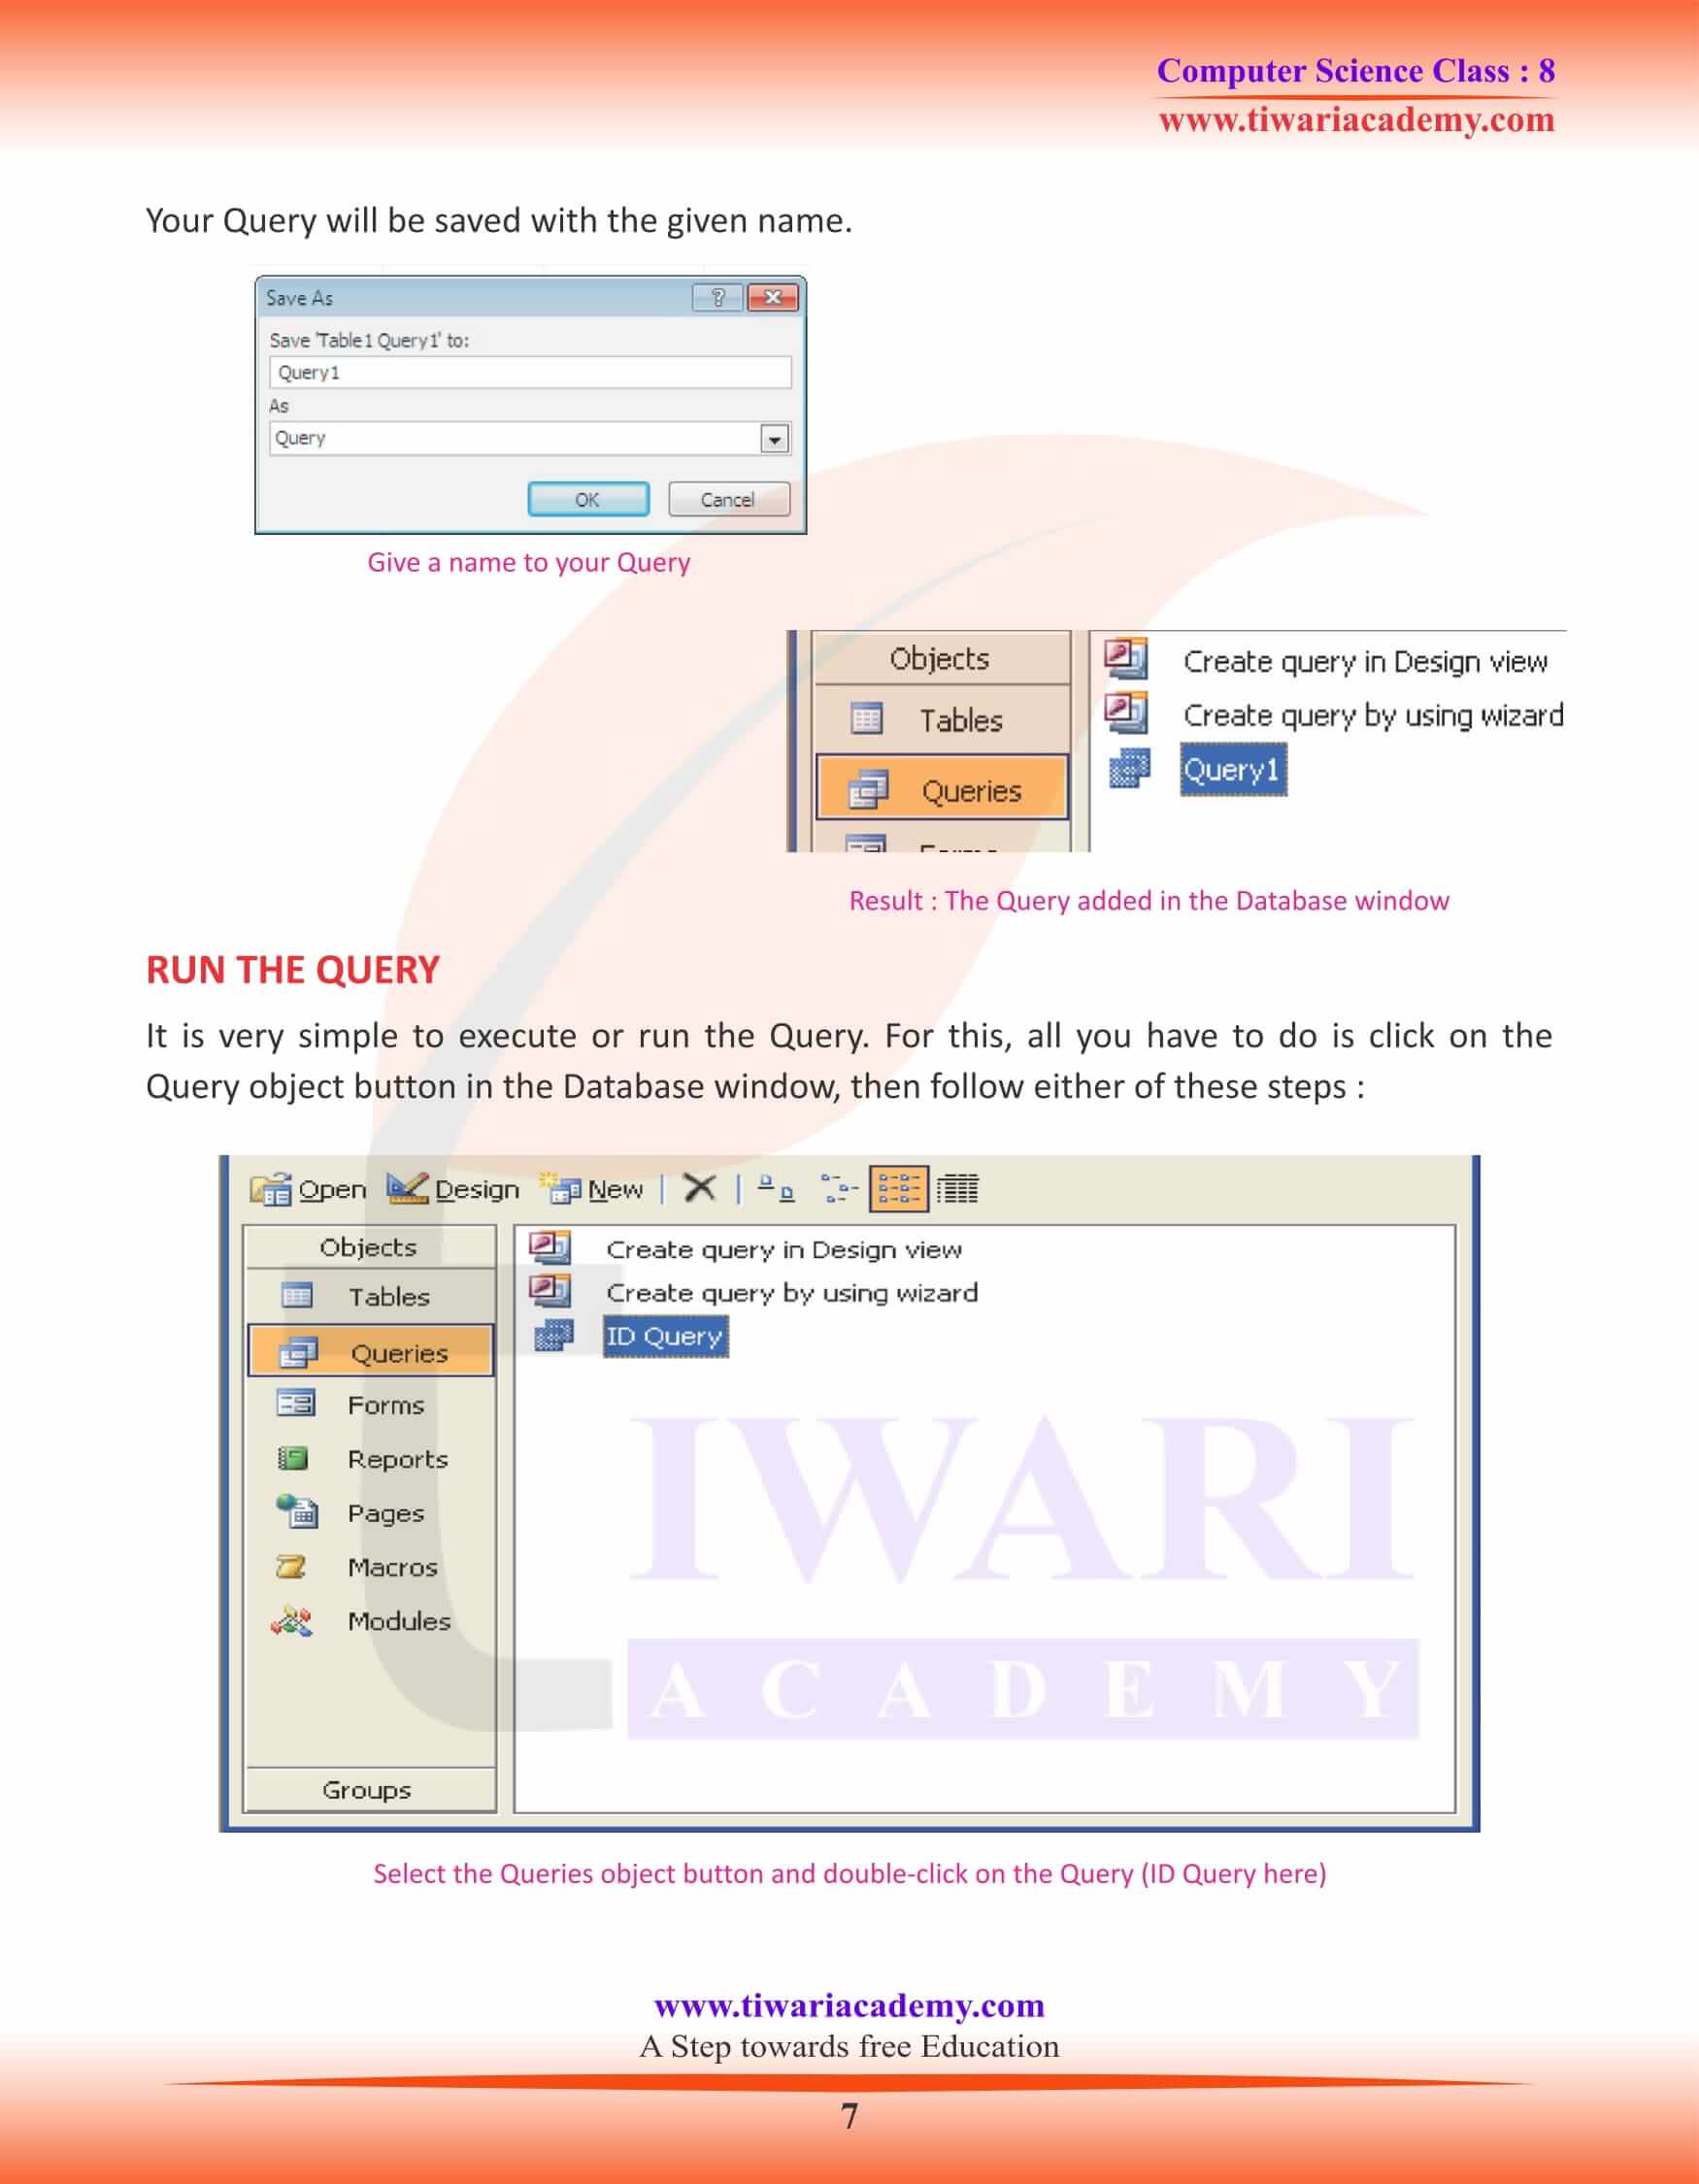
You can add a certain Criteria, so that only those records, that meet the specified criteria are displayed. You can do this simply by clicking the cursor in the Criteria field and then typing the information that you want to search.
Note: If you have not put “Quotes” around the text string that you want to search and enter as the criteria, you do not need to worry, the MS Access program, will do this for you.
Example: Specify the criteria for those students, whose DOB is between 10 and 12 (both numbers included).
