NCERT Solutions for Class 8 Computer Science Chapter 5 Introduction to Flash updated for new academic session 2025-26. Get here Grade 8 Computer book chapter 5 which explains about the wording of Flash program during the use of video playing.
Class 8 Computer Science Chapter 5 Introduction to Flash
Introduction to Flash
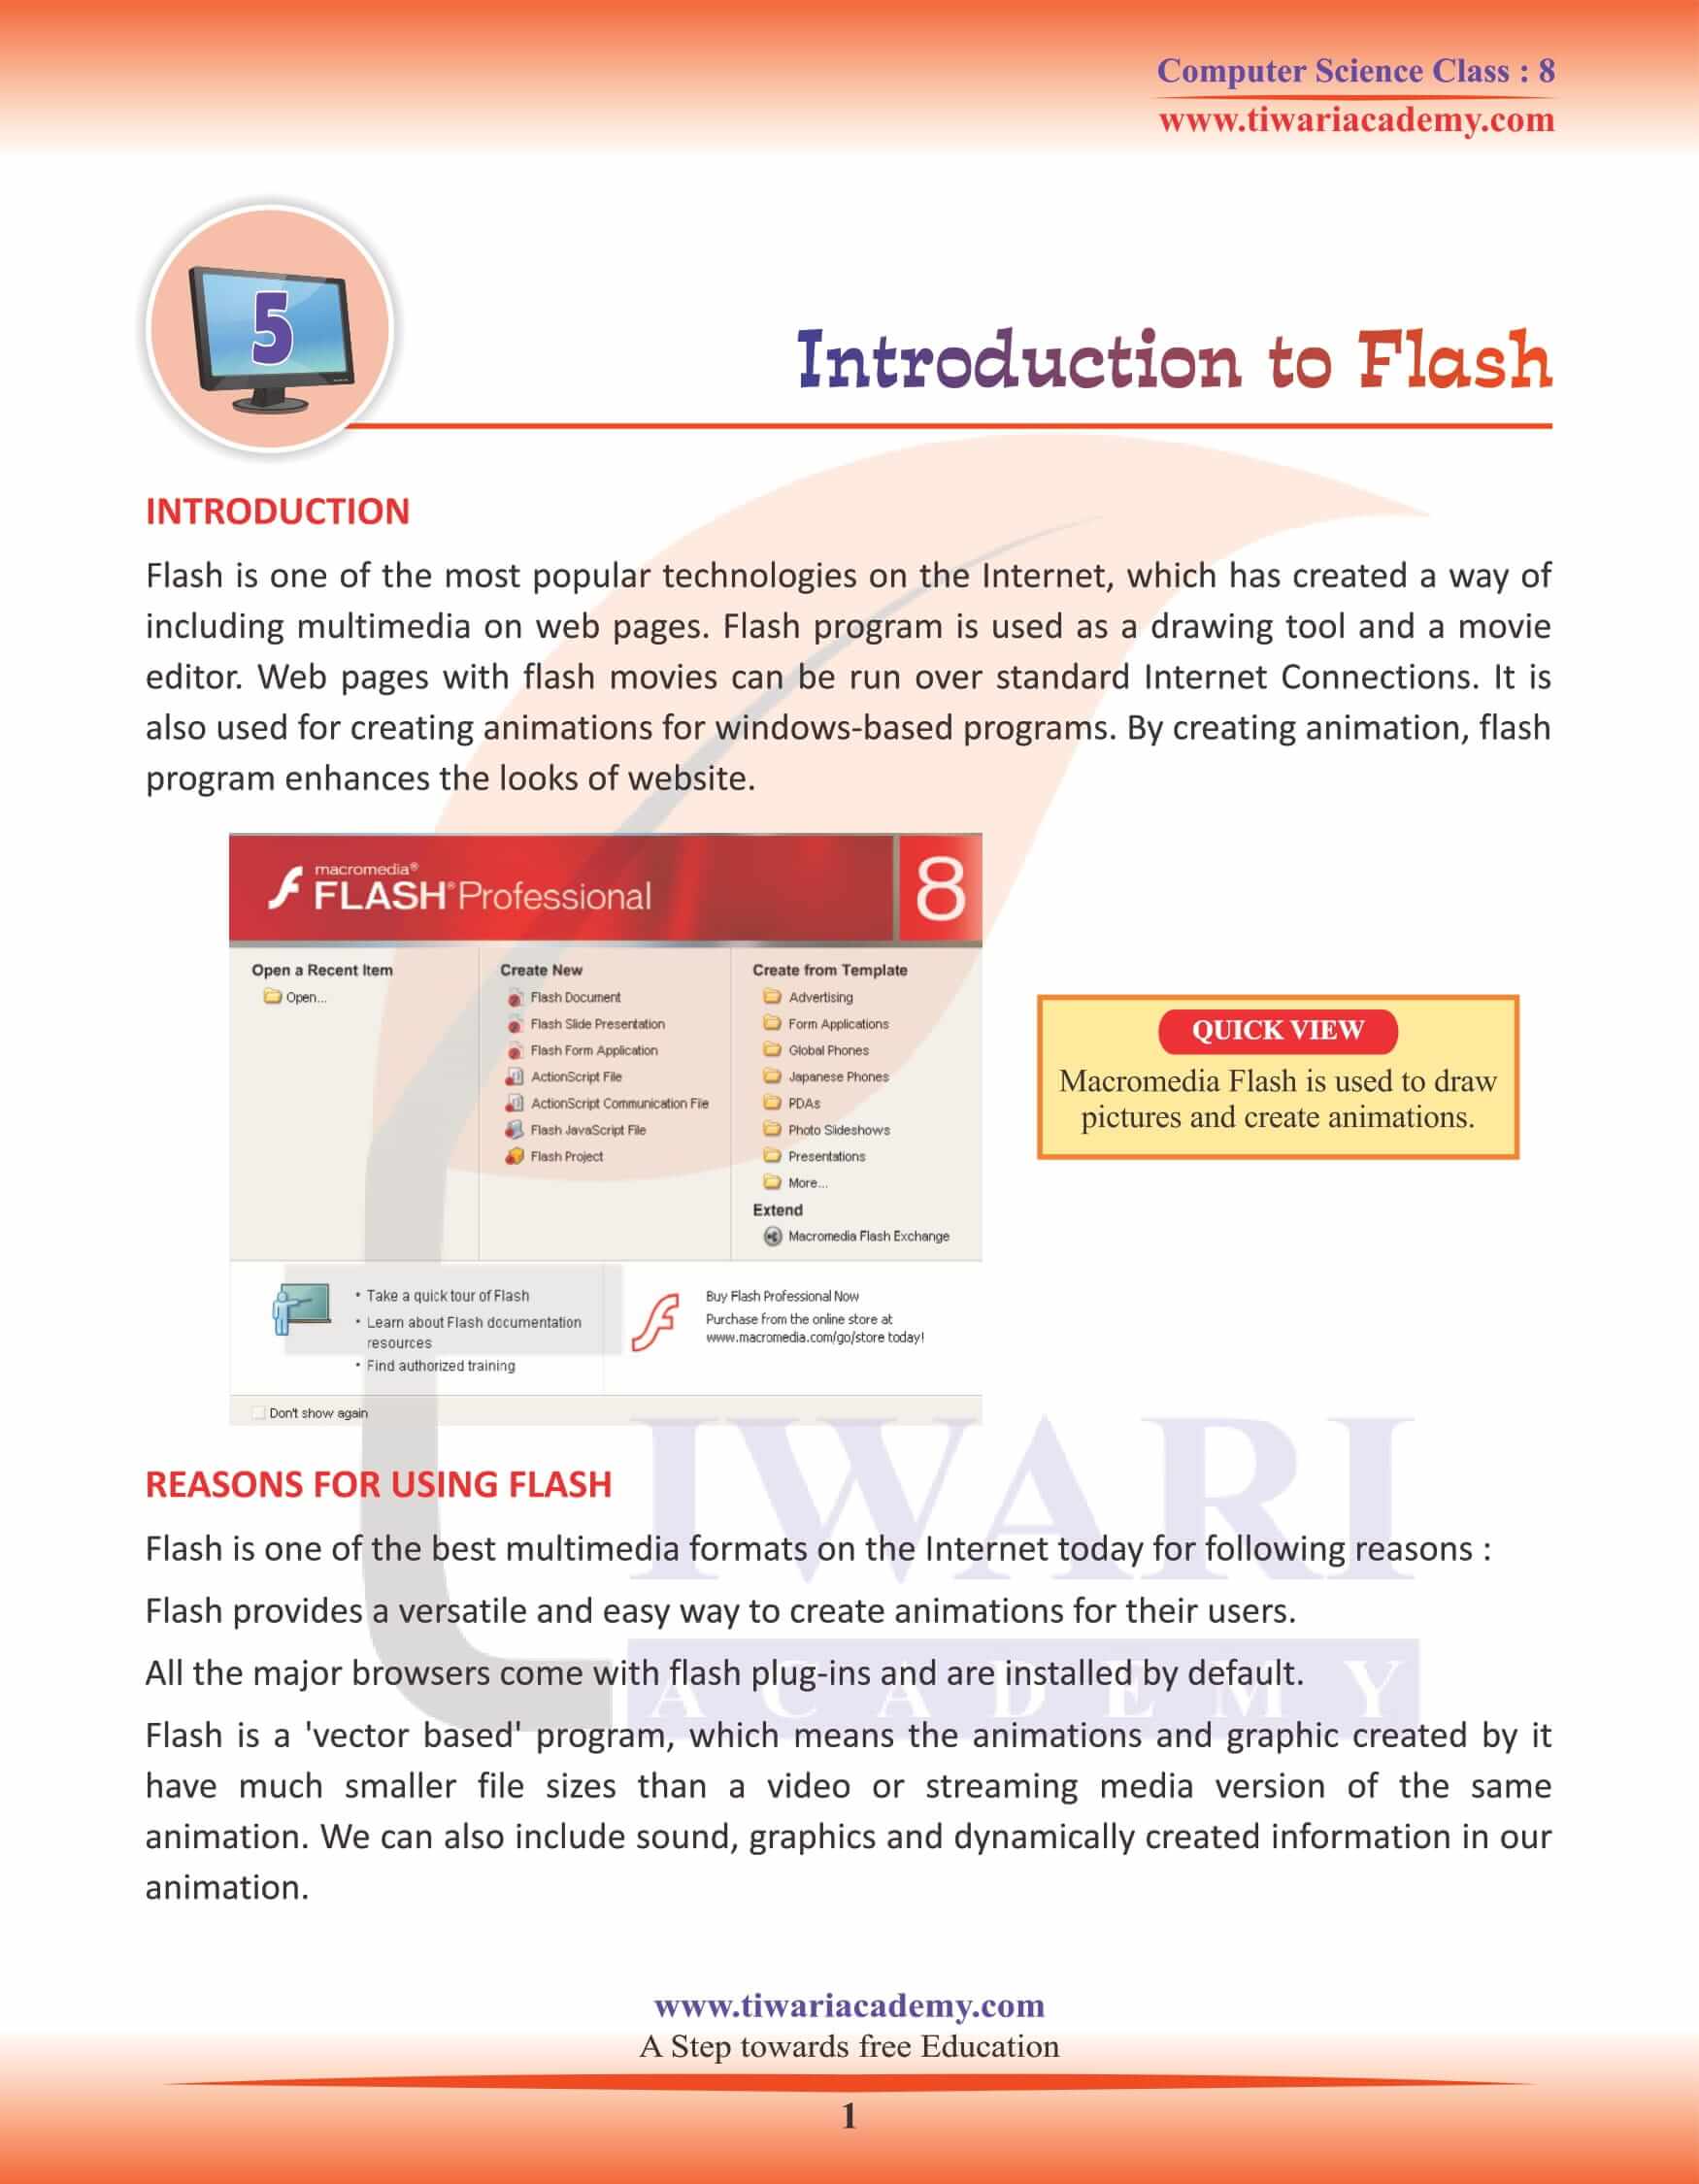
Flash is one of the most popular technologies on the Internet, which has created a way of including multimedia on web pages. Flash program is used as a drawing tool and a movie editor. Web pages with flash movies can be run over standard Internet Connections. It is also used for creating animations for windows-based programs. By creating animation, flash program enhances the looks of website.
REASONS FOR USING FLASH
Flash is one of the best multimedia formats on the Internet today for following reasons : Flash provides a versatile and easy way to create animations for their users. All the major browsers come with flash plug-ins and are installed by default. Flash is a ‘vector based’ program, which means the animations and graphic created by it have much smaller file sizes than a video or streaming media version of the same animation. We can also include sound, graphics and dynamically created information in our animation.
COLOUR MIXER PANEL
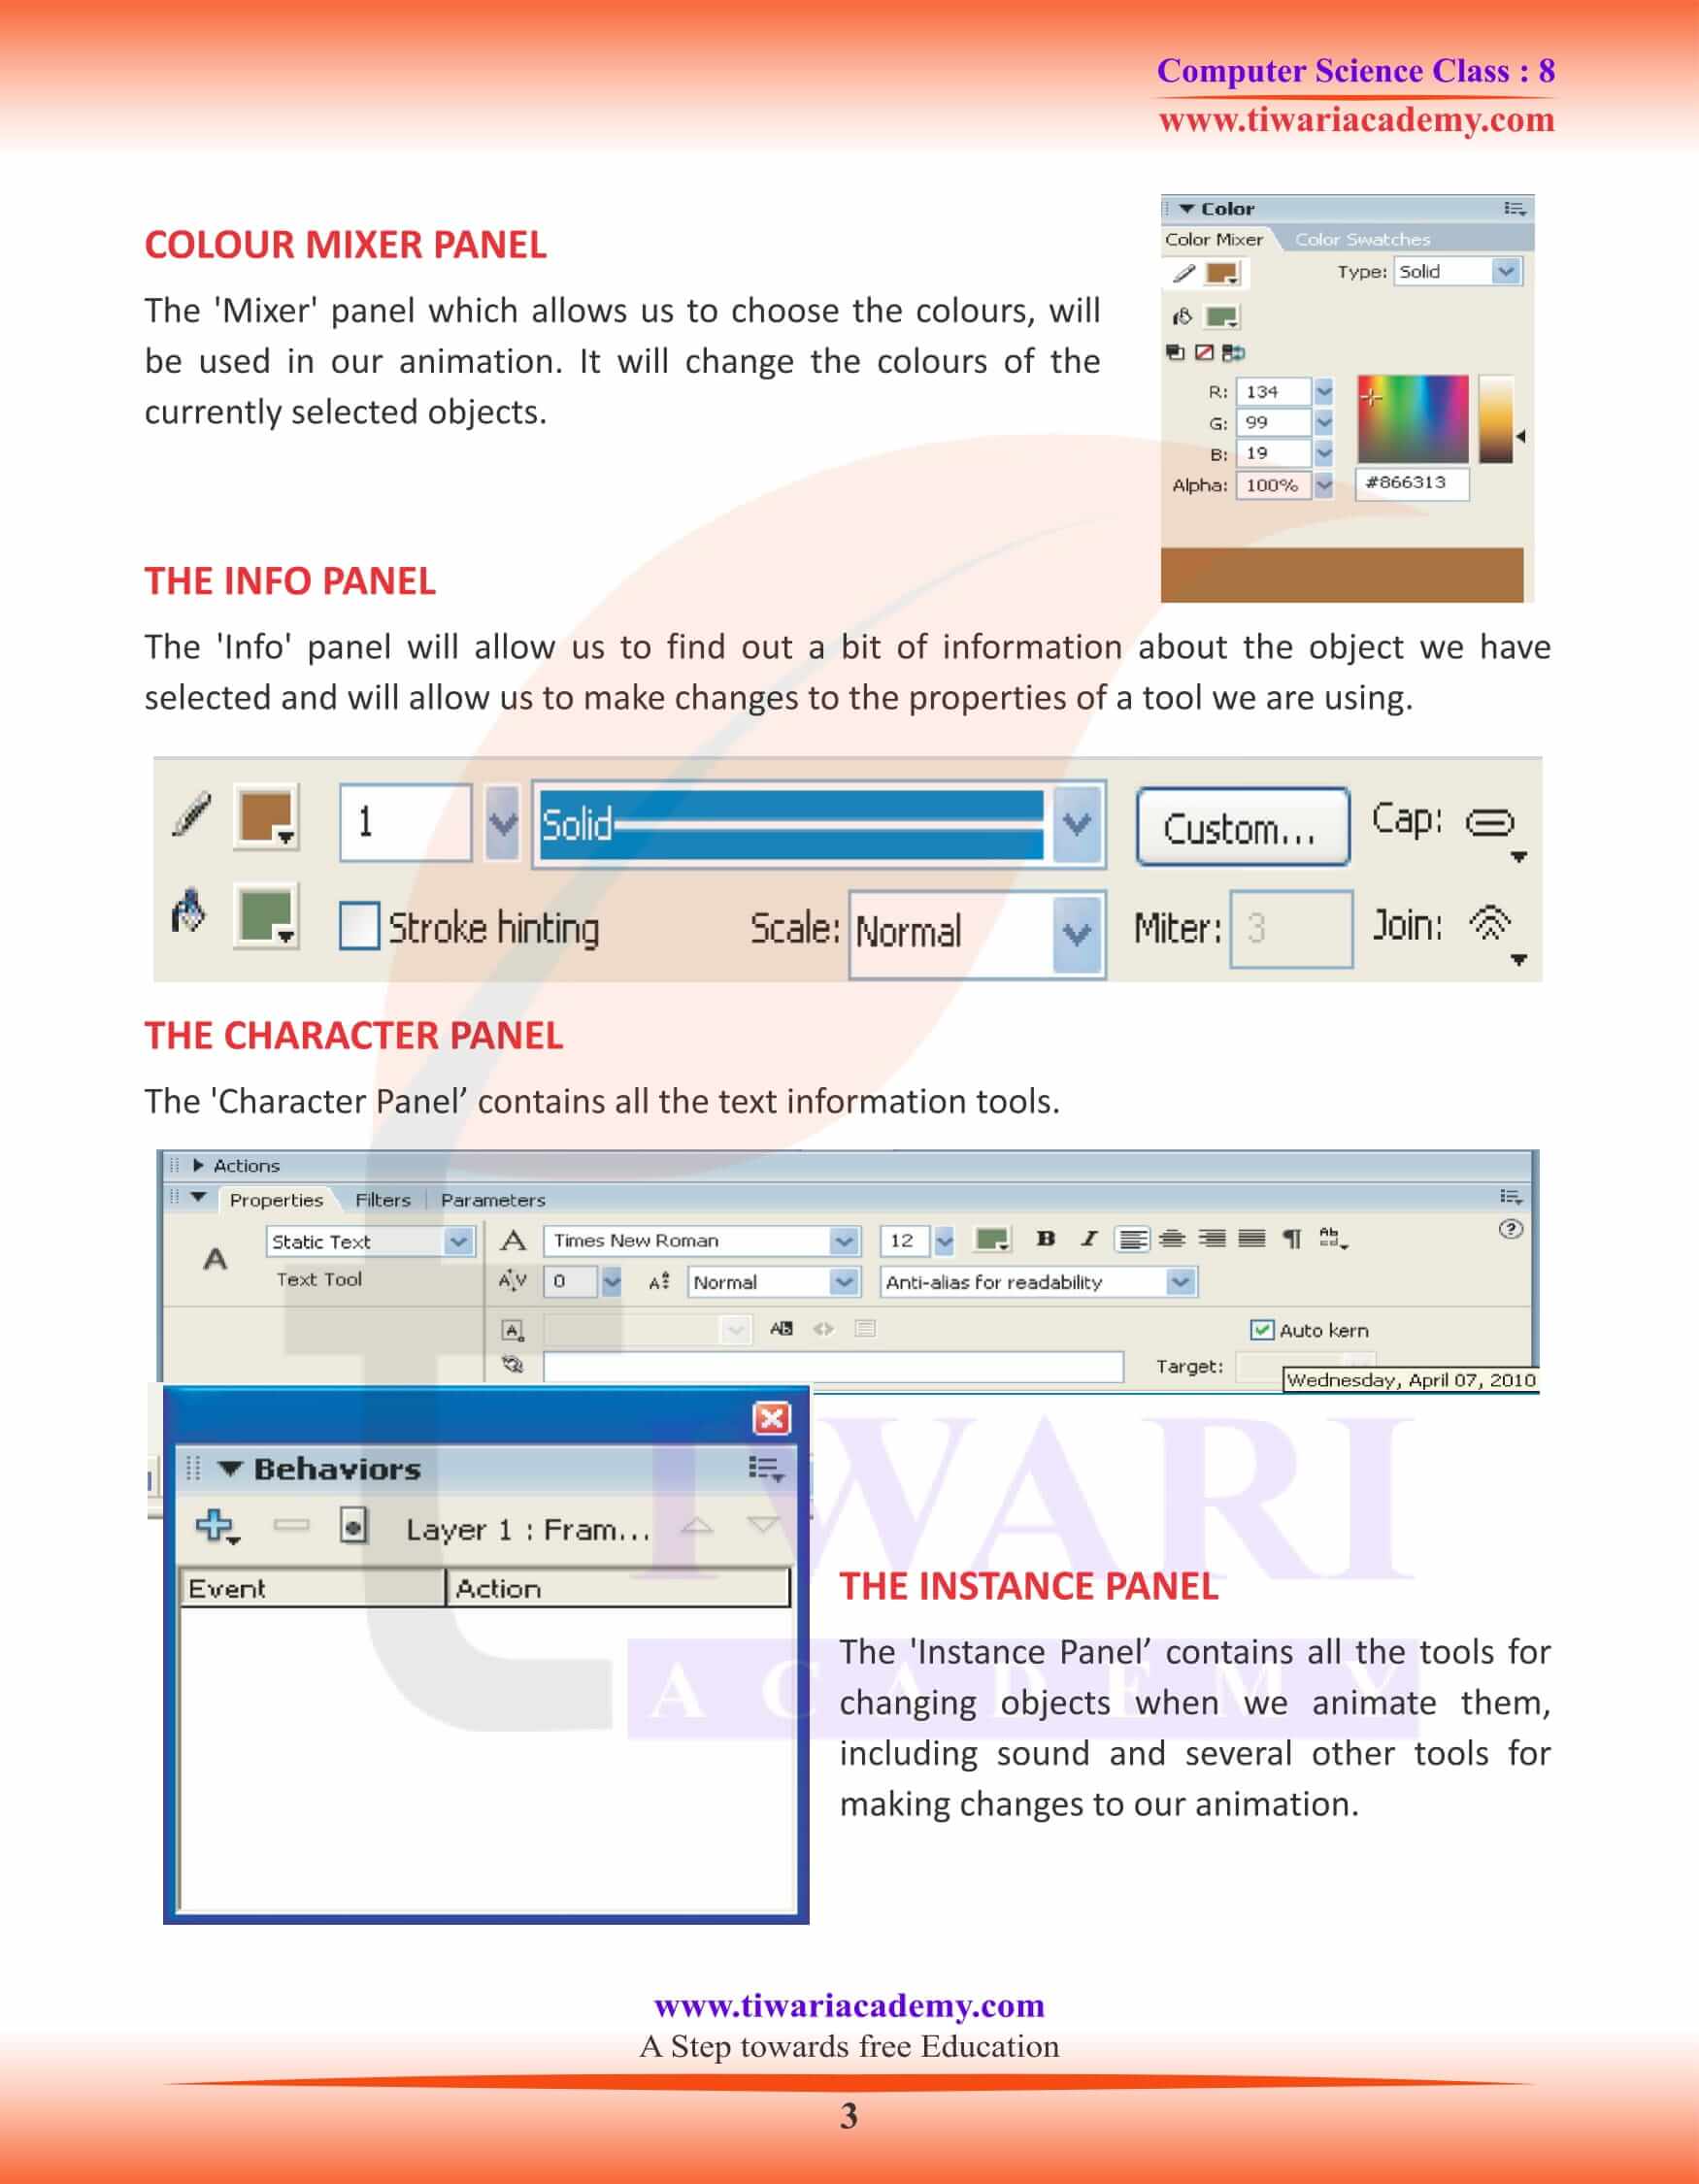
The ‘Mixer’ panel which allows us to choose the colours, will be used in our animation. It will change the colours of the currently selected objects.
THE INFO PANEL
The ‘Info’ panel will allow us to find out a bit of information about the object we have selected and will allow us to make changes to the properties of a tool we are using.
THE INSTANCE PANEL
The ‘Instance Panel’ contains all the tools for changing objects when we animate them, including sound and several other tools for making changes to our animation.
CREATING ANIMATIONS
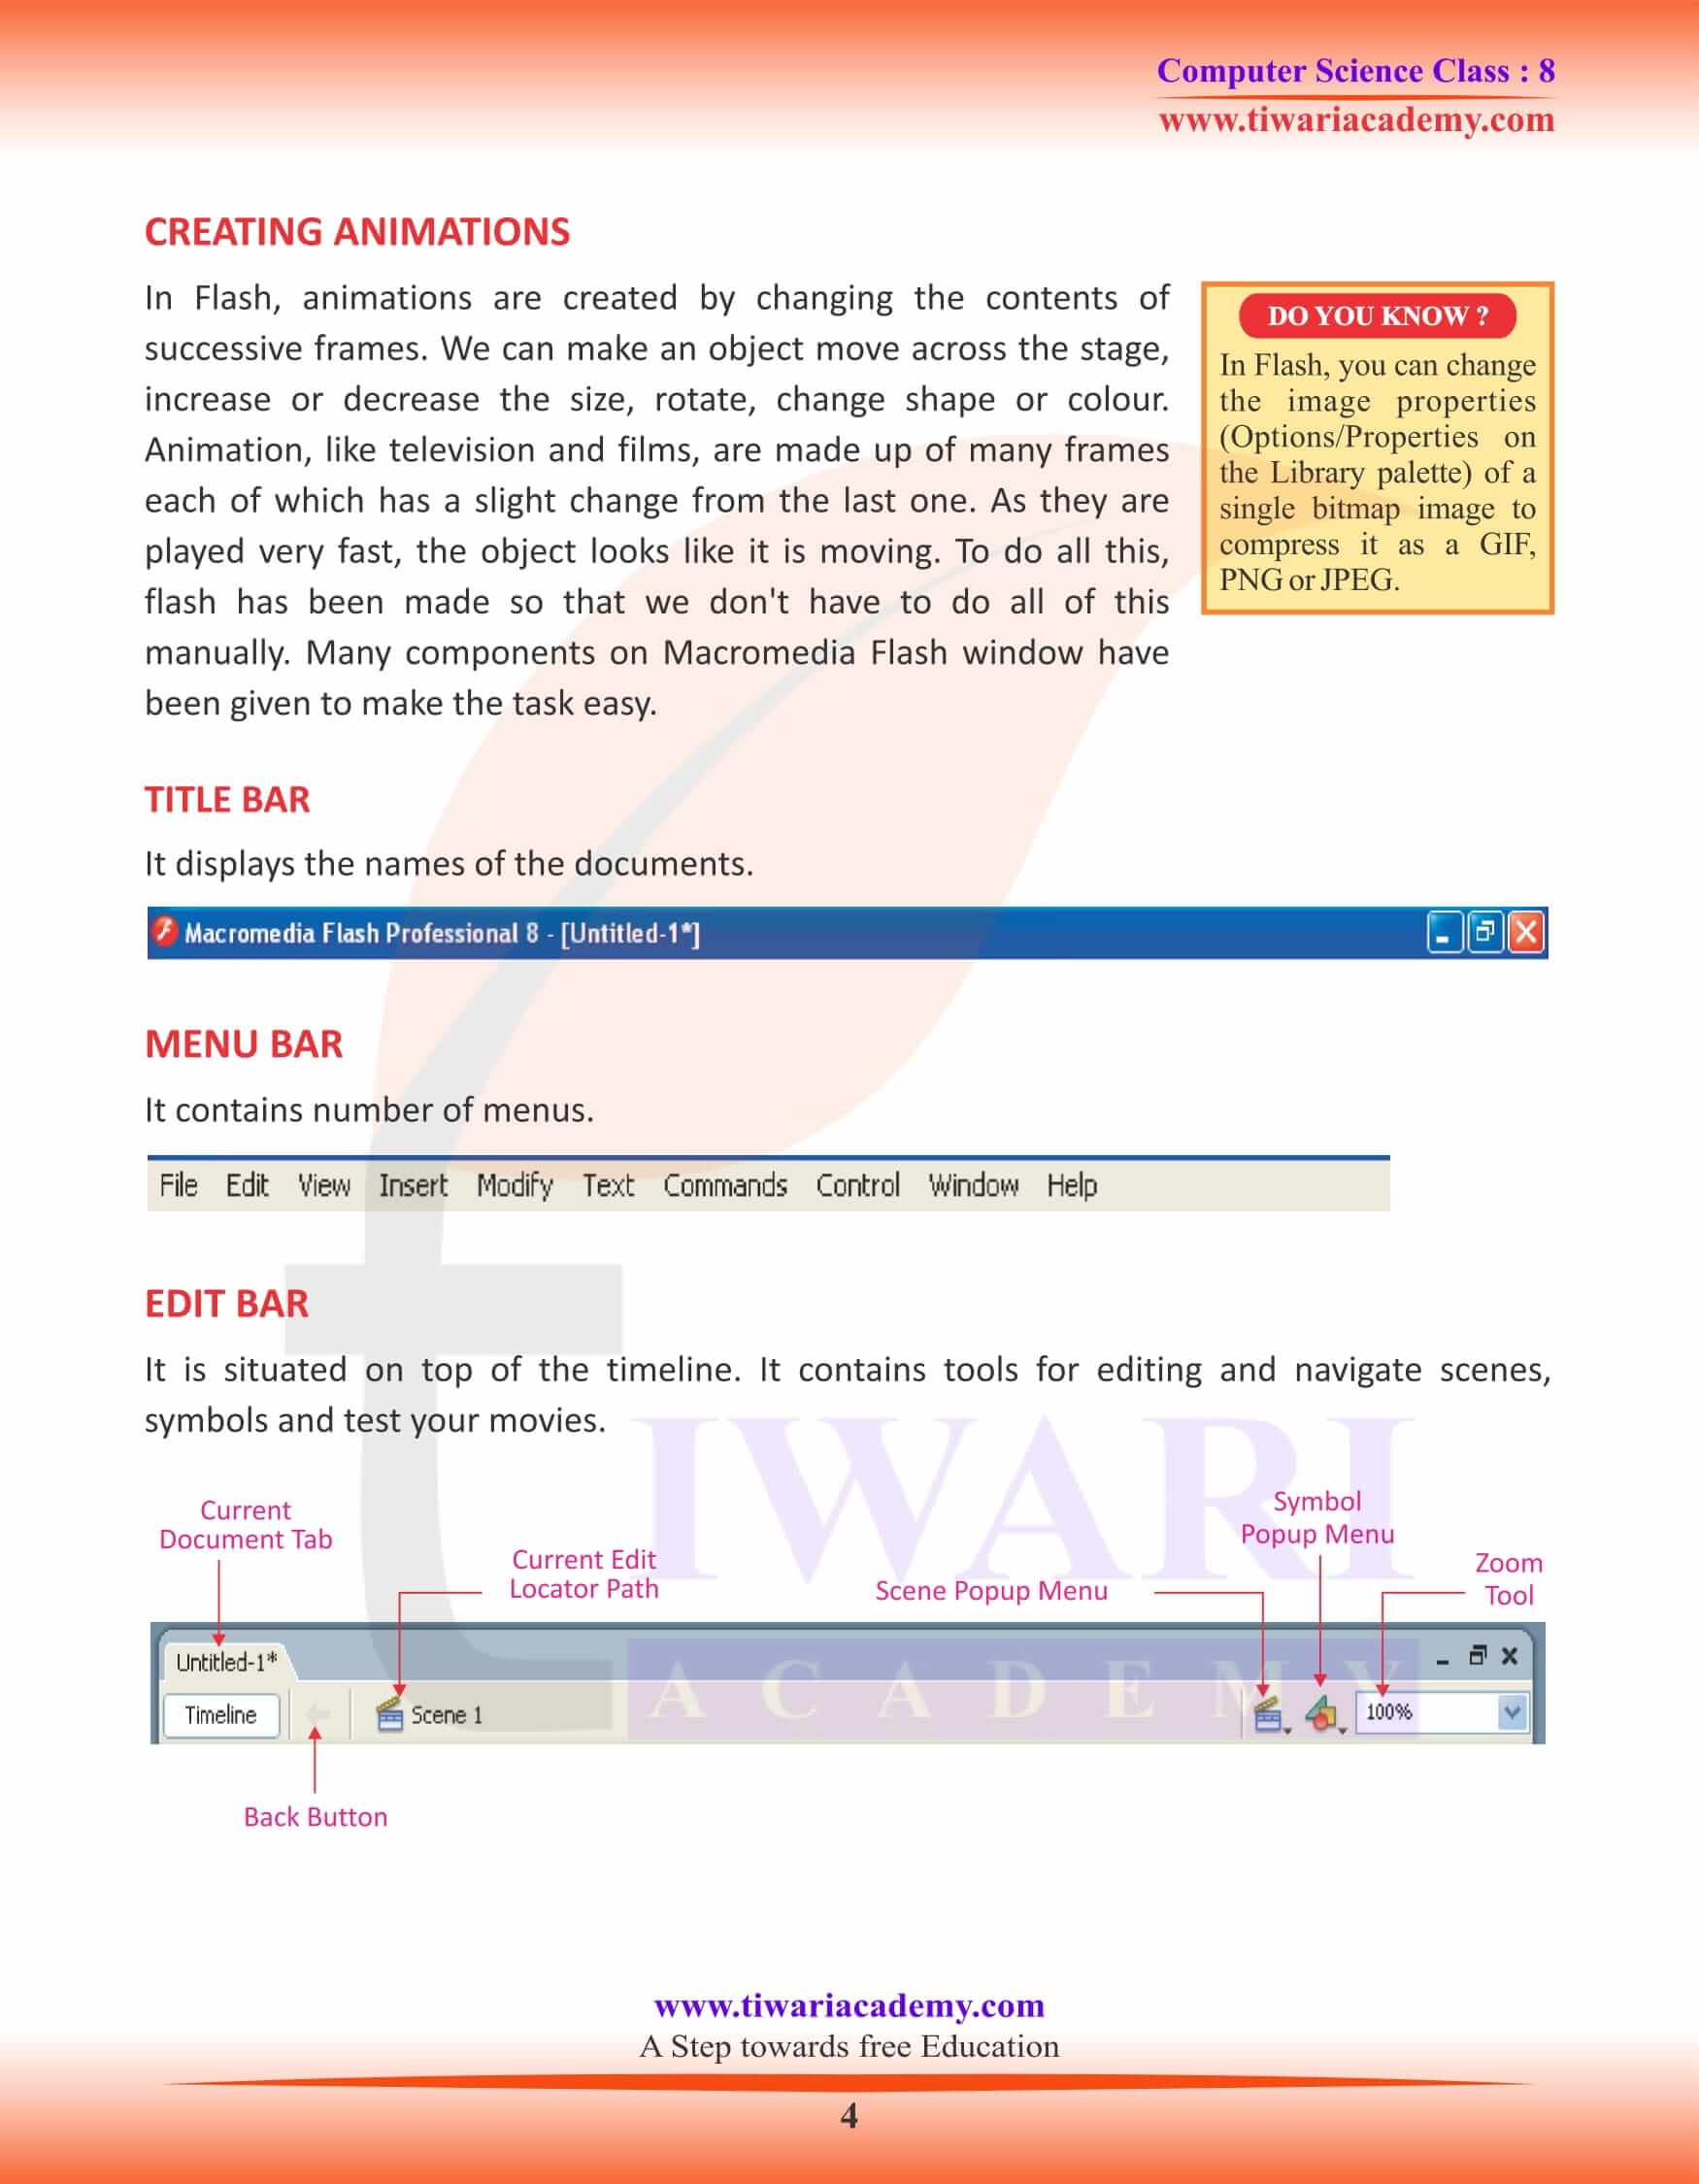
In Flash, animations are created by changing the contents of successive frames. We can make an object move across the stage, increase or decrease the size, rotate, change shape or colour. Animation, like television and films, are made up of many frames each of which has a slight change from the last one. As they are played very fast, the object looks like it is moving. To do all this, flash has been made so that we don’t have to do all of this manually. Many components on Macromedia Flash window have been given to make the task easy.
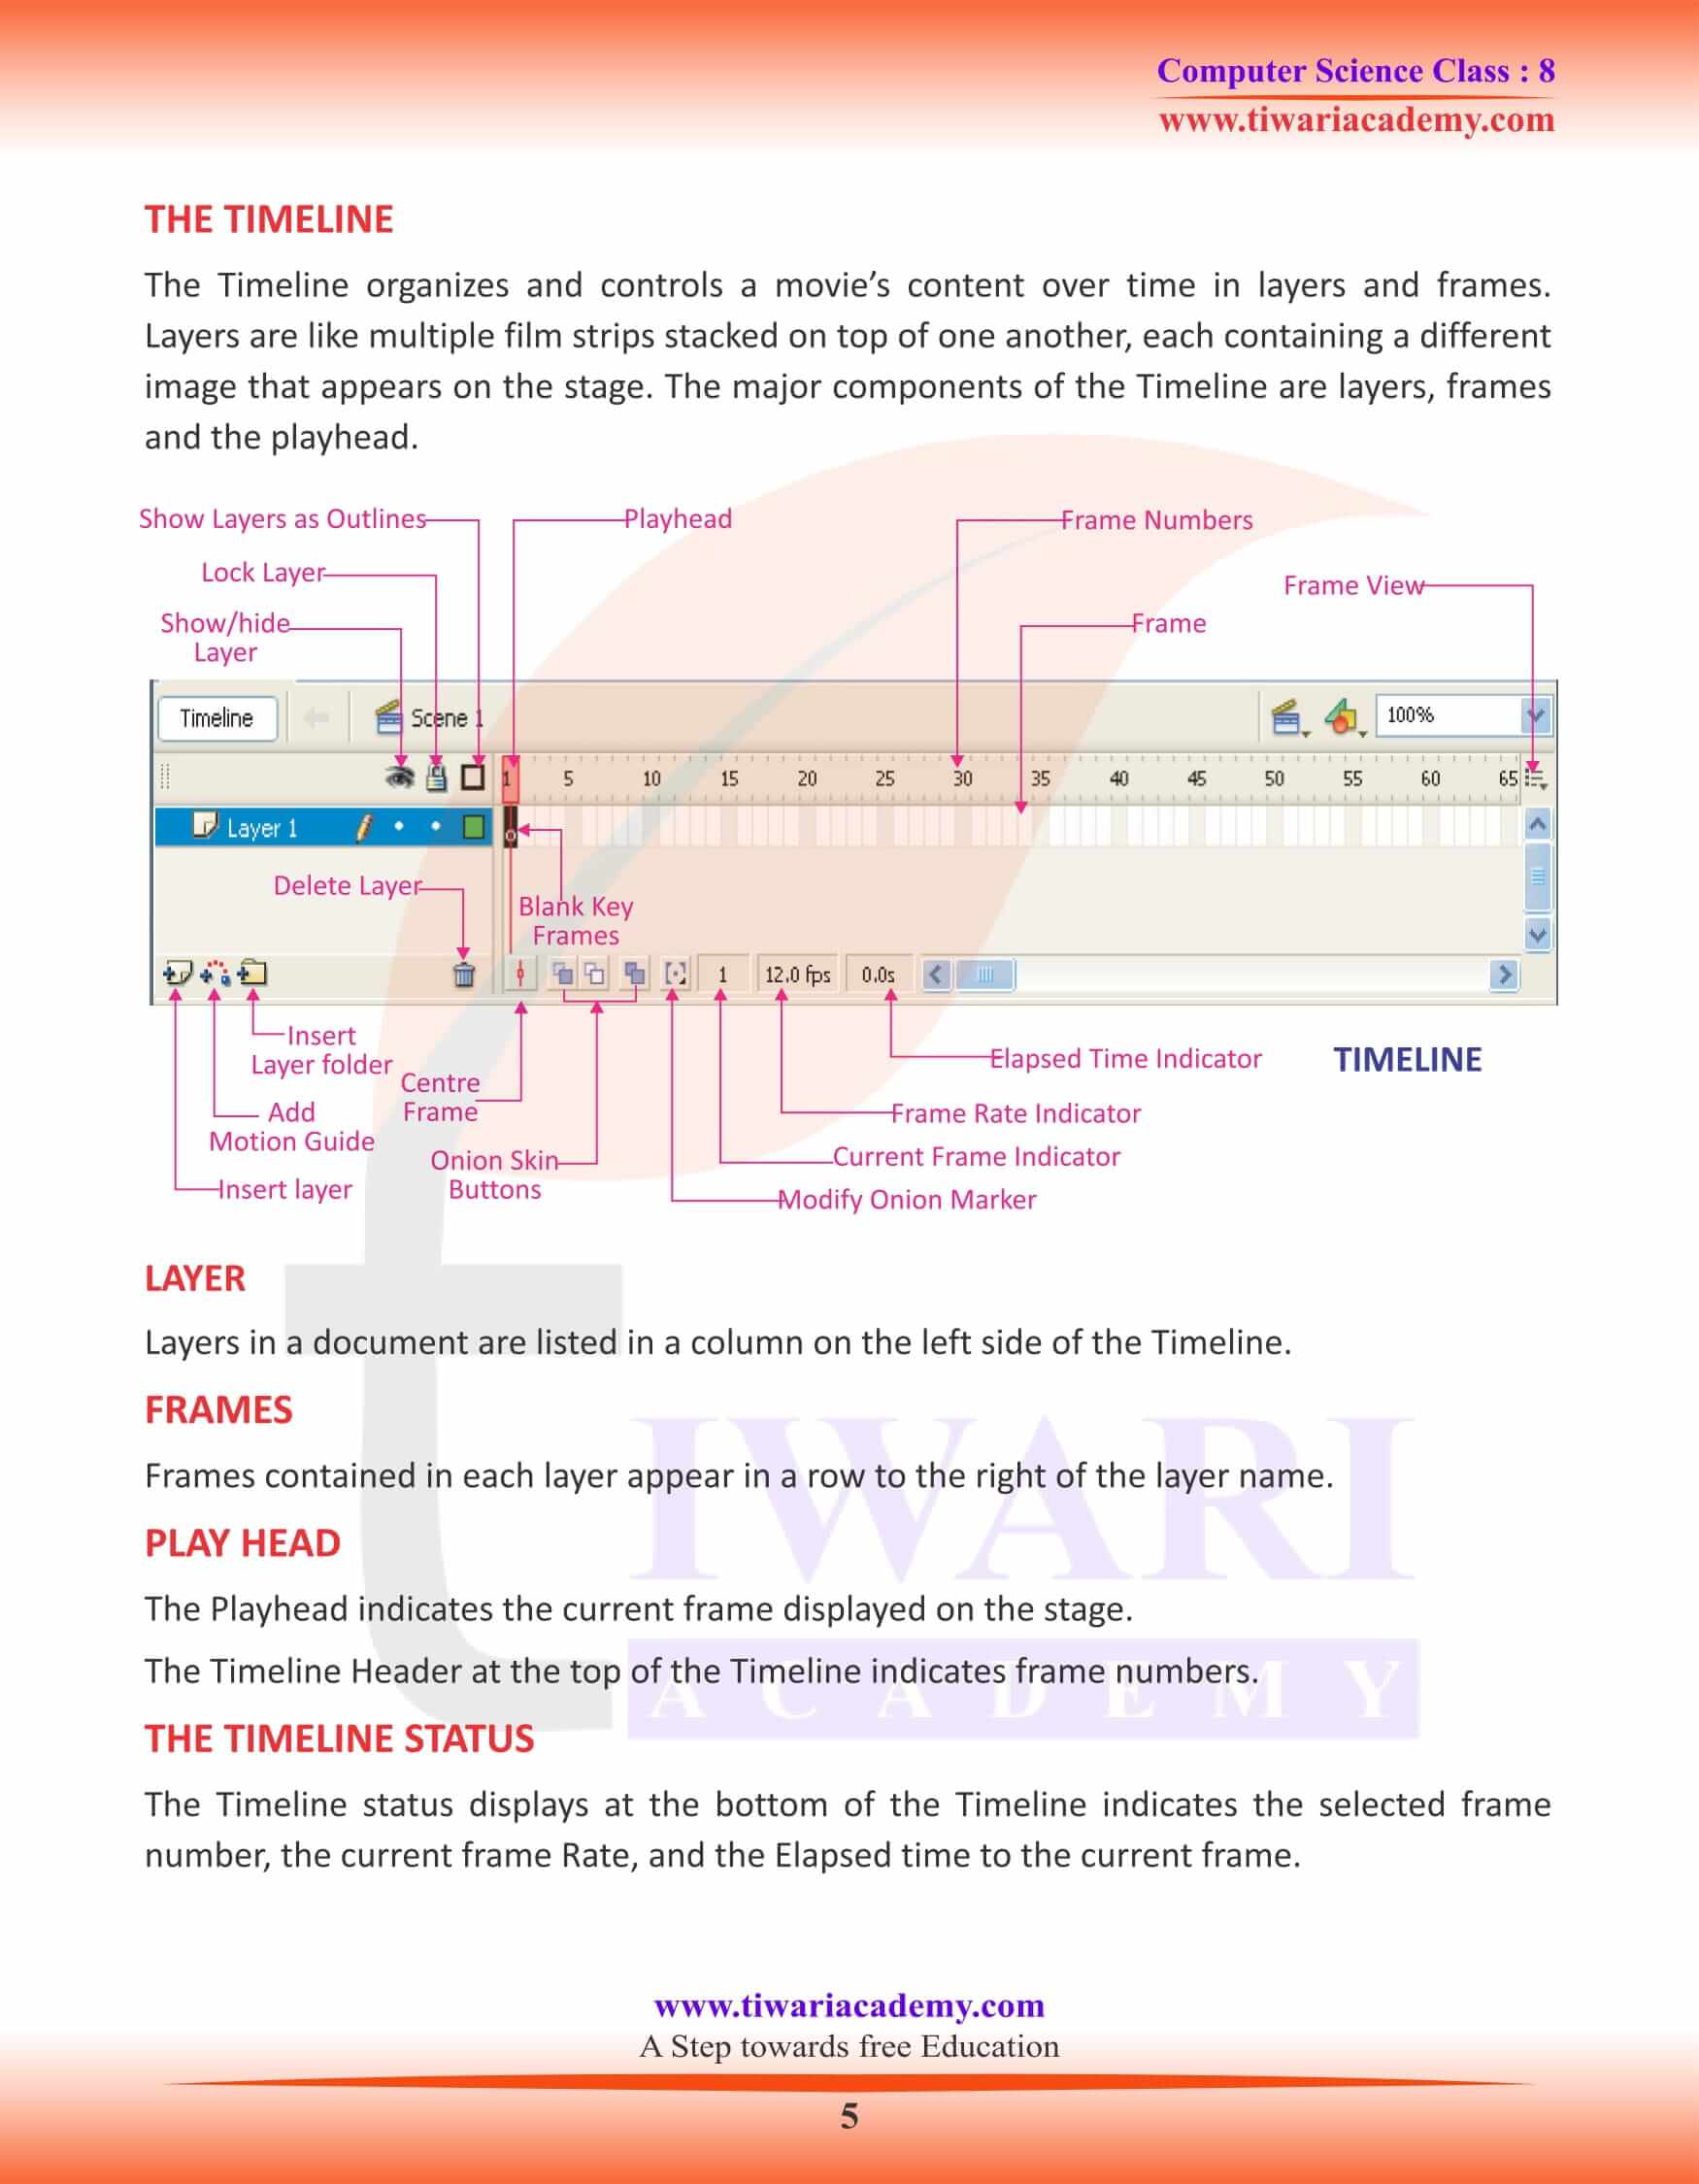
THE TIMELINE STATUS
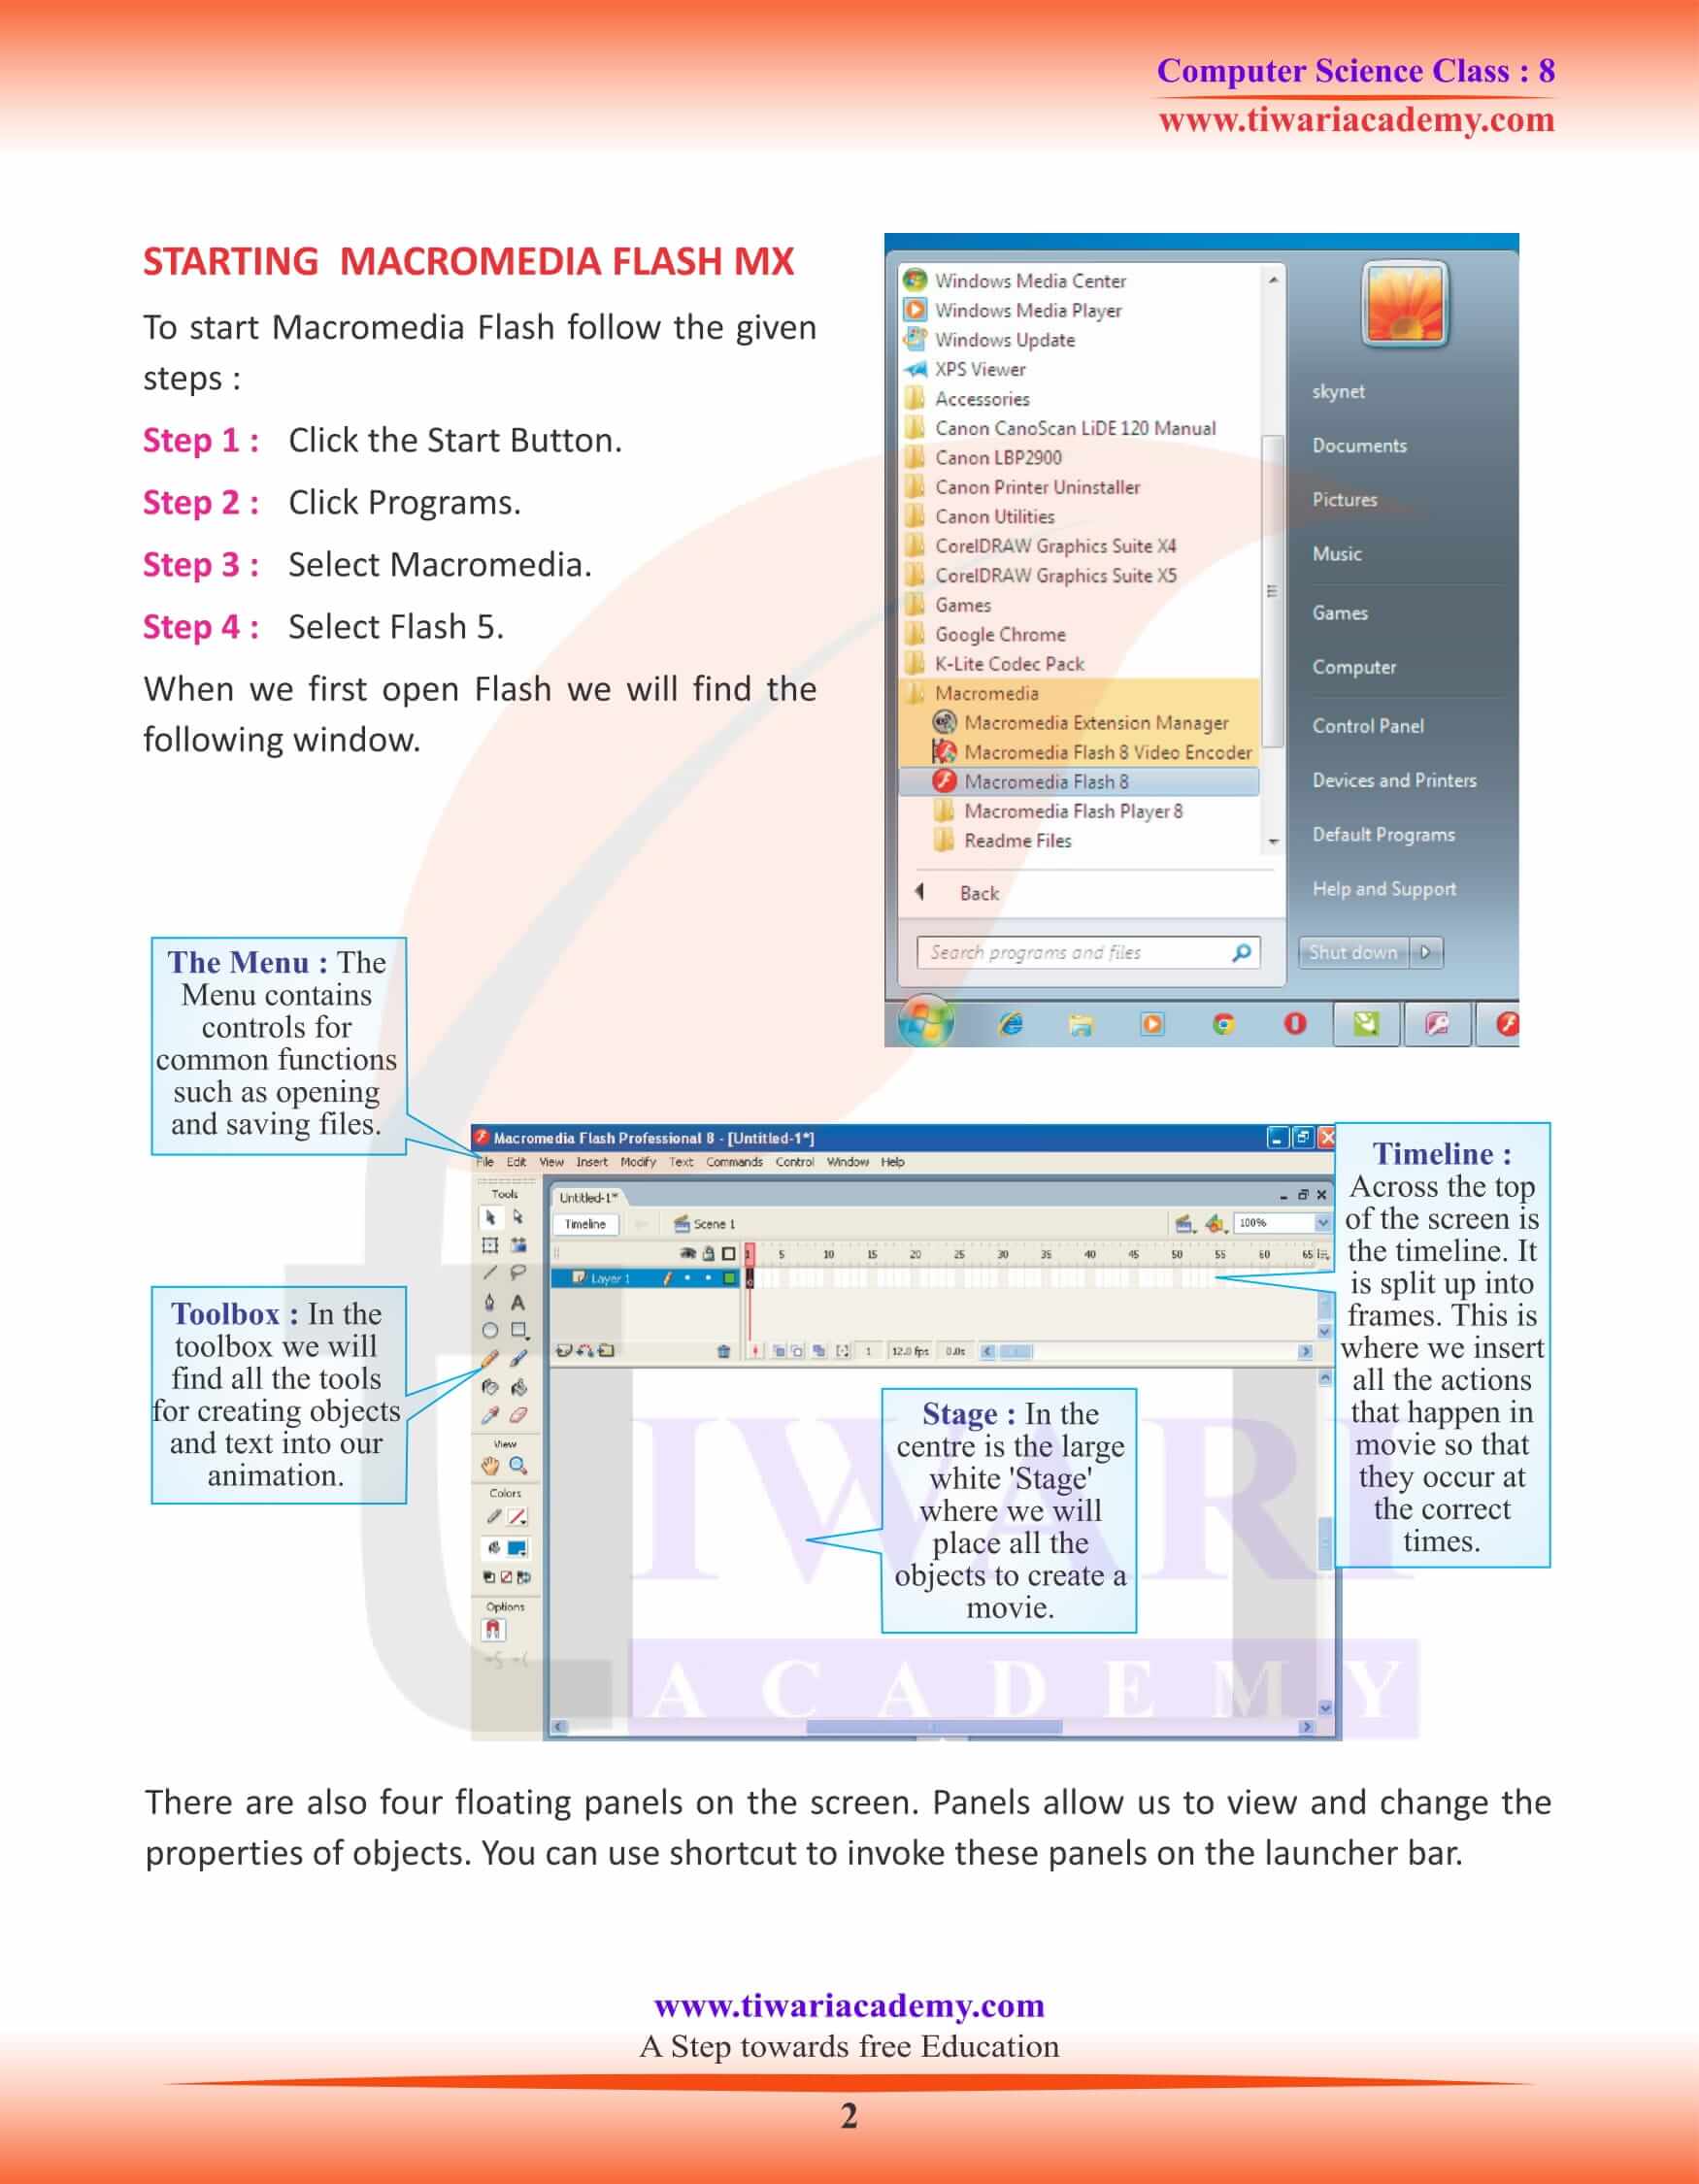
The Timeline status displays at the bottom of the Timeline indicates the selected frame number, the current frame Rate, and the Elapsed time to the current frame.
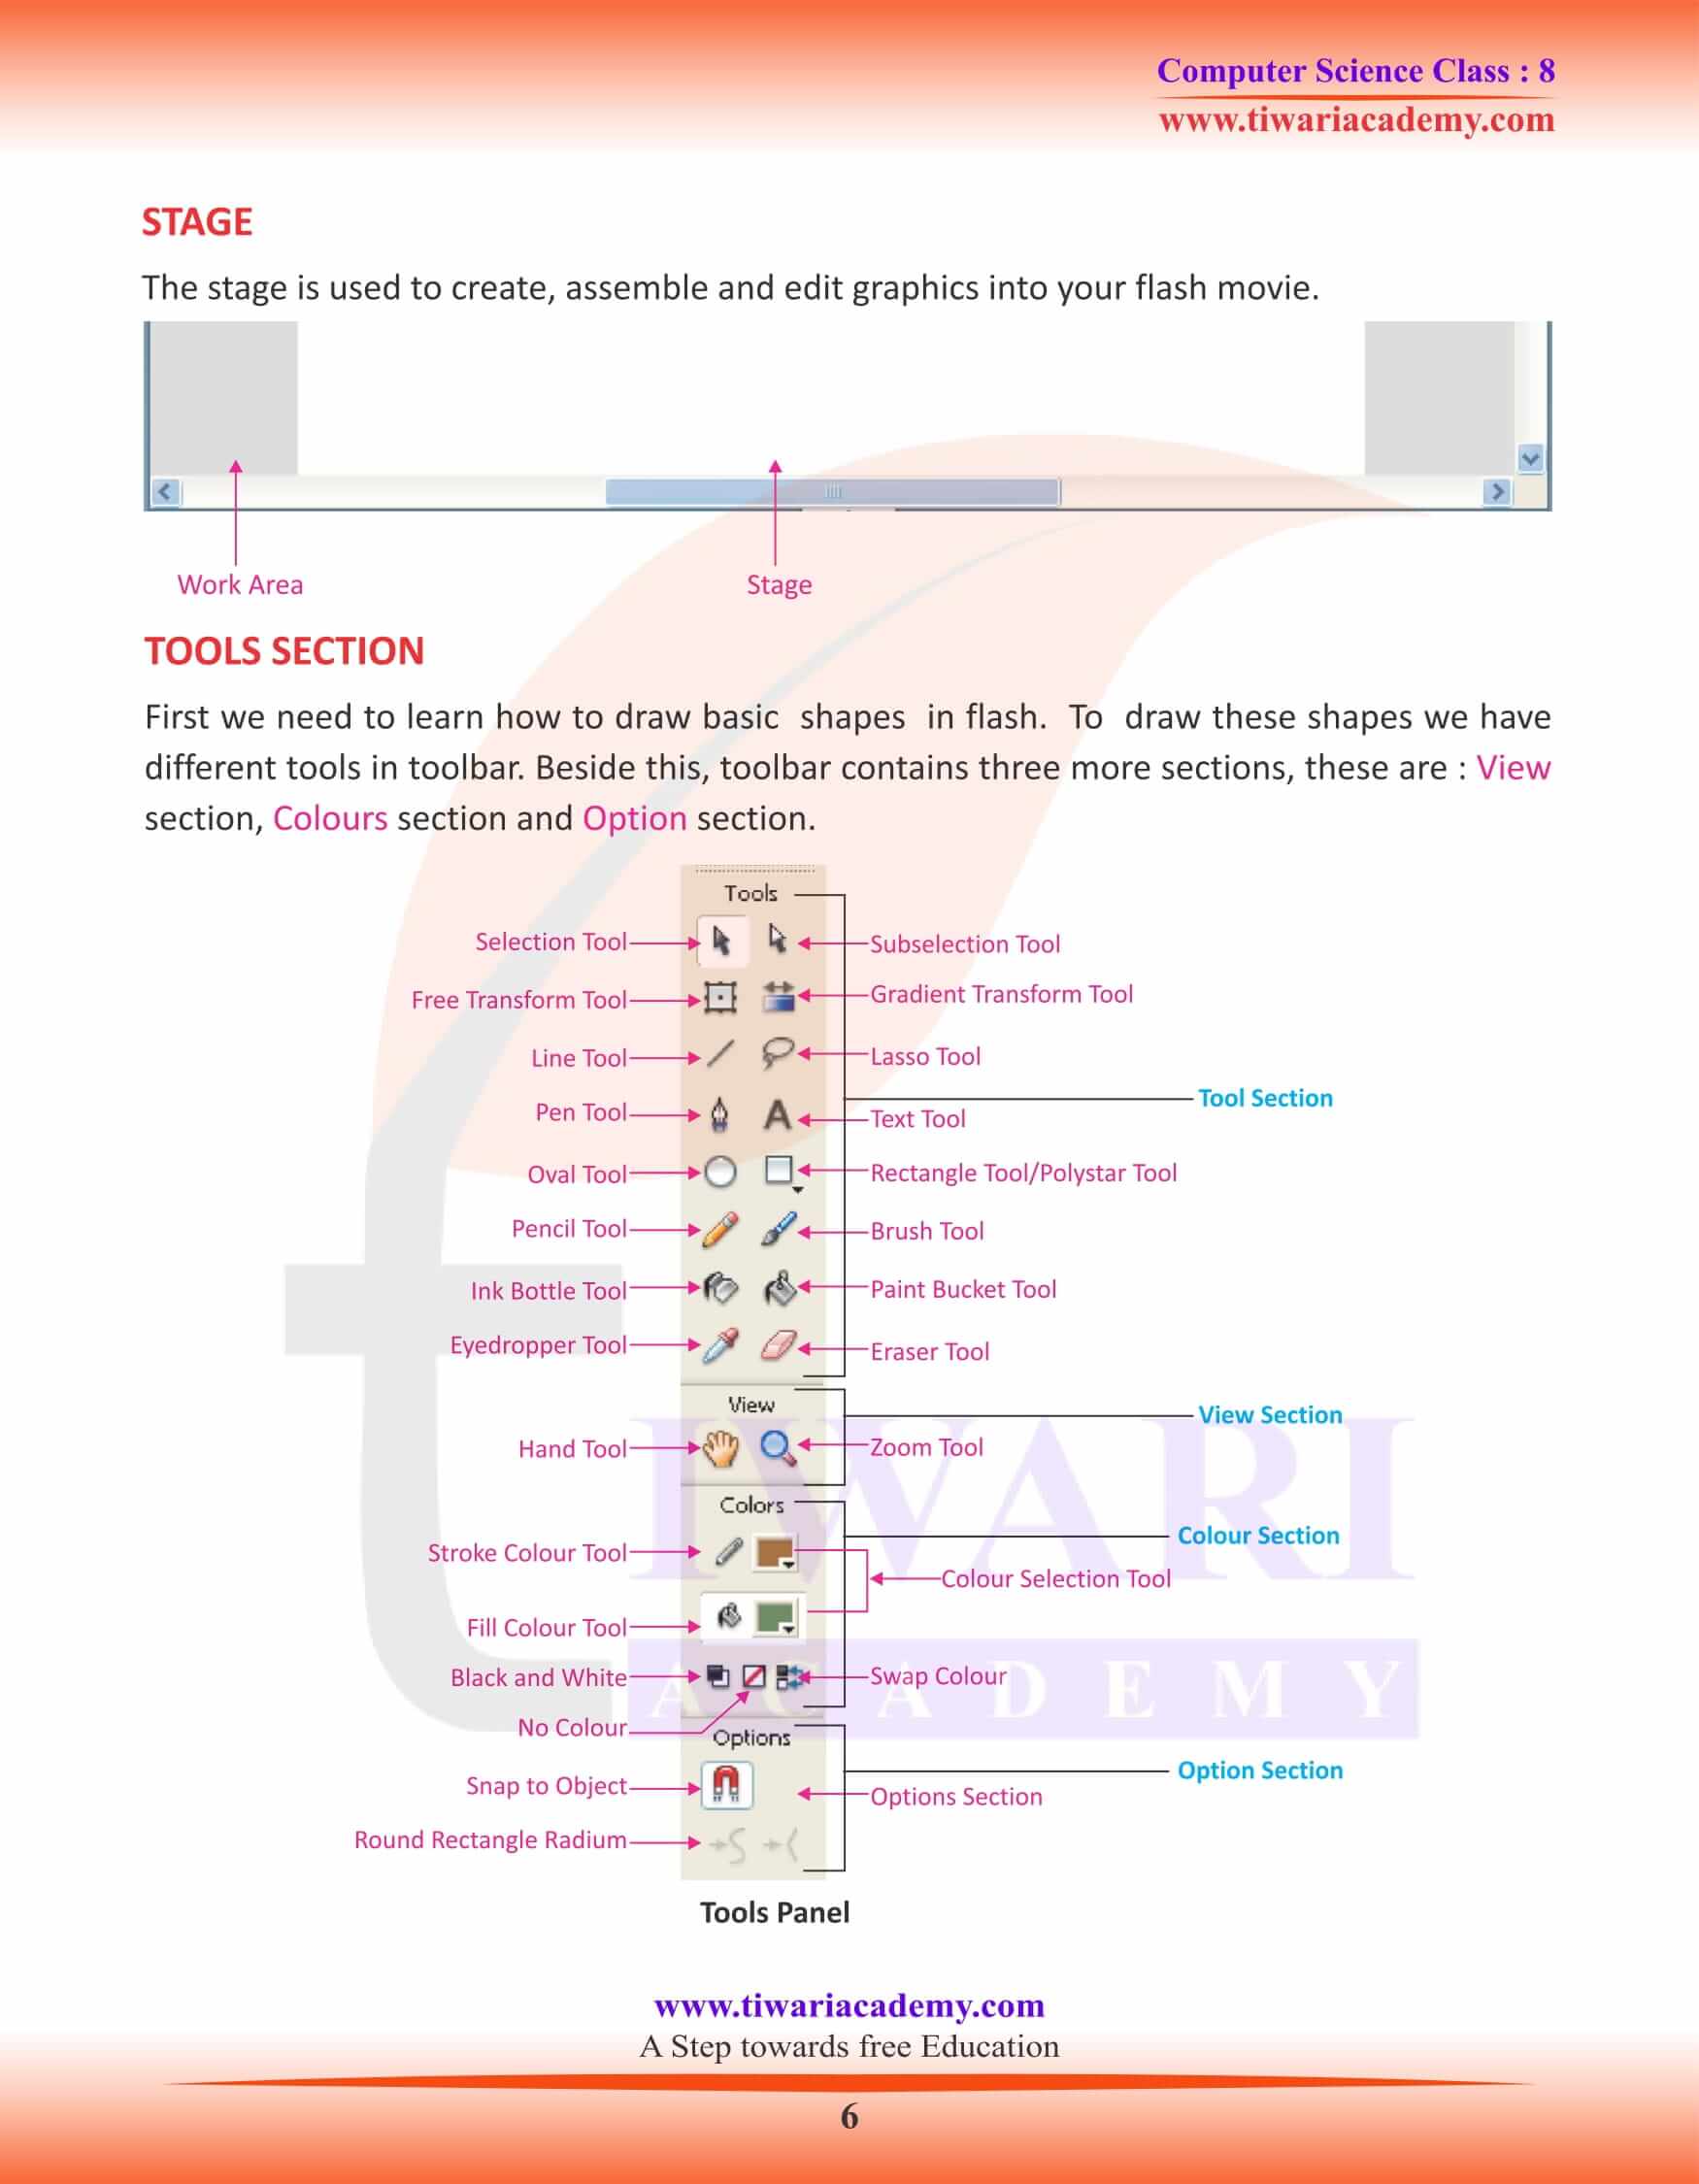
Tools Section
In tool section, tools are available to draw and edit the objects.
View Section
Tools related to view section provide you options from viewing stage.
Colours Section
This colours section of toolbar gives options to select the colours of element on the stage.
Option Section
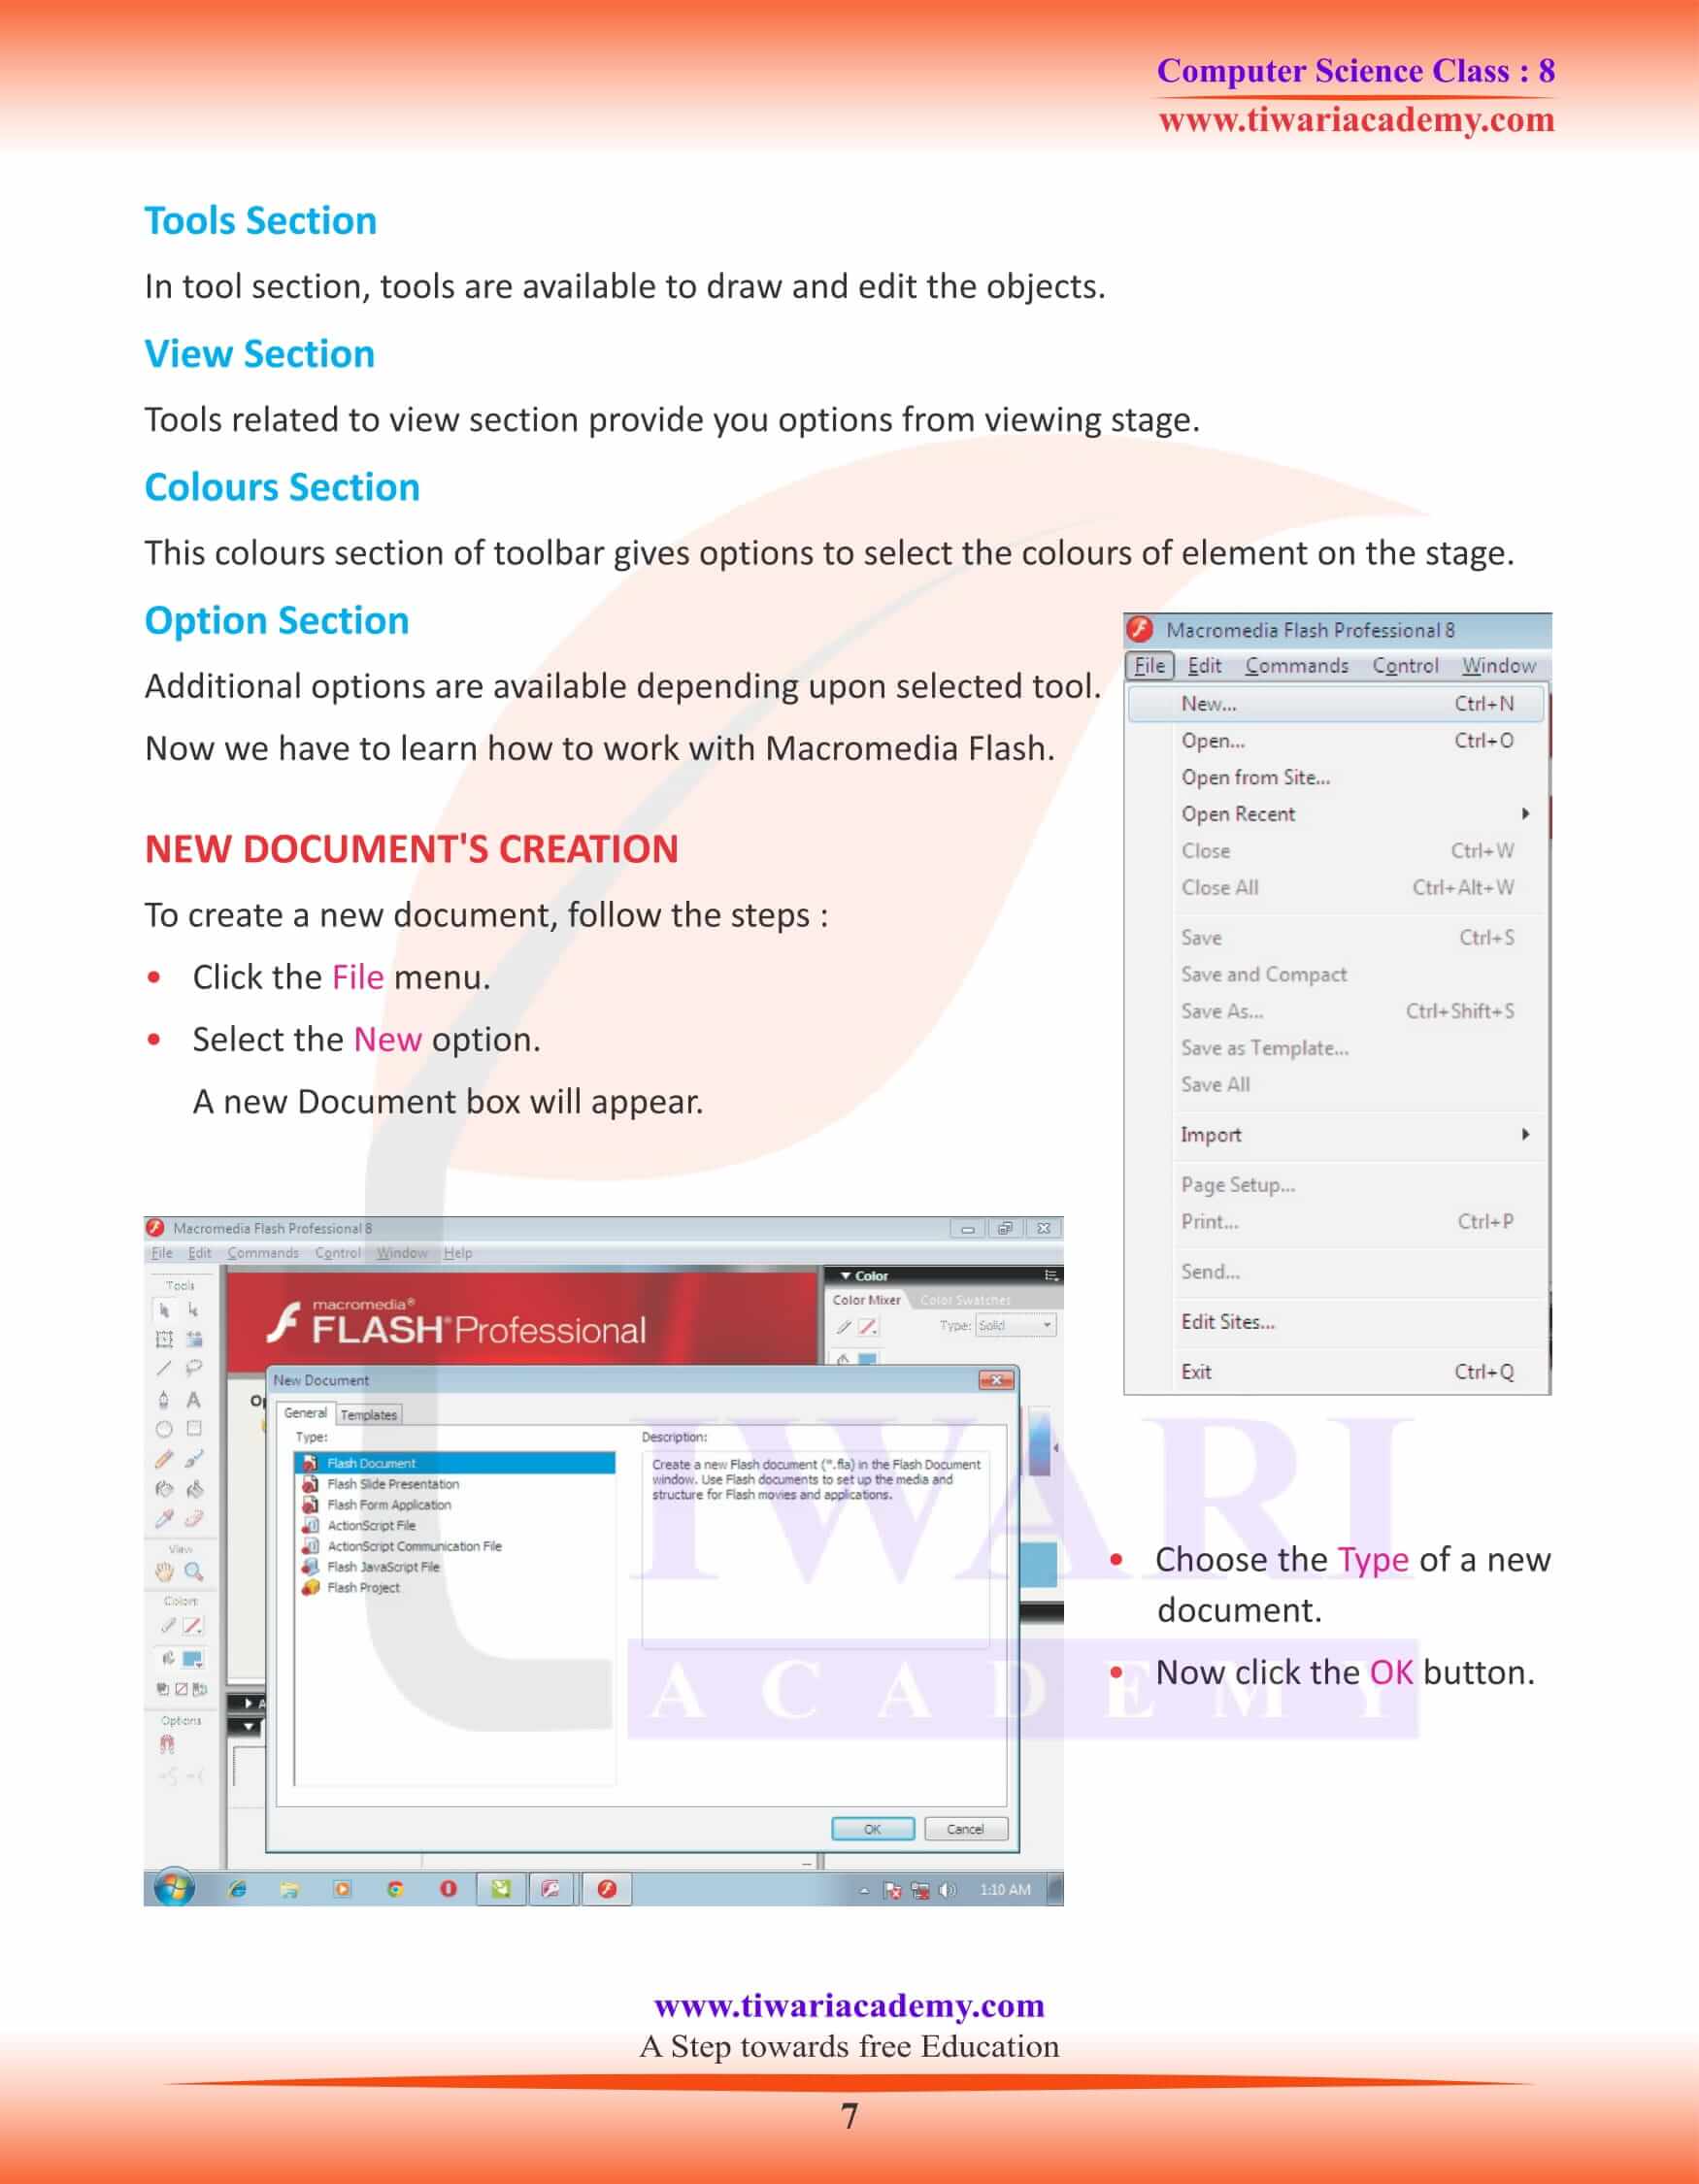
Additional options are available depending upon selected tool. Now we have to learn how to work with Macromedia Flash.
ANIMATING TEXT
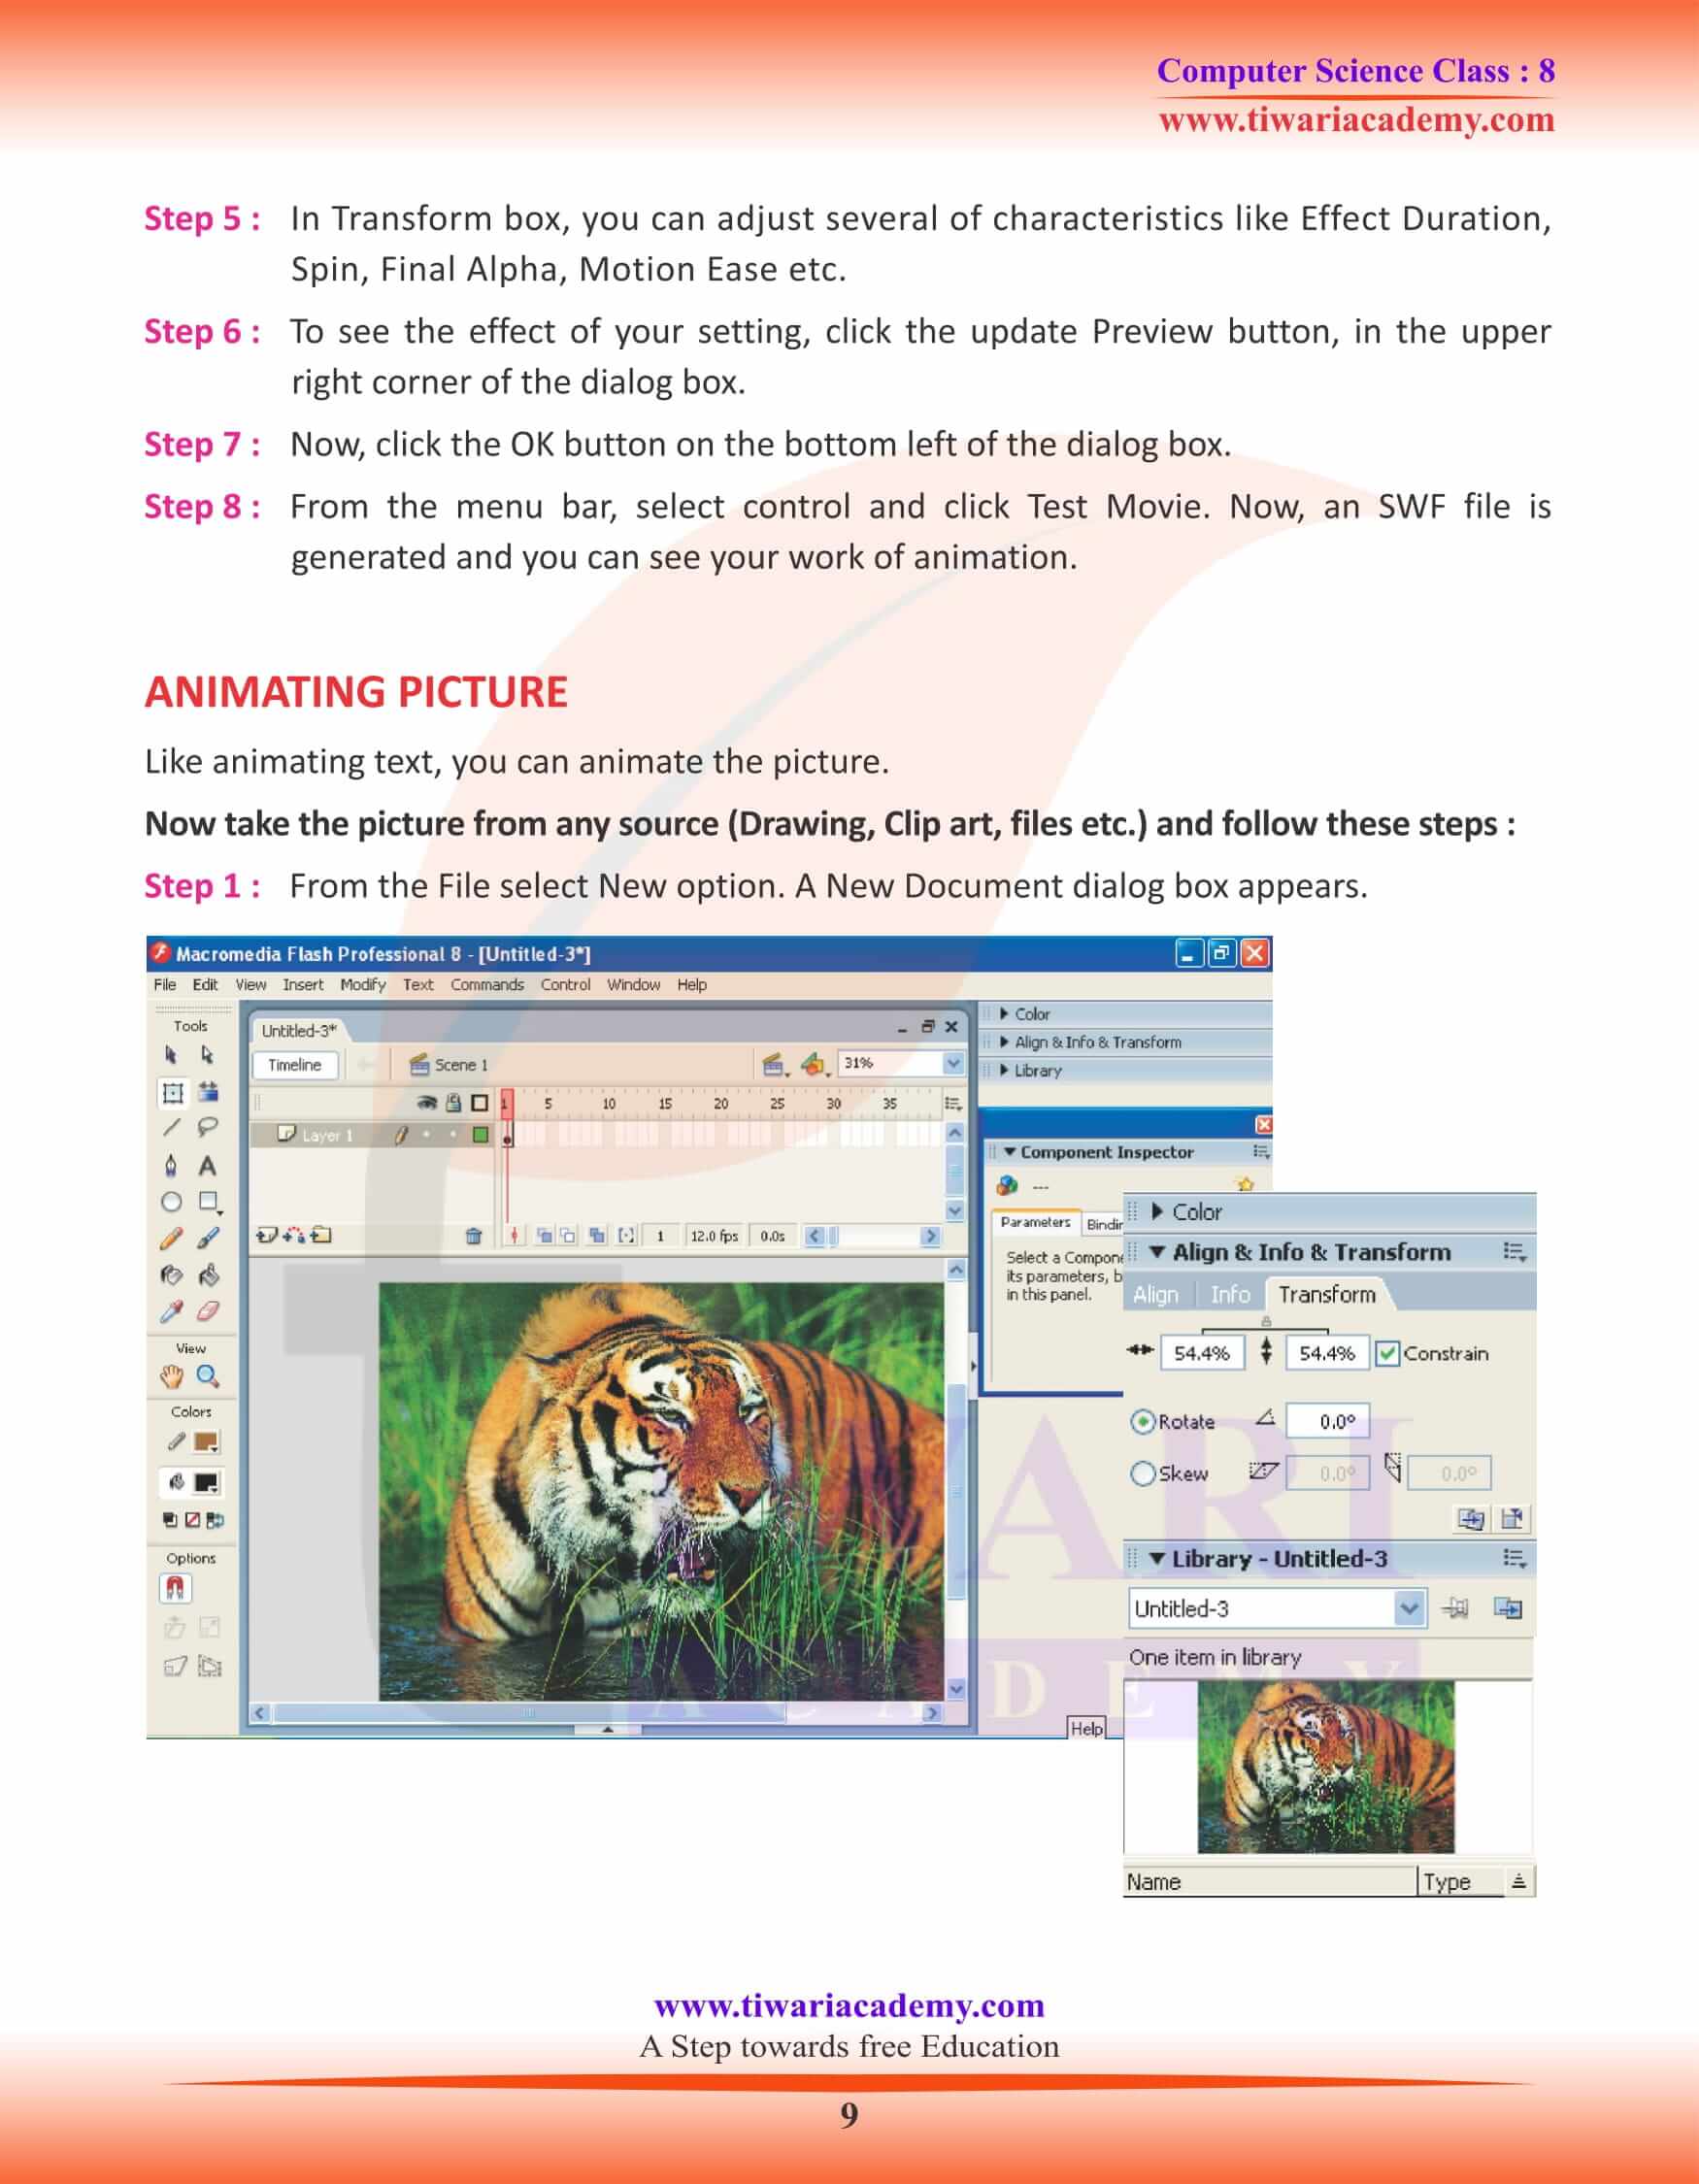
Basic animation in Flash is quite simple. Text, like images can be made into symbols and animate in exactly the same way as images can. The procedure is the same except for one difference, even when it is a symbol we can still edit text by double clicking on it. Apart from this we can rotate it, scale it, move it and perform any other changes that we would do normally.
Follow the given steps to animate text.
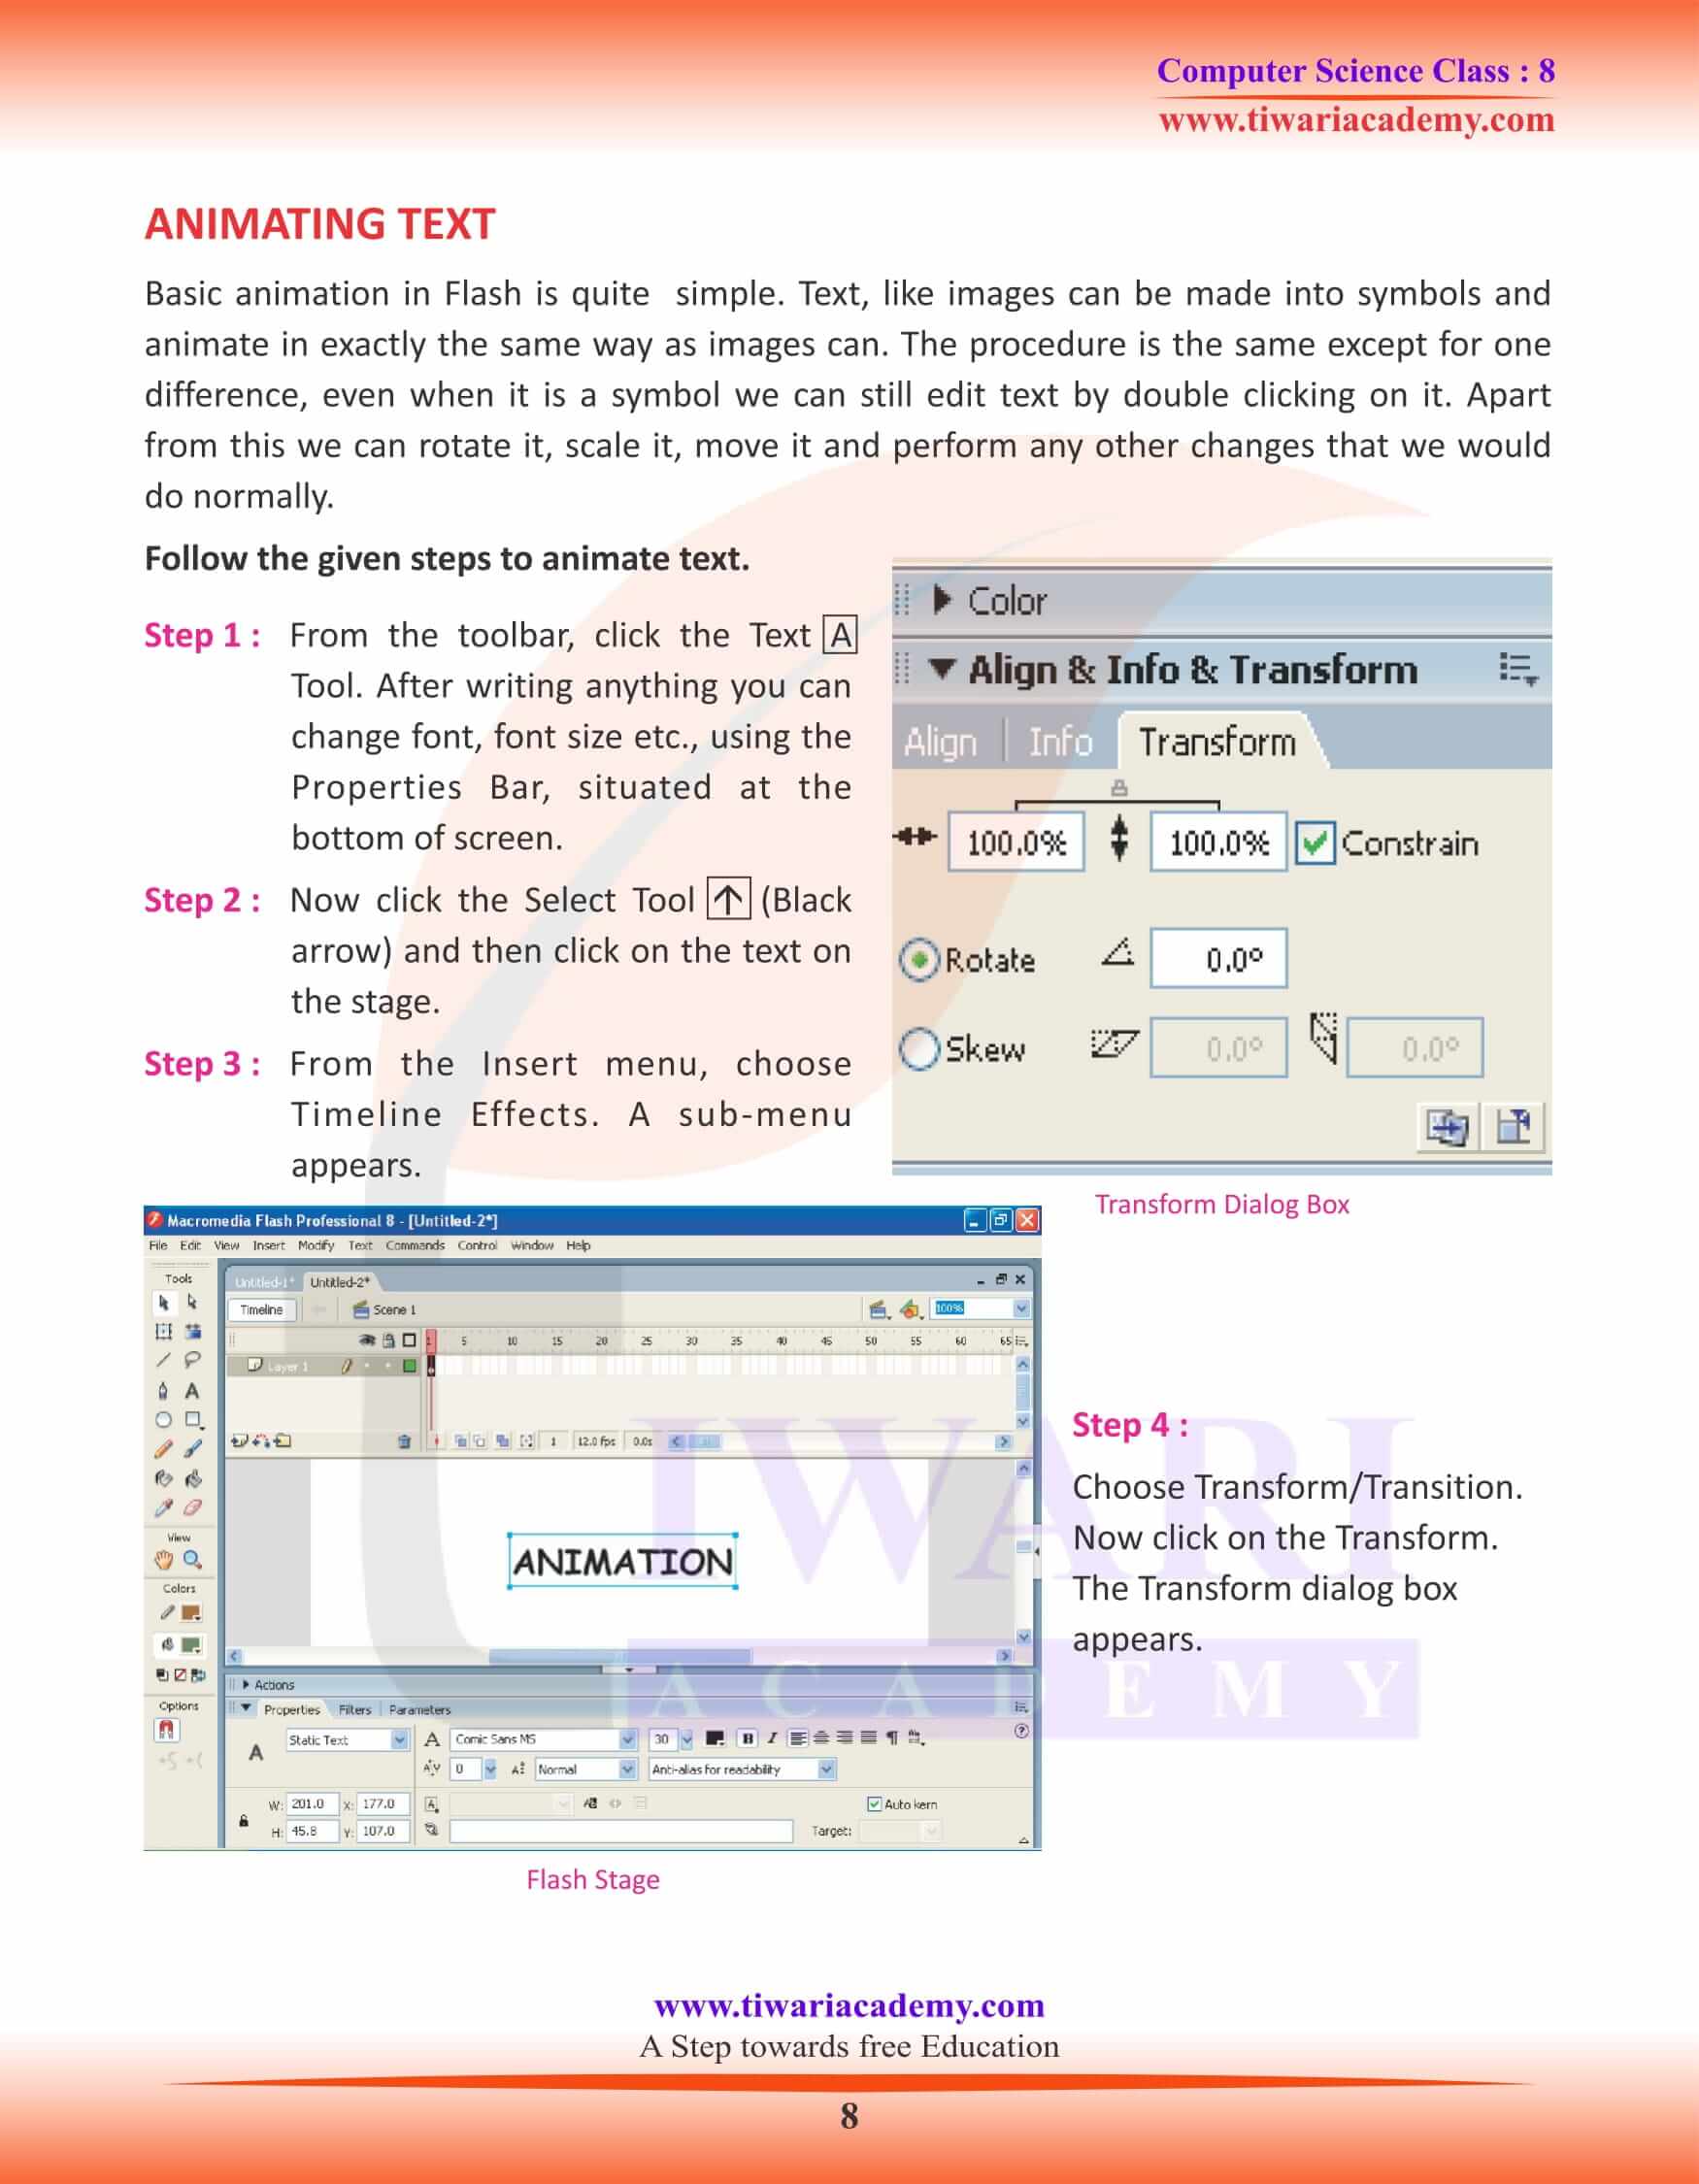
Step 1 : From the toolbar, click the Text A Tool. After writing anything you can
change font, font size etc., using the Properties Bar, situated at the bottom of screen.
Step 2 : Now click the Select Tool (Black arrow) and then click on the text on the stage.
Step 3 : From the Insert menu, choose Timeline Effects. A sub-menu
appears.
Step 4 :Choose Transform/Transition. Now click on the Transform. The Transform dialog box appears.
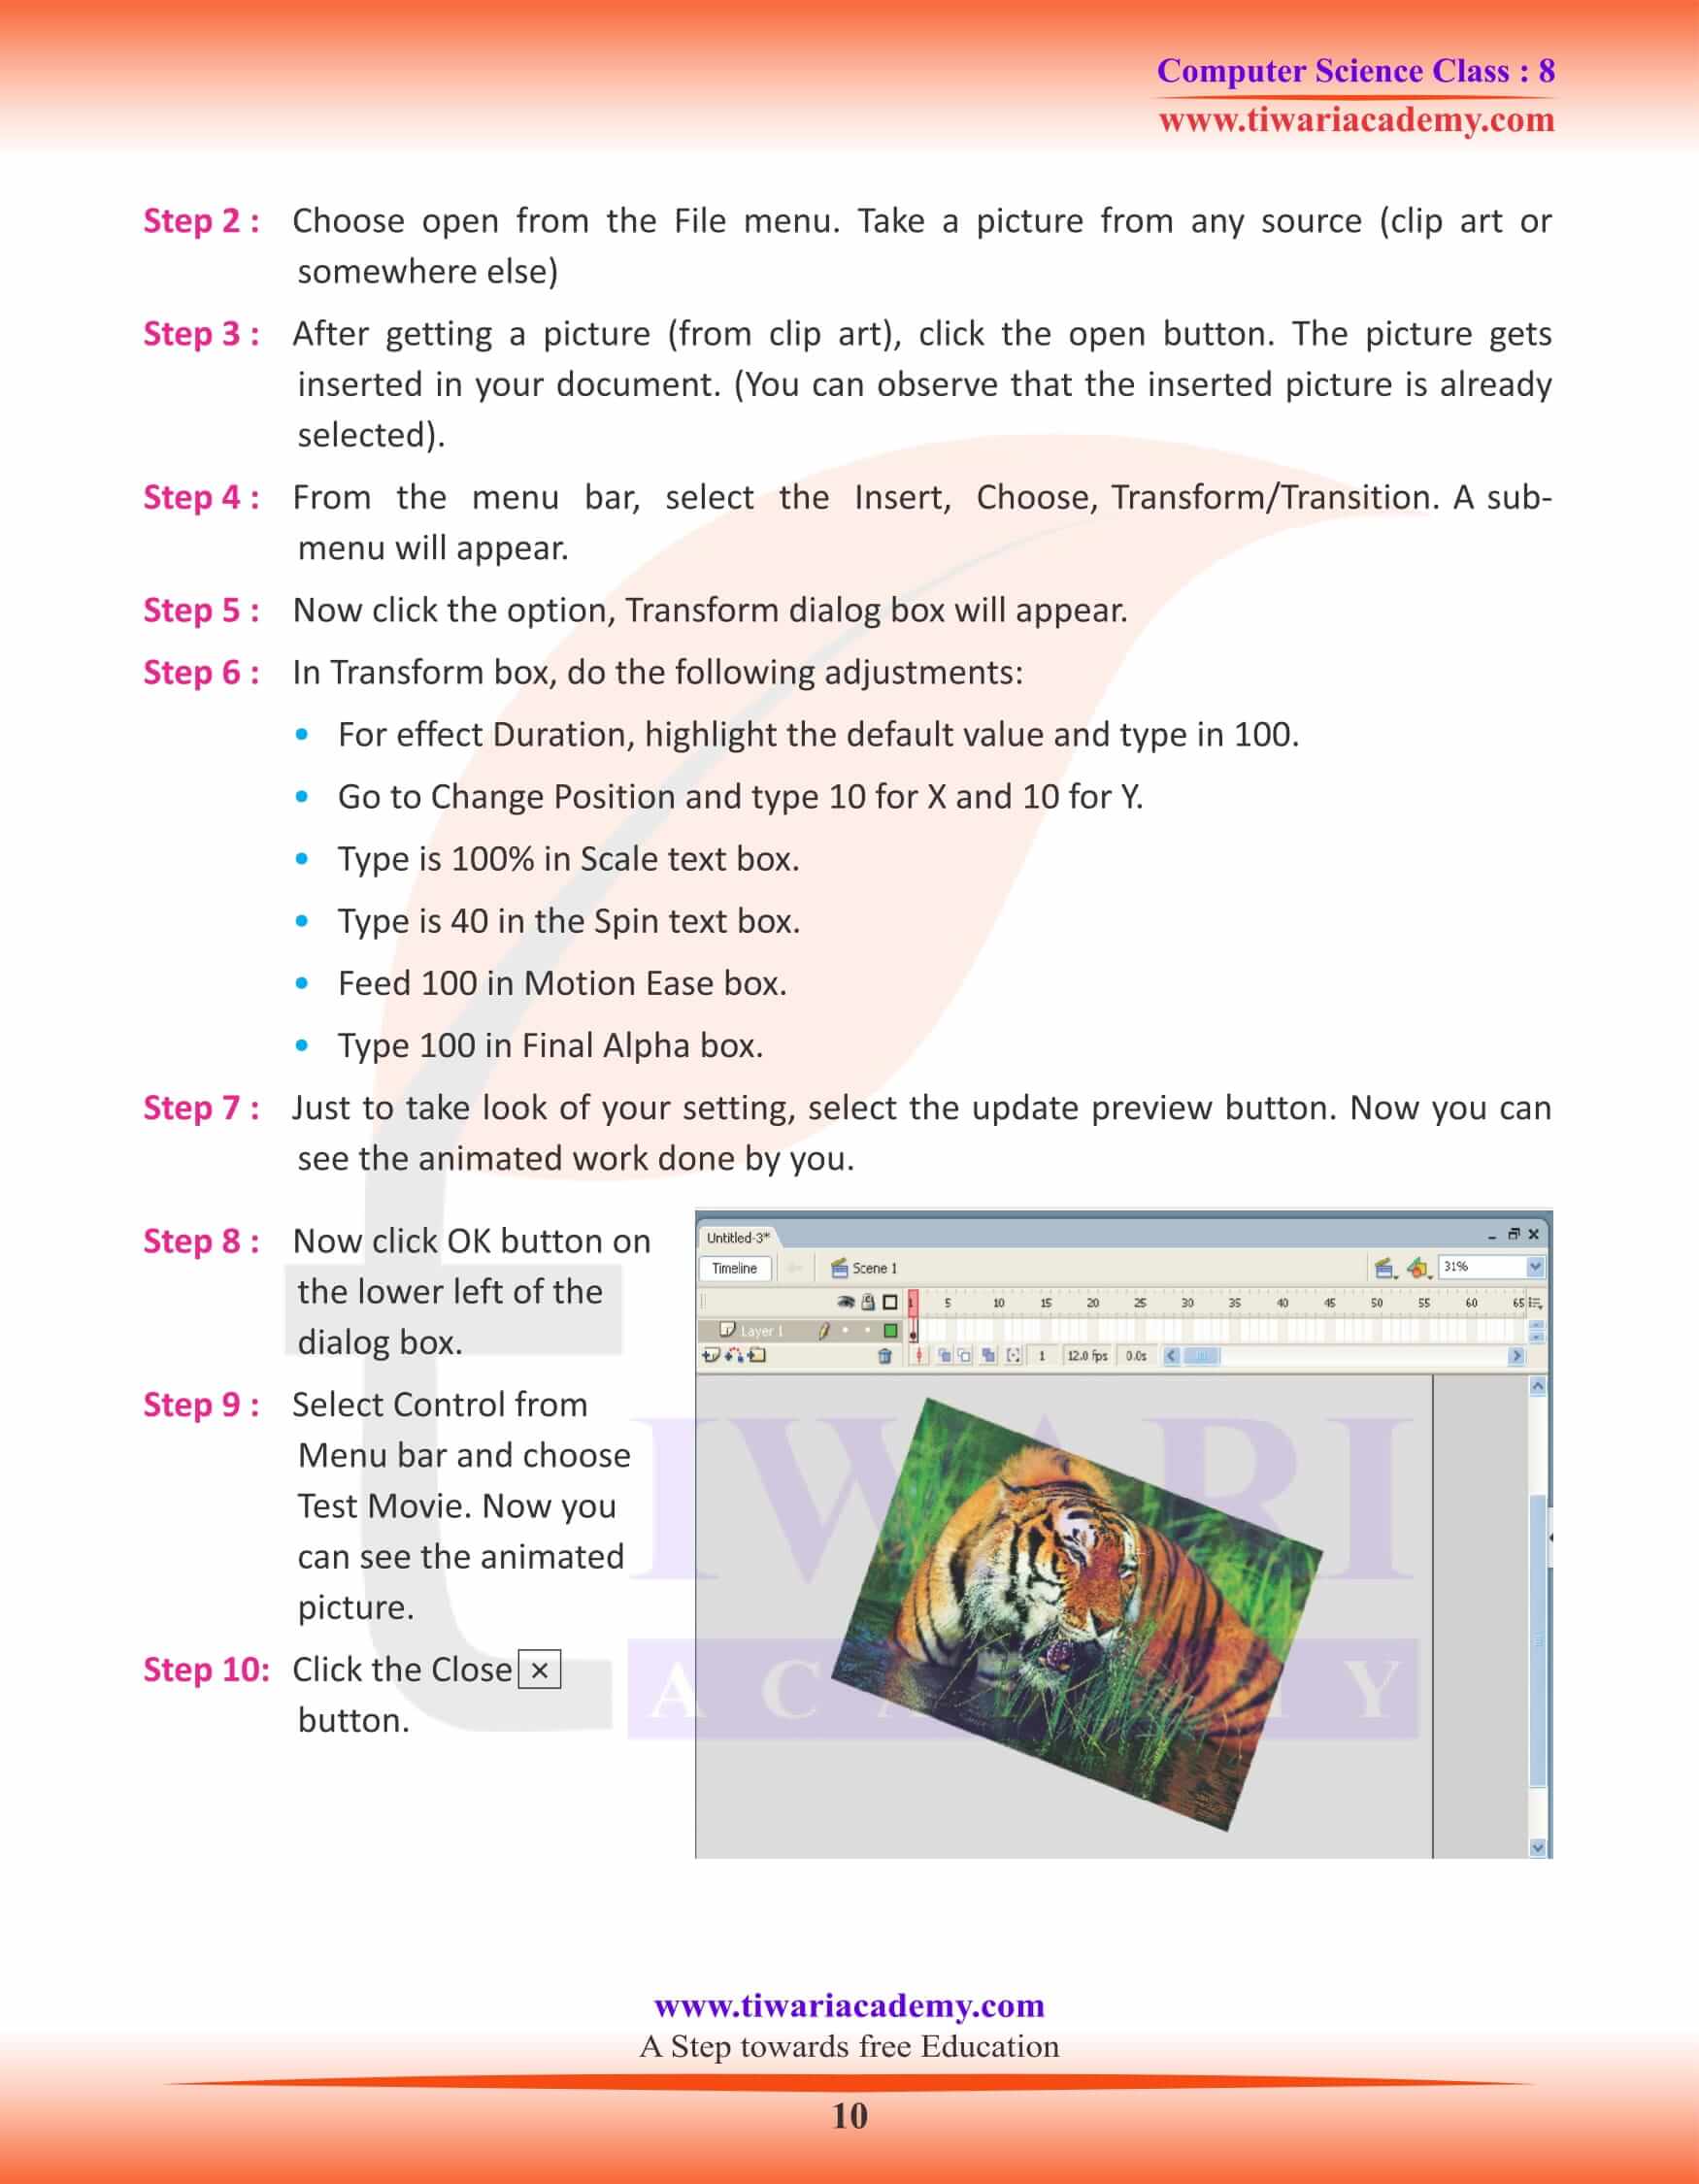
Step 5 : In Transform box, you can adjust several of characteristics like Effect Duration, Spin, Final Alpha, Motion Ease etc.
Step 6 : To see the effect of your setting, click the update Preview button, in the upper right corner of the dialog box.
Step 7 : Now, click the OK button on the bottom left of the dialog box.
Step 8 : From the menu bar, select control and click Test Movie. Now, an SWF file is generated and you can see your work of animation.
