NCERT Solutions for Class 7 Computer Science Chapter 3 Microsoft PowerPoint in English Medium updated for CBSE 2025-26. Get here the complete knowledge about grade 7 Computer chapter 3, which explains the working use of MS Power Point program.
Class 7 Computer Science Chapter 3 Microsoft PowerPoint
MS PowerPoint
In today’s visual world people are used to understand things easily and faster by using visual images. We live in an era of advertisement. PowerPoint is basically a presentation for different products. Presentation is nothing but number of slides which come one after another. To create a slide, one has to know about the software in which text, graphics, sound, motion, animation etc. can be used. There are various such software but commonly used software is MS PowerPoint. PowerPoint is an important part of Microsoft office. This software is used to create slides to show presentations. The slides can be moved one by one with fixed intervals and they can be operated automatically. A presentation can be projected on a big screen by attaching the computer to a Multimedia Projector.
GETTING STARTED WITH MS POWERPOINT
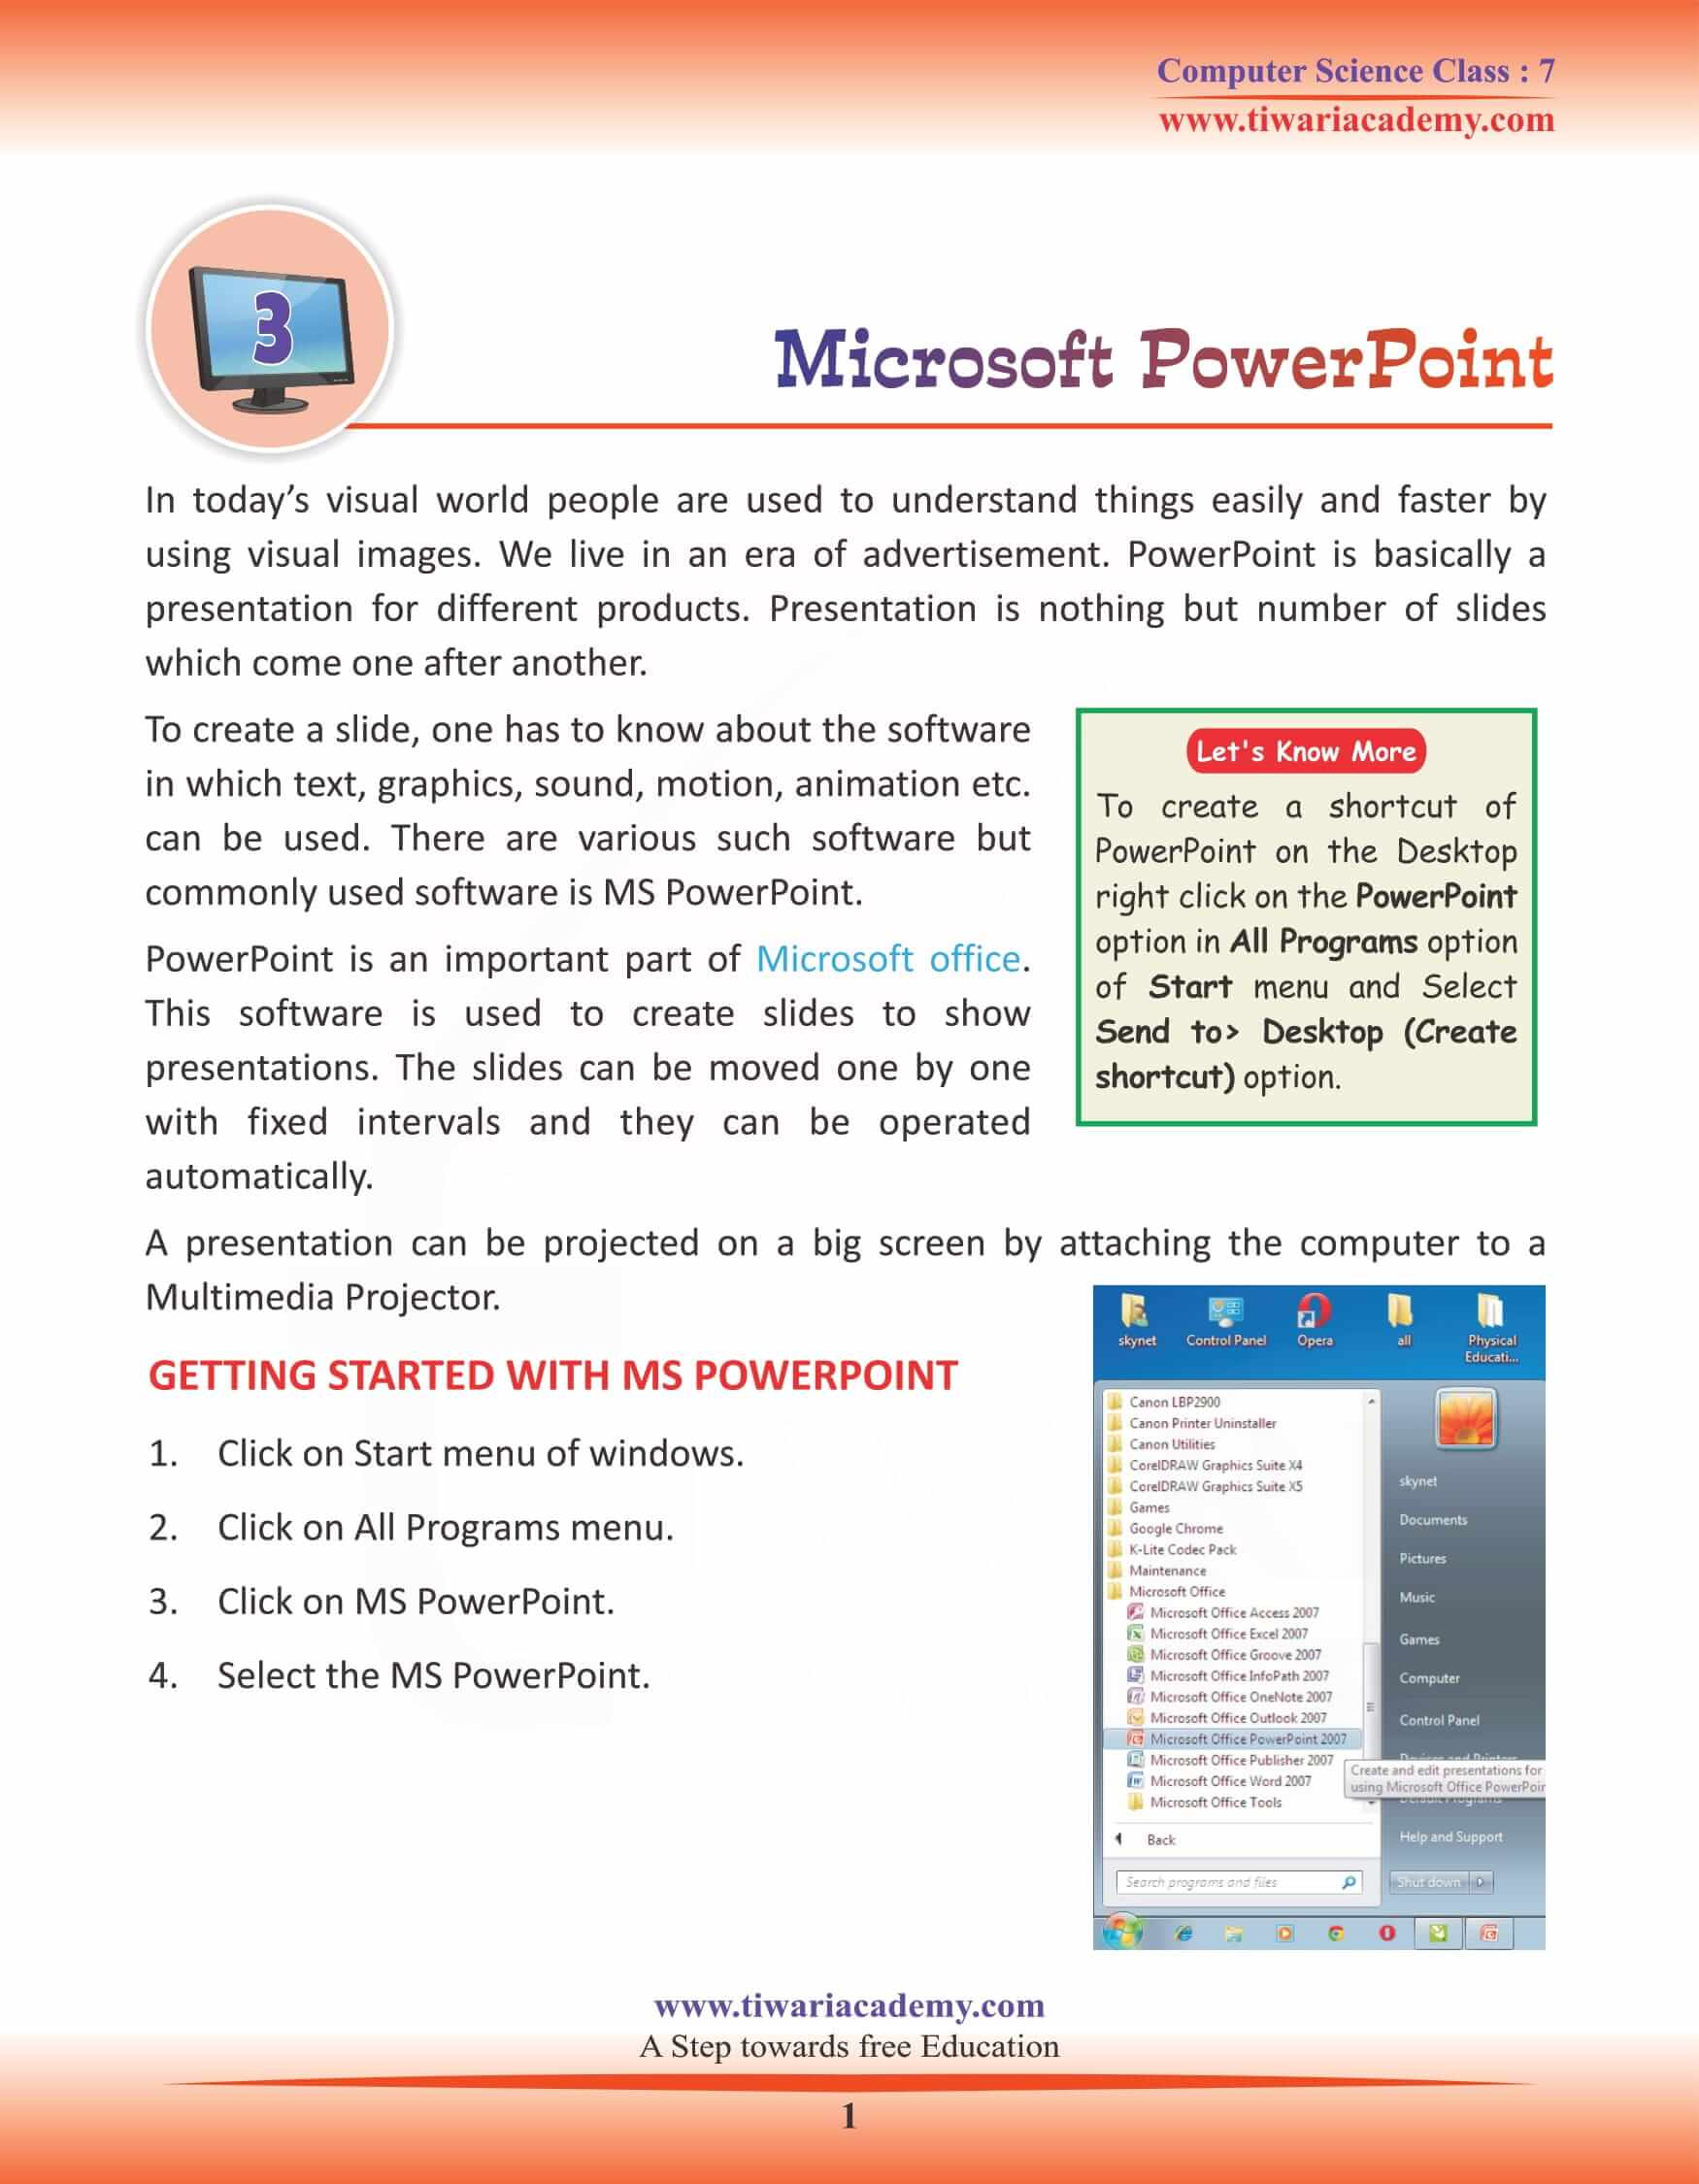
- Click on Start menu of windows.
- Click on All Programs menu.
- Click on MS PowerPoint.
- Select the MS PowerPoint.
CREATING A PRESENTATION USING DESIGN TEMPLATE
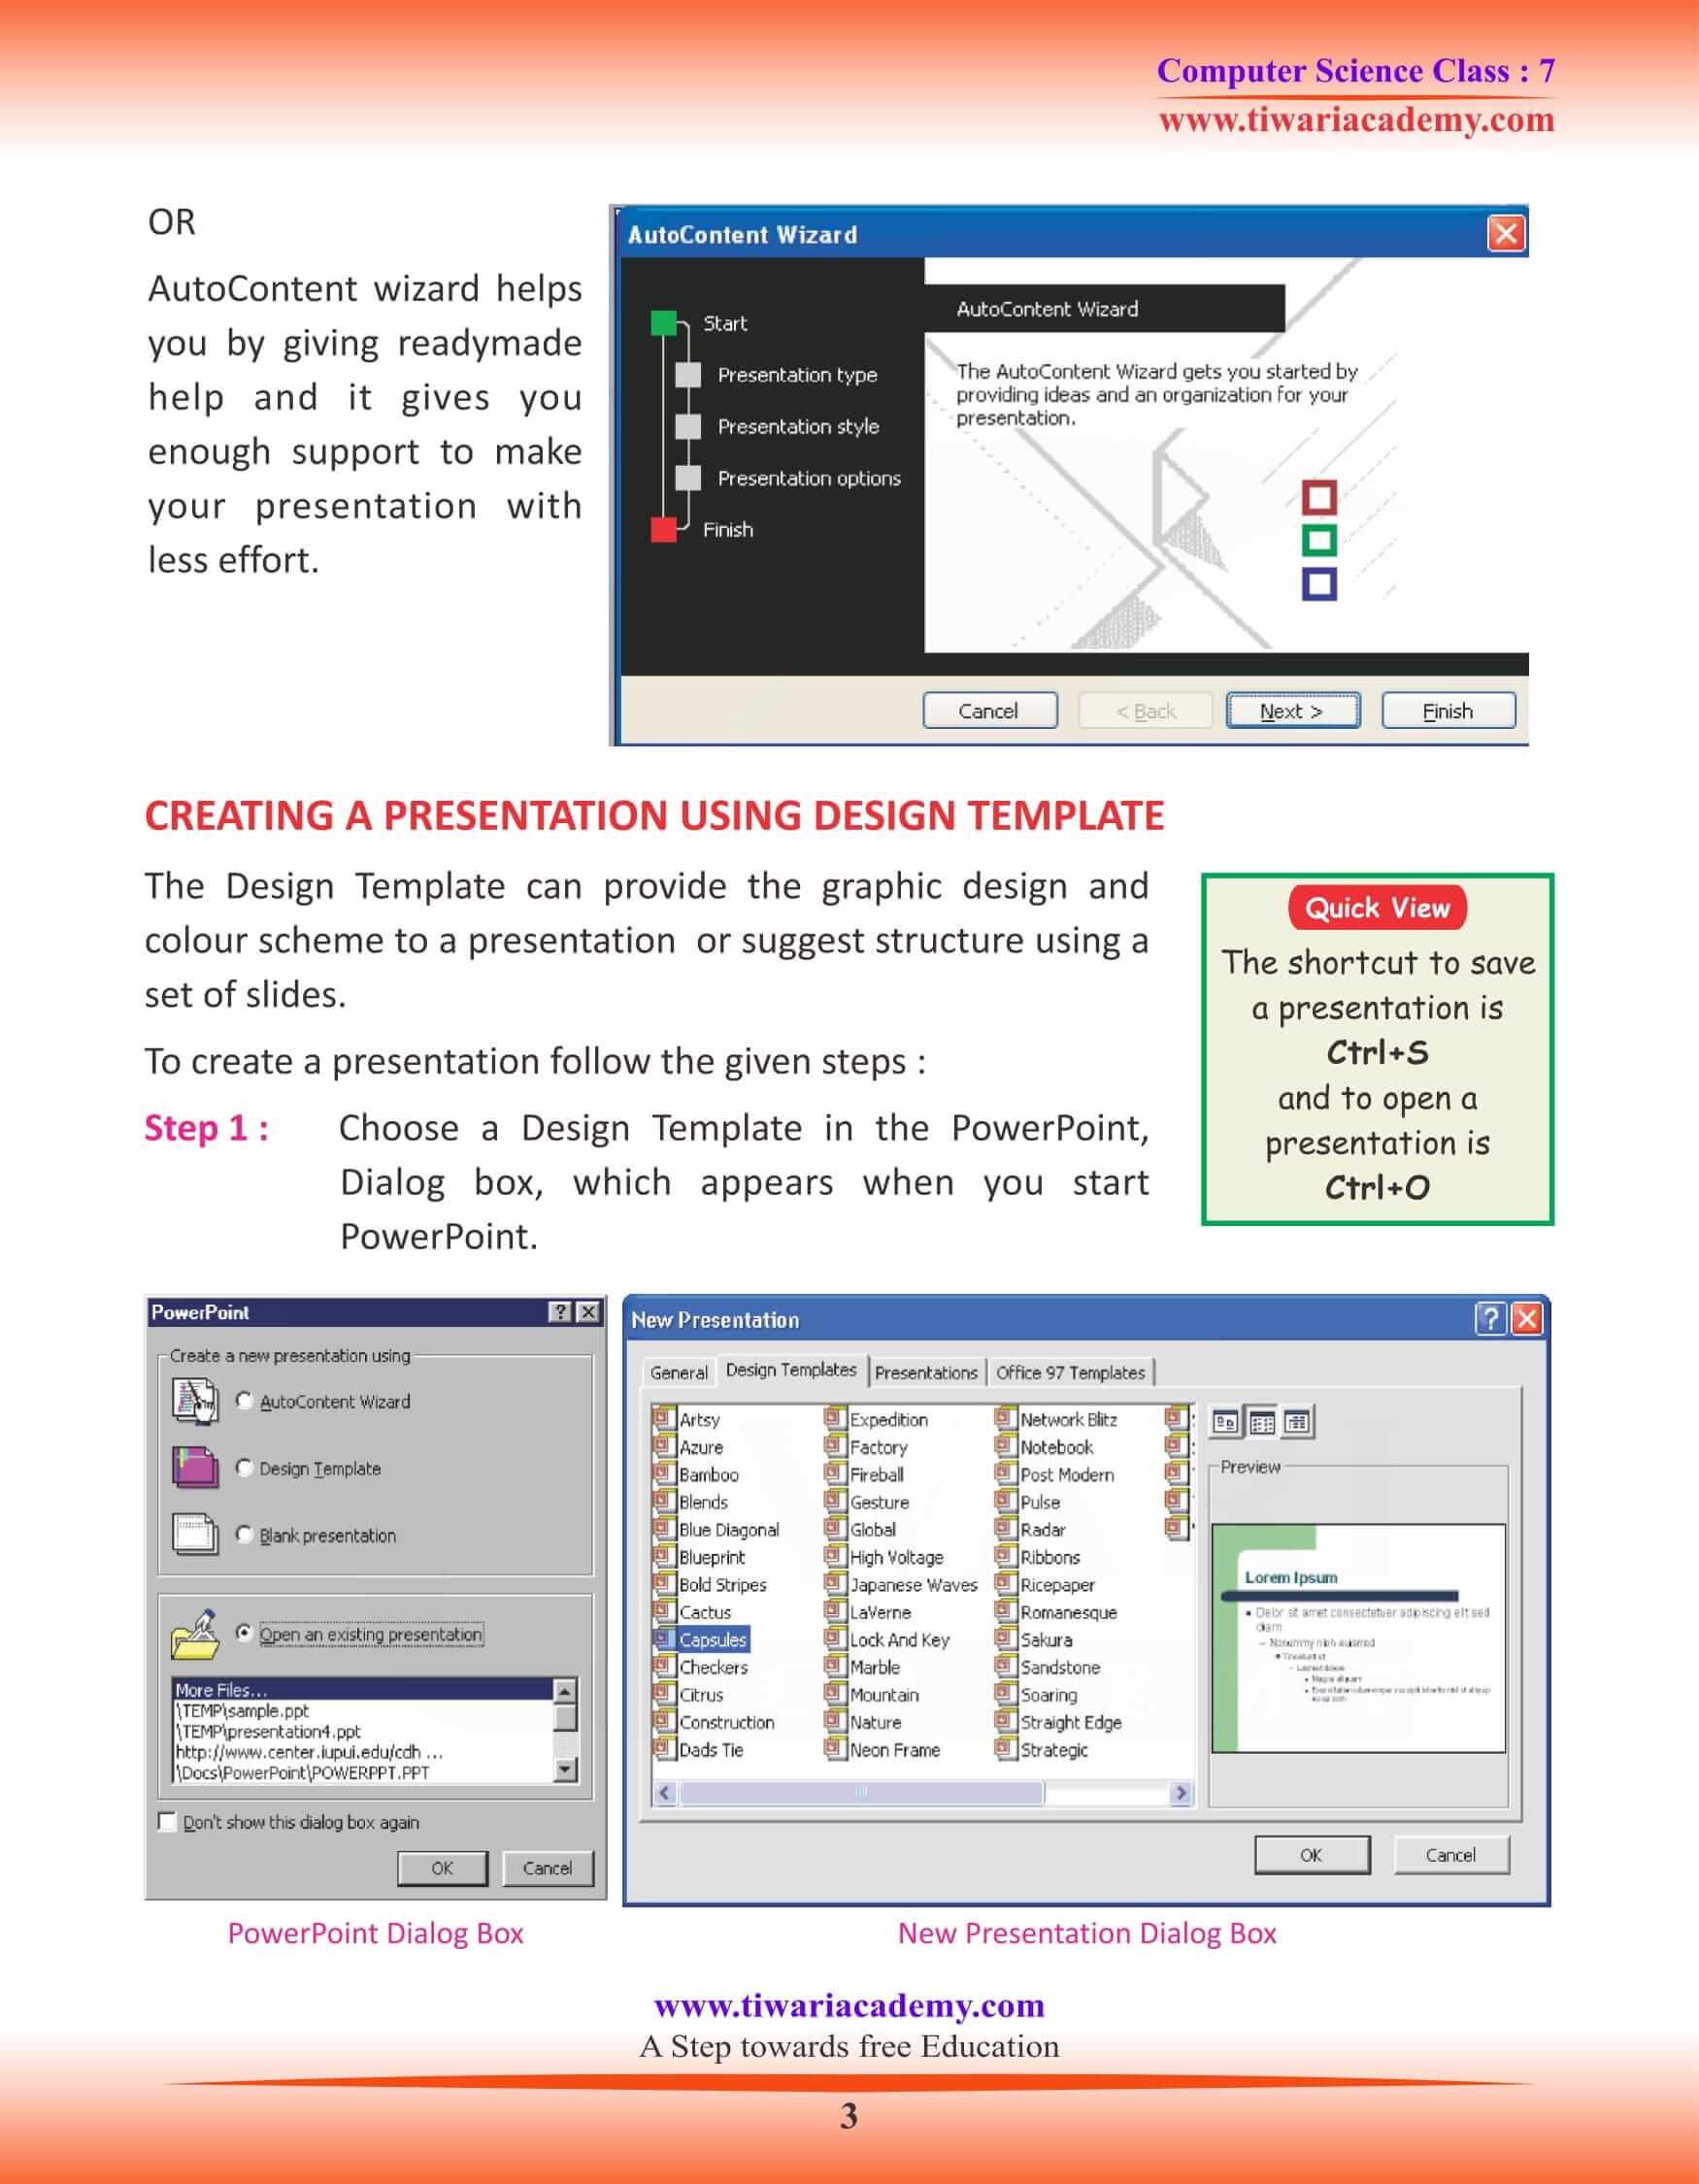
The Design Template can provide the graphic design and colour scheme to a presentation or suggest structure using a set of slides. To create a presentation follow the given steps :
Step 1 : Choose a Design Template in the PowerPoint, Dialog box, which appears when you start PowerPoint.
OR
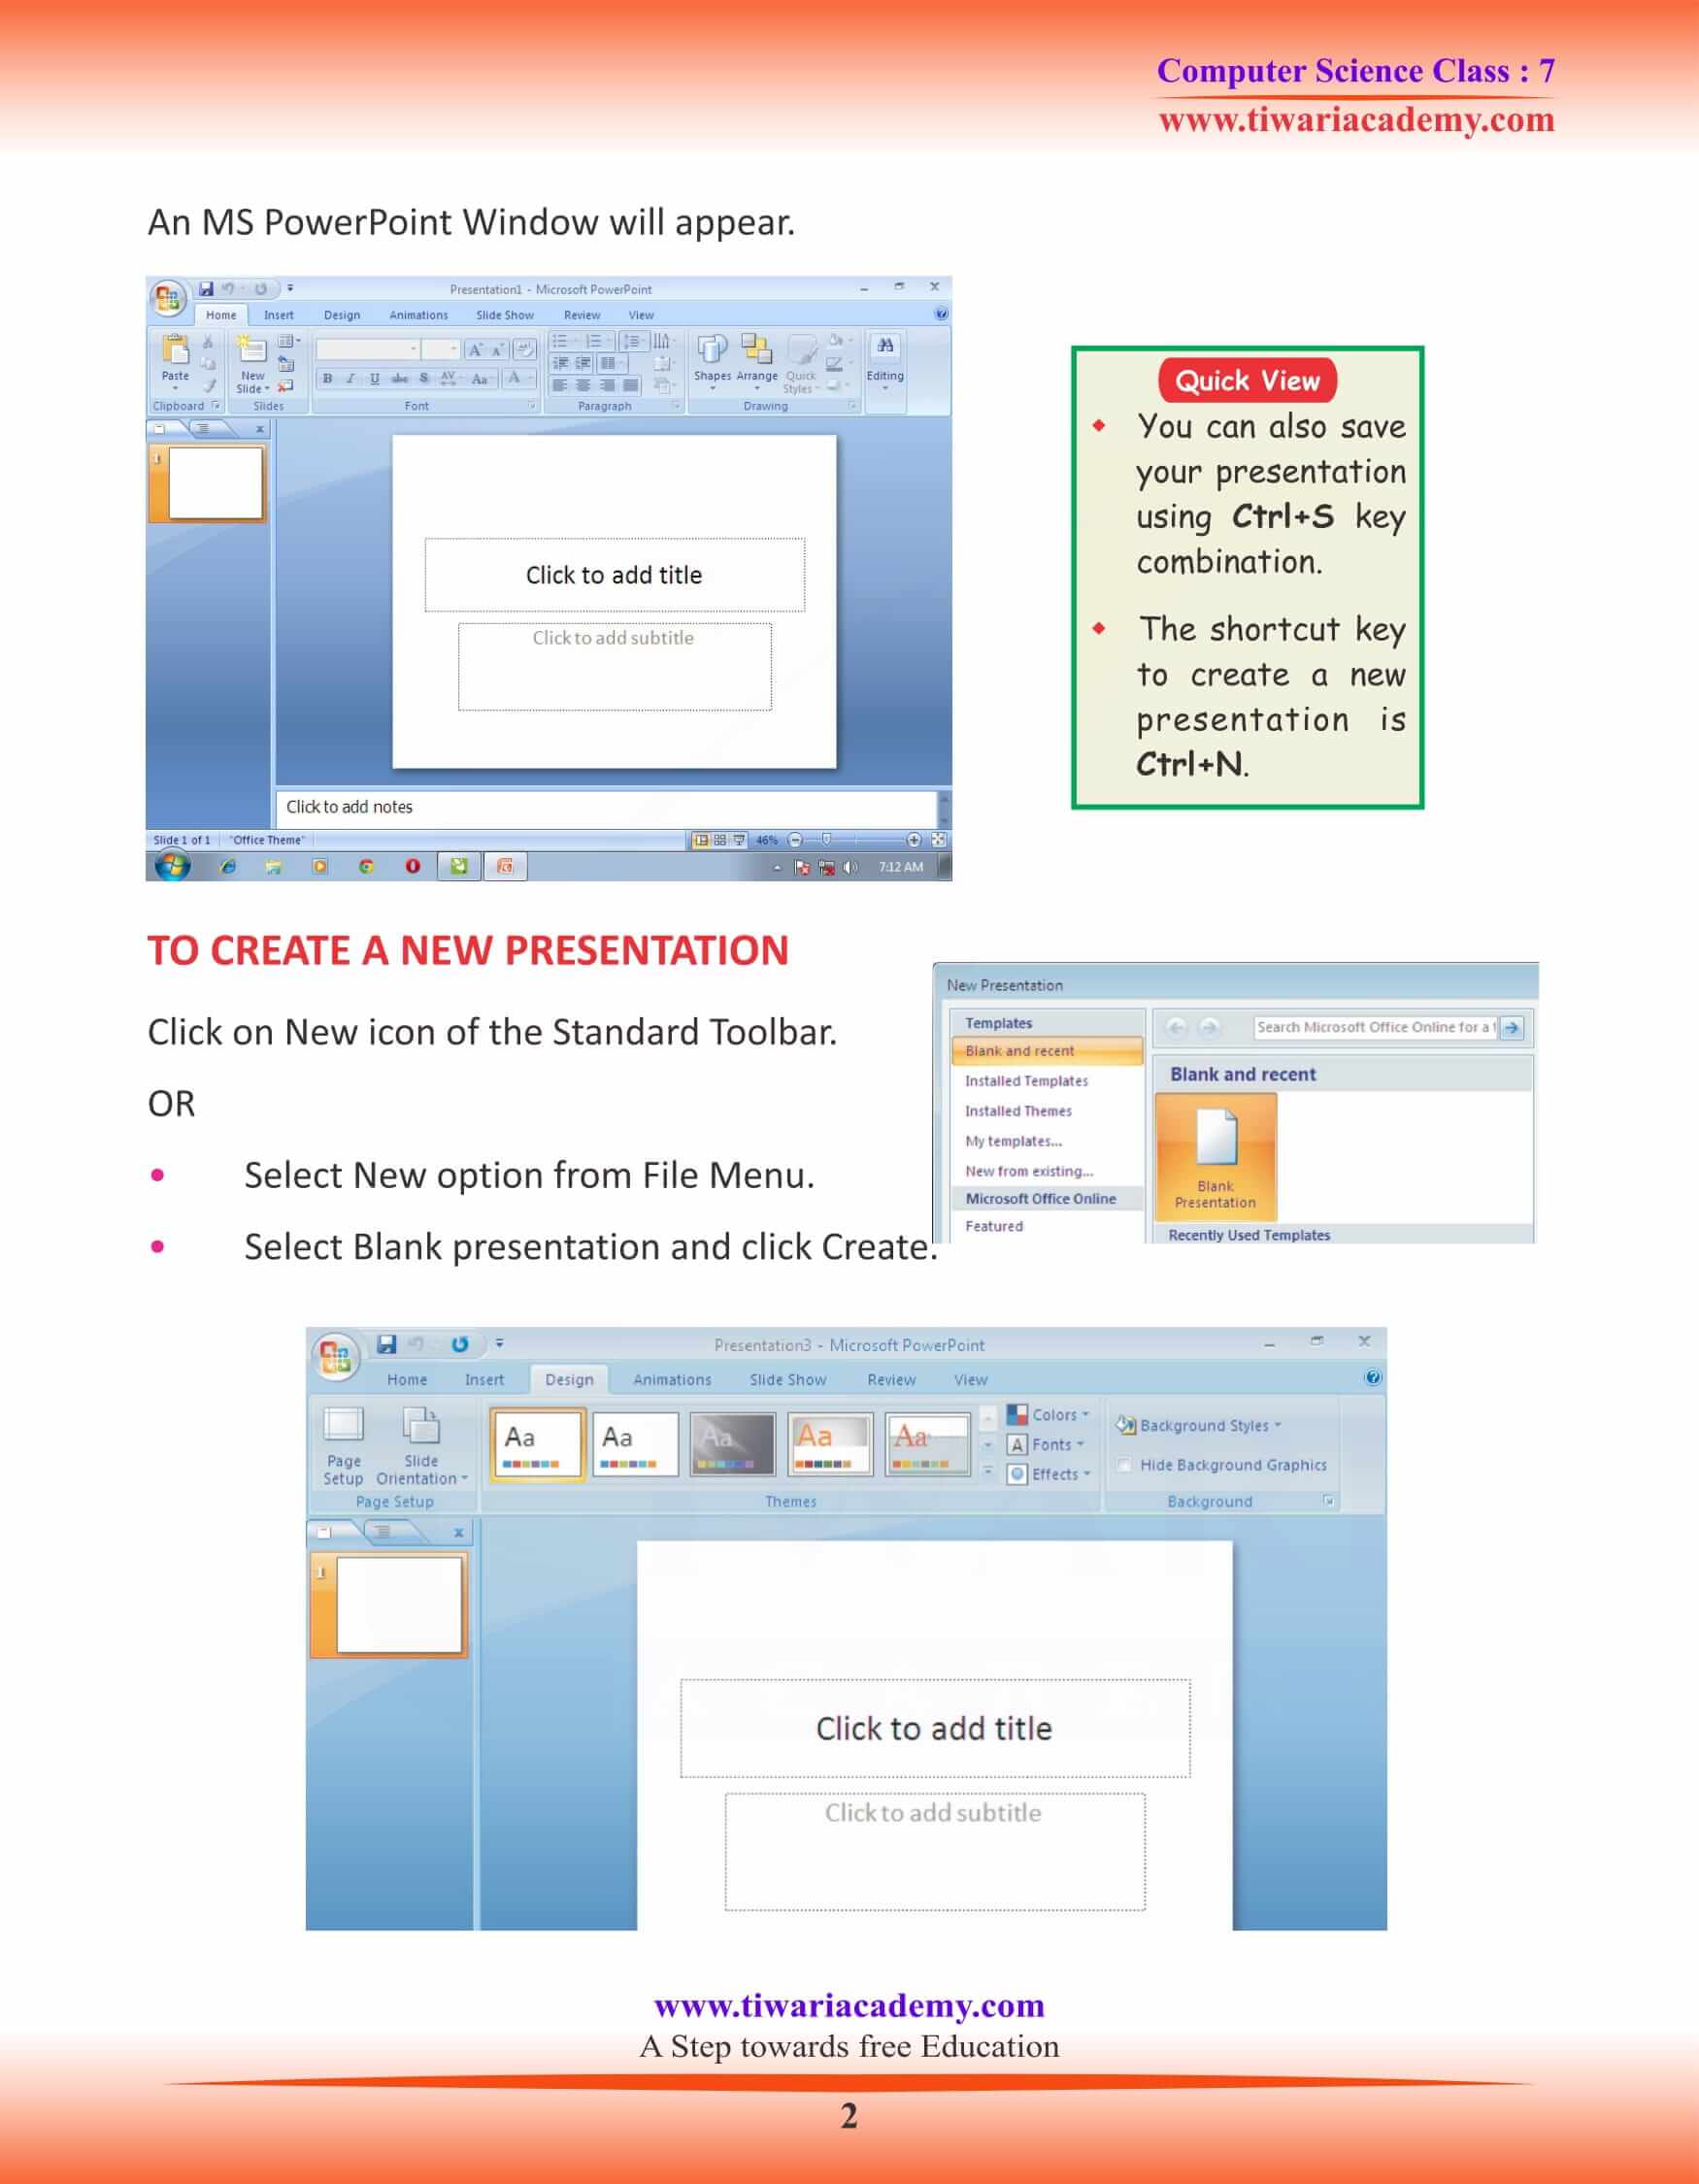
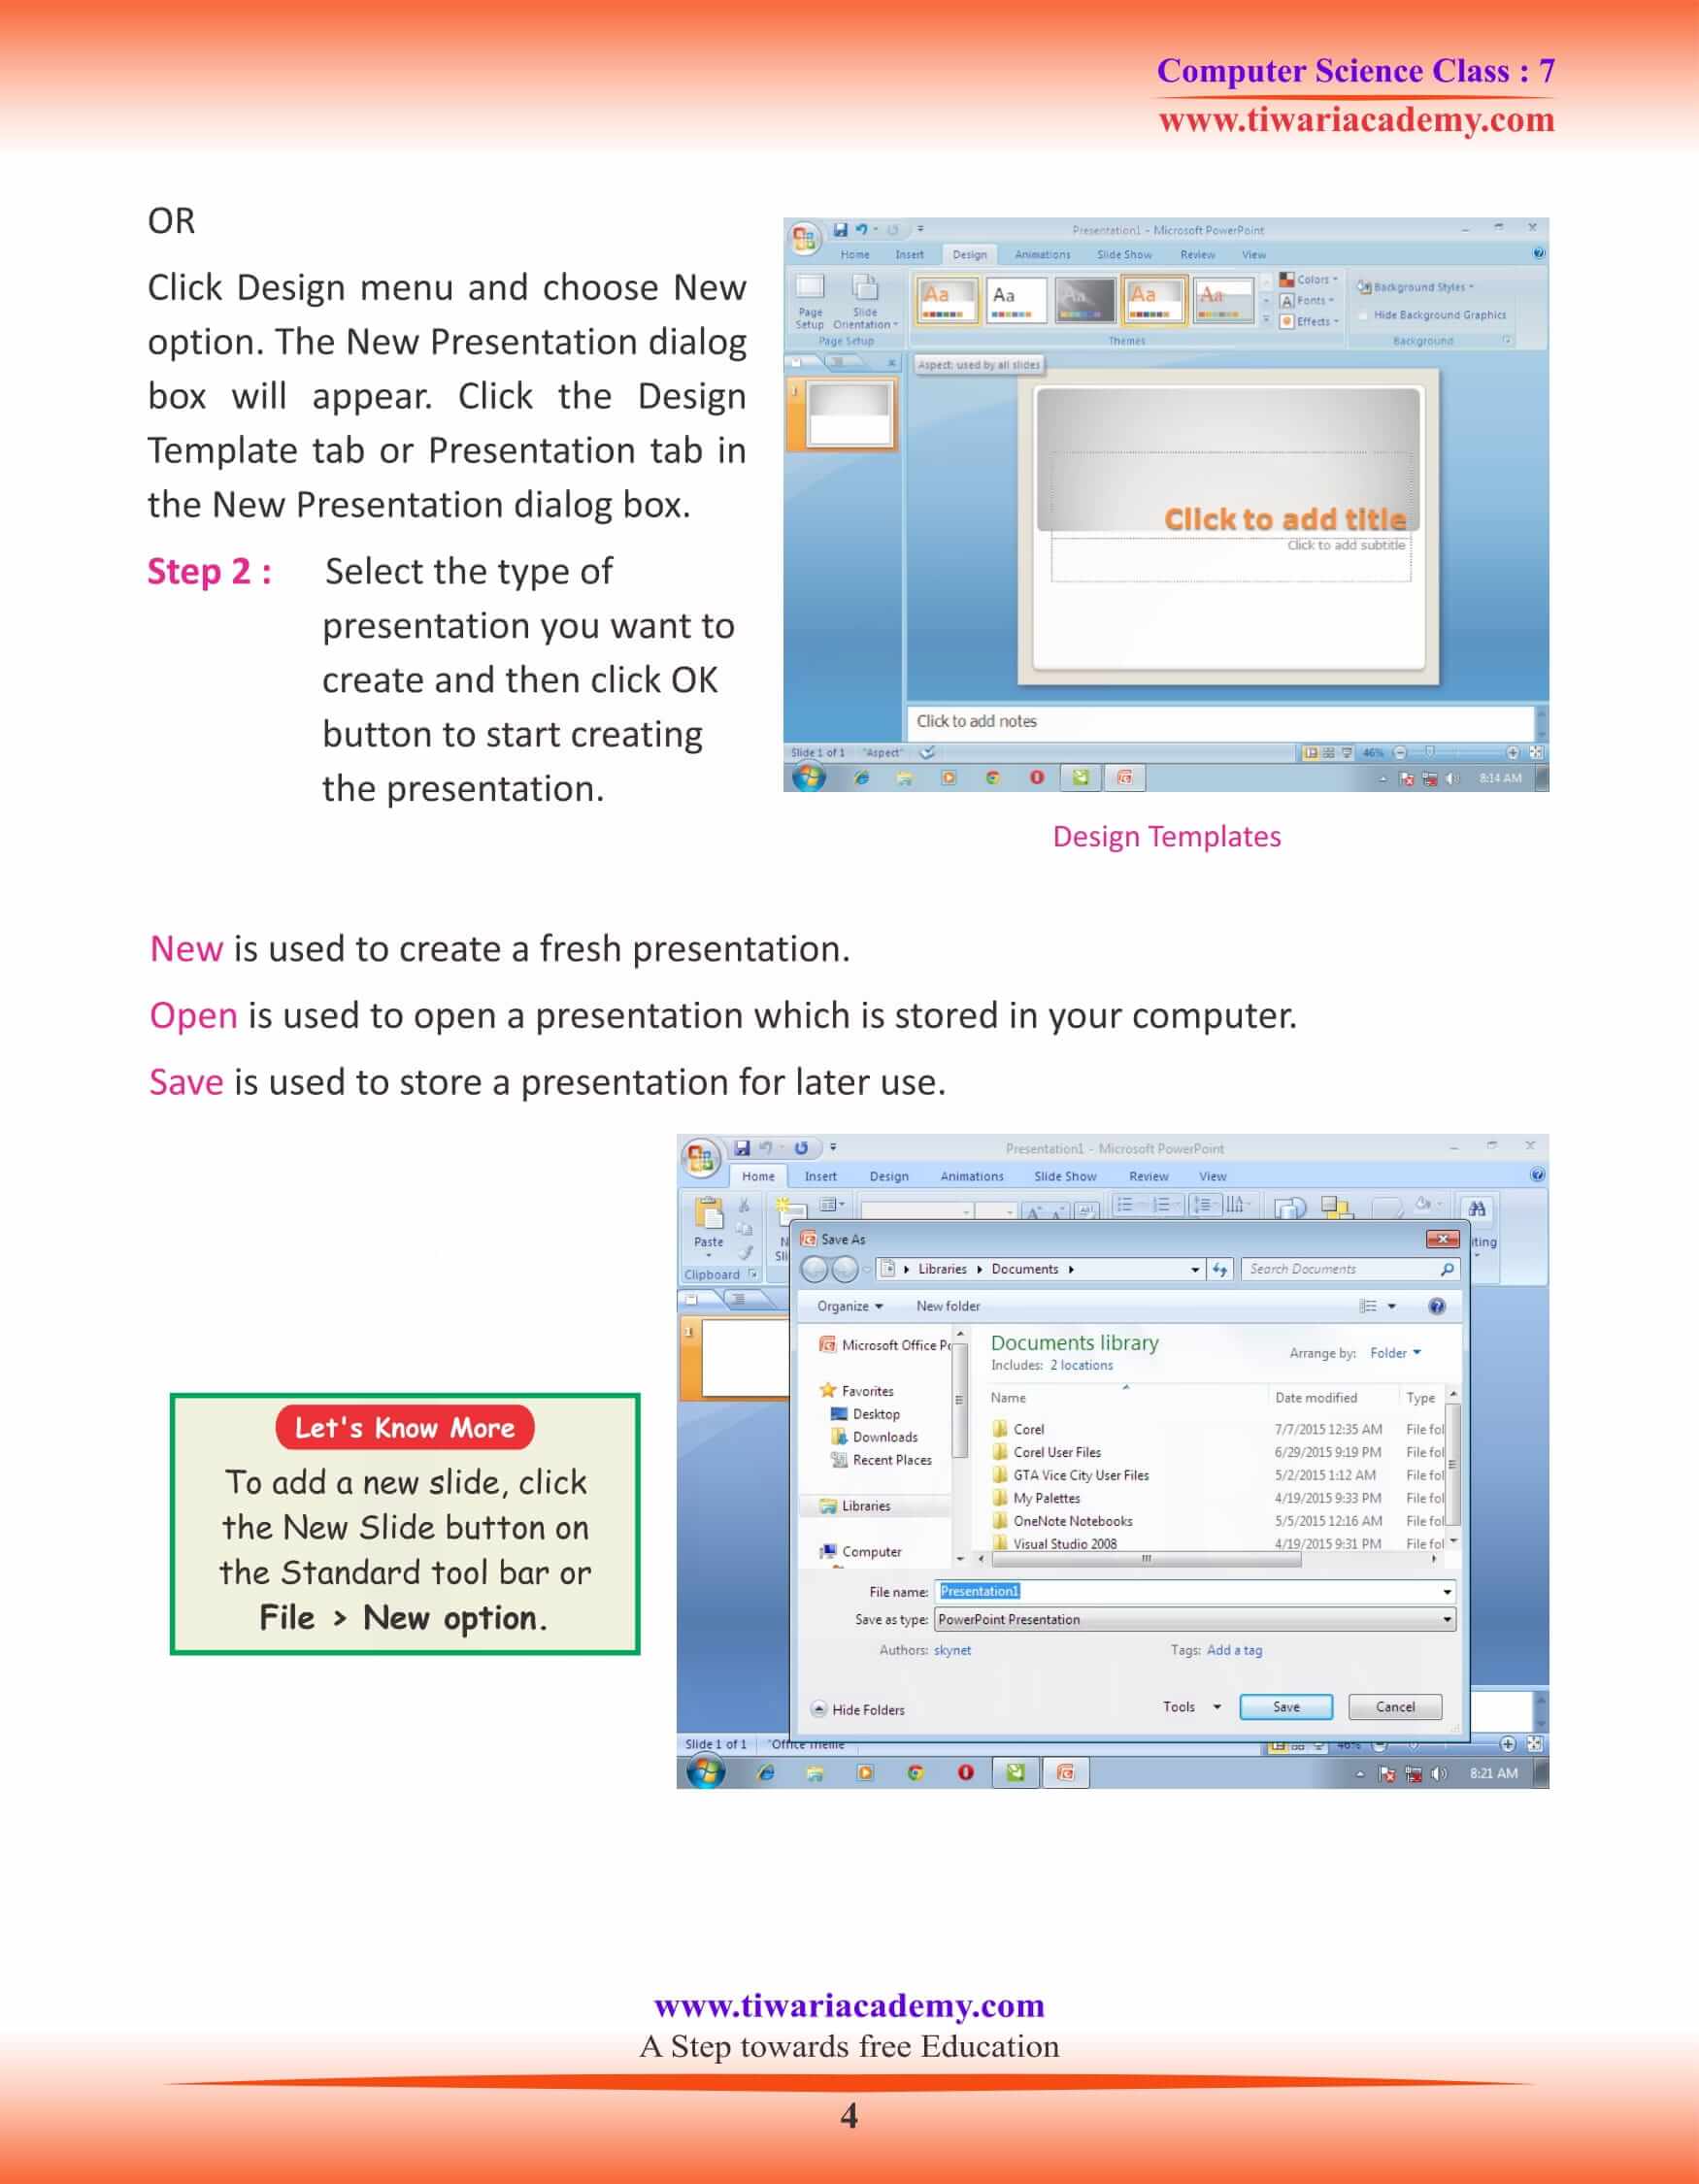
Click Design menu and choose New option. The New Presentation dialog box will appear. Click the Design Template tab or Presentation tab in the New Presentation dialog box.
Step 2 : Select the type of presentation you want to create and then click OK button to start creating the presentation.
New is used to create a fresh presentation.
Open is used to open a presentation which is stored in your computer.
Save is used to store a presentation for later use.
PRINT
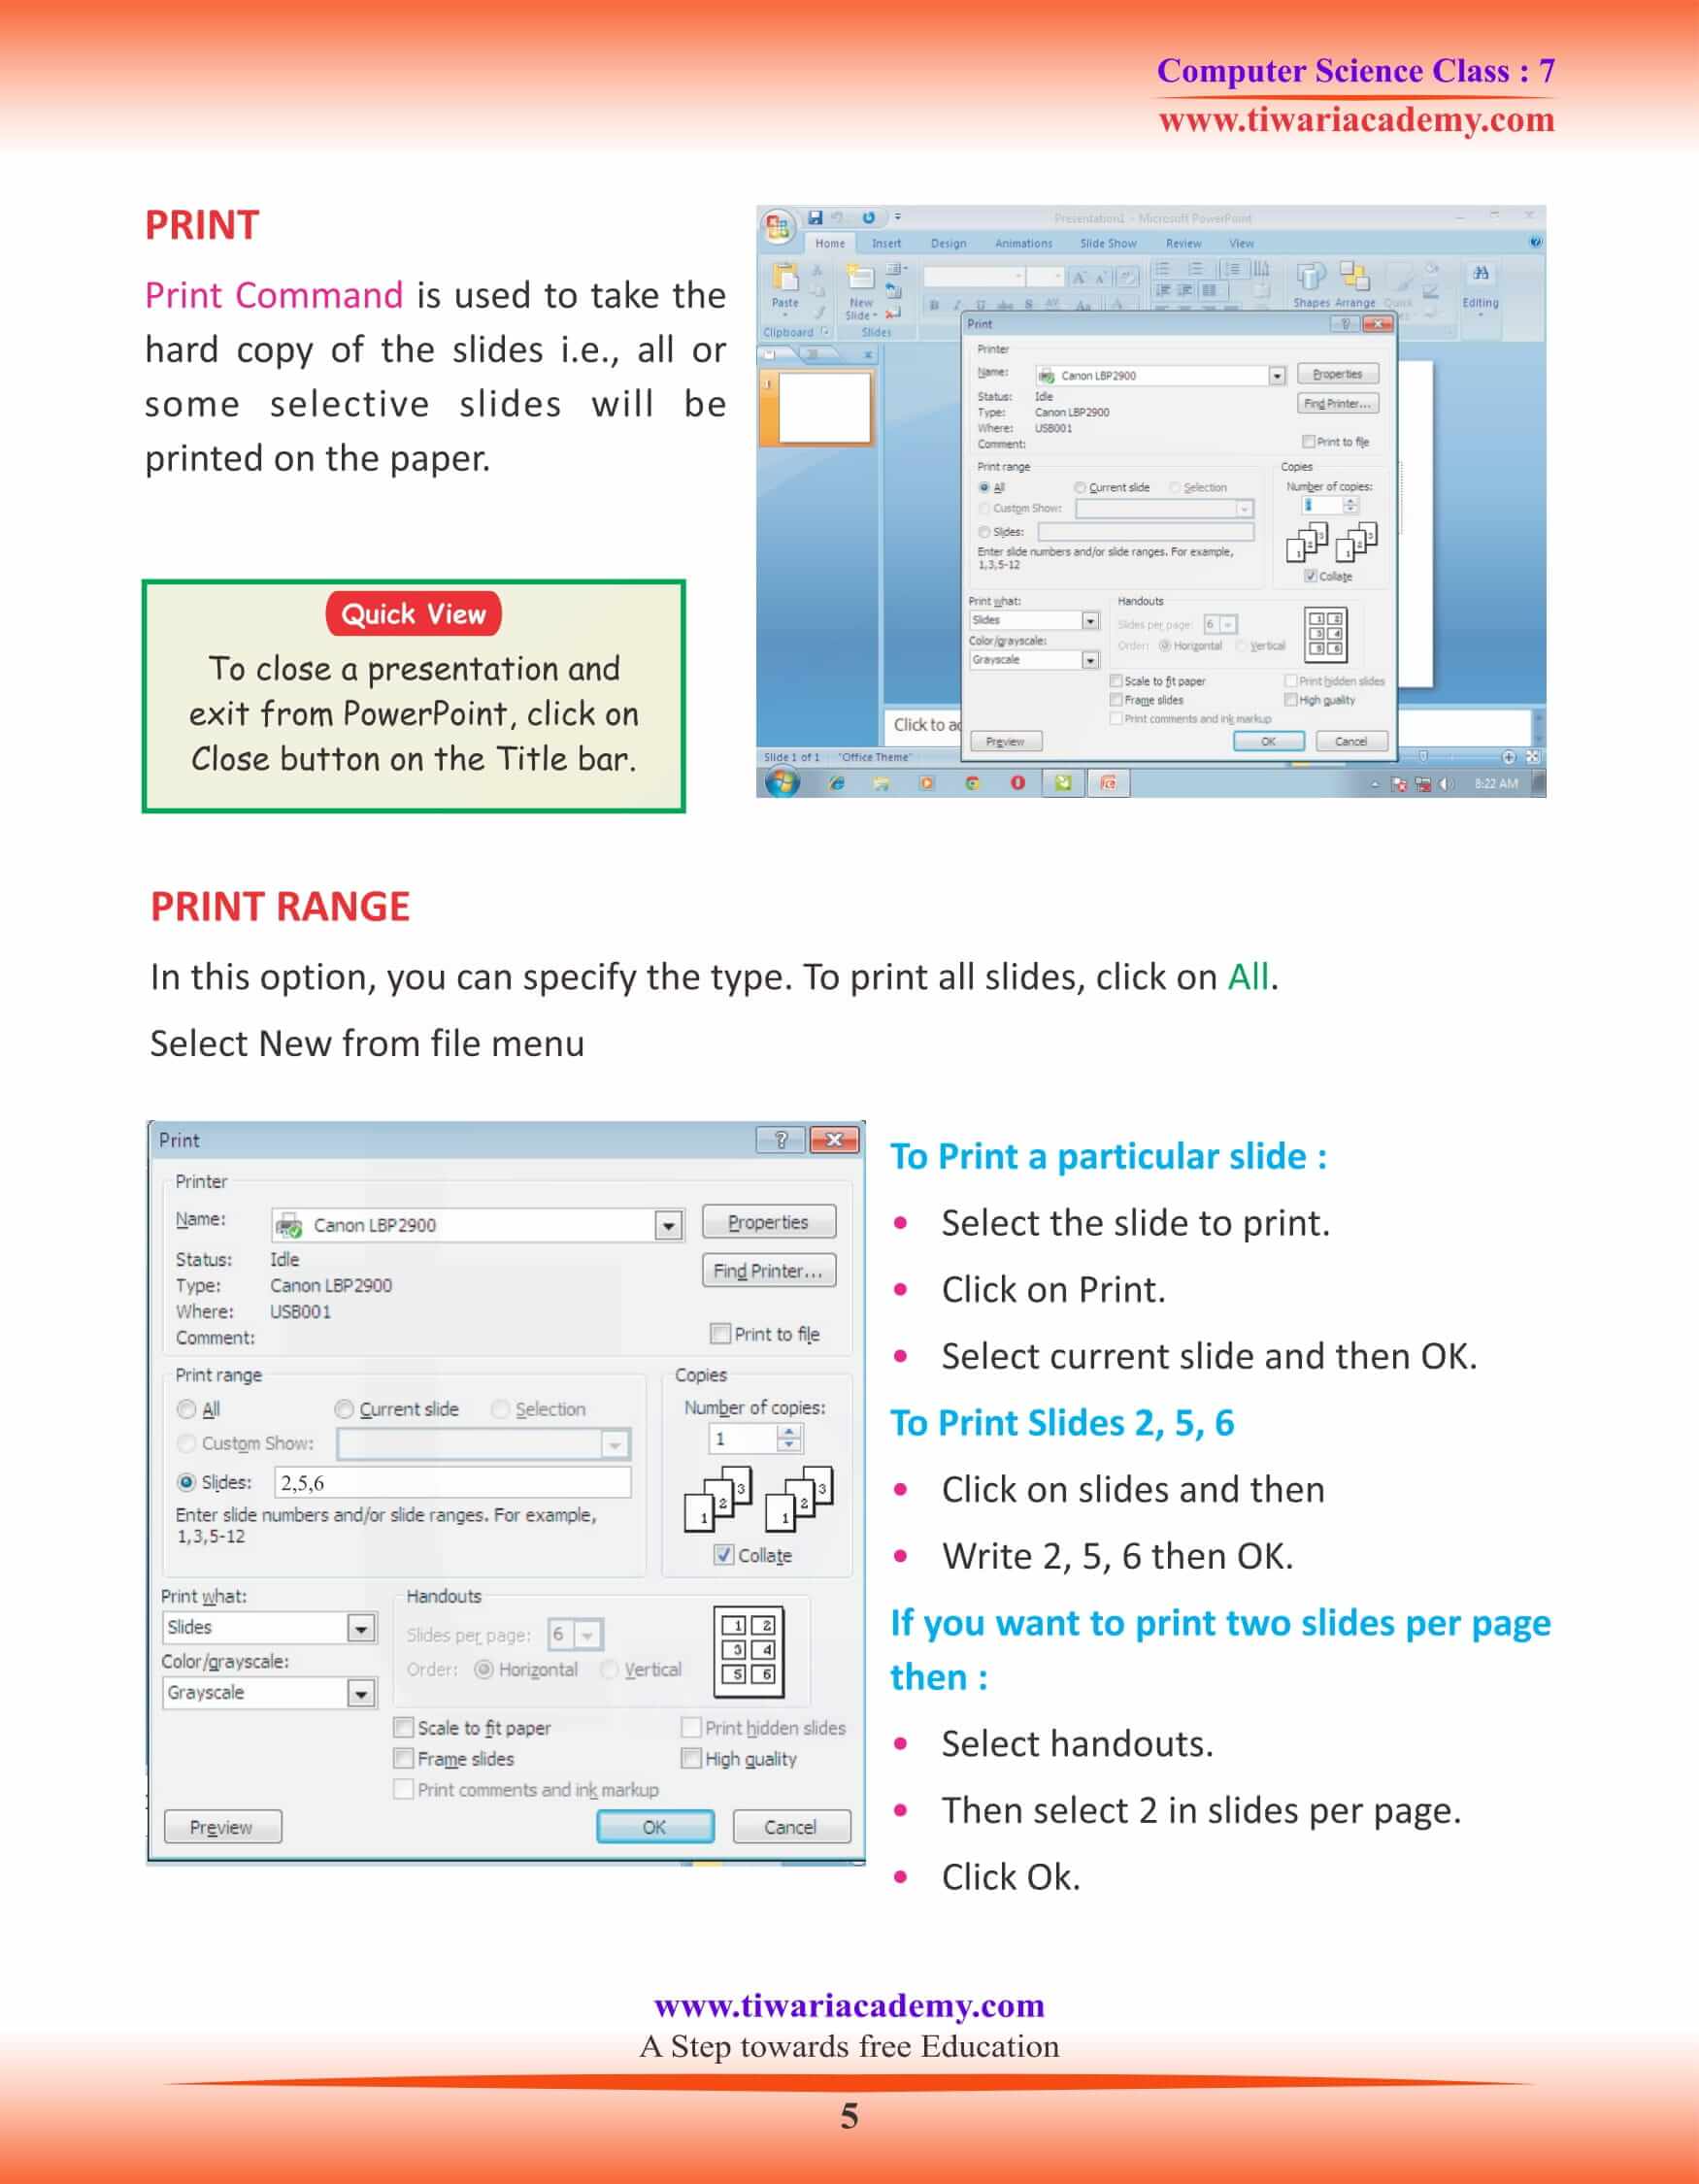
Print Command is used to take the hard copy of the slides i.e., all or some selective slides will be printed on the paper.
FORMATTING TOOLBAR
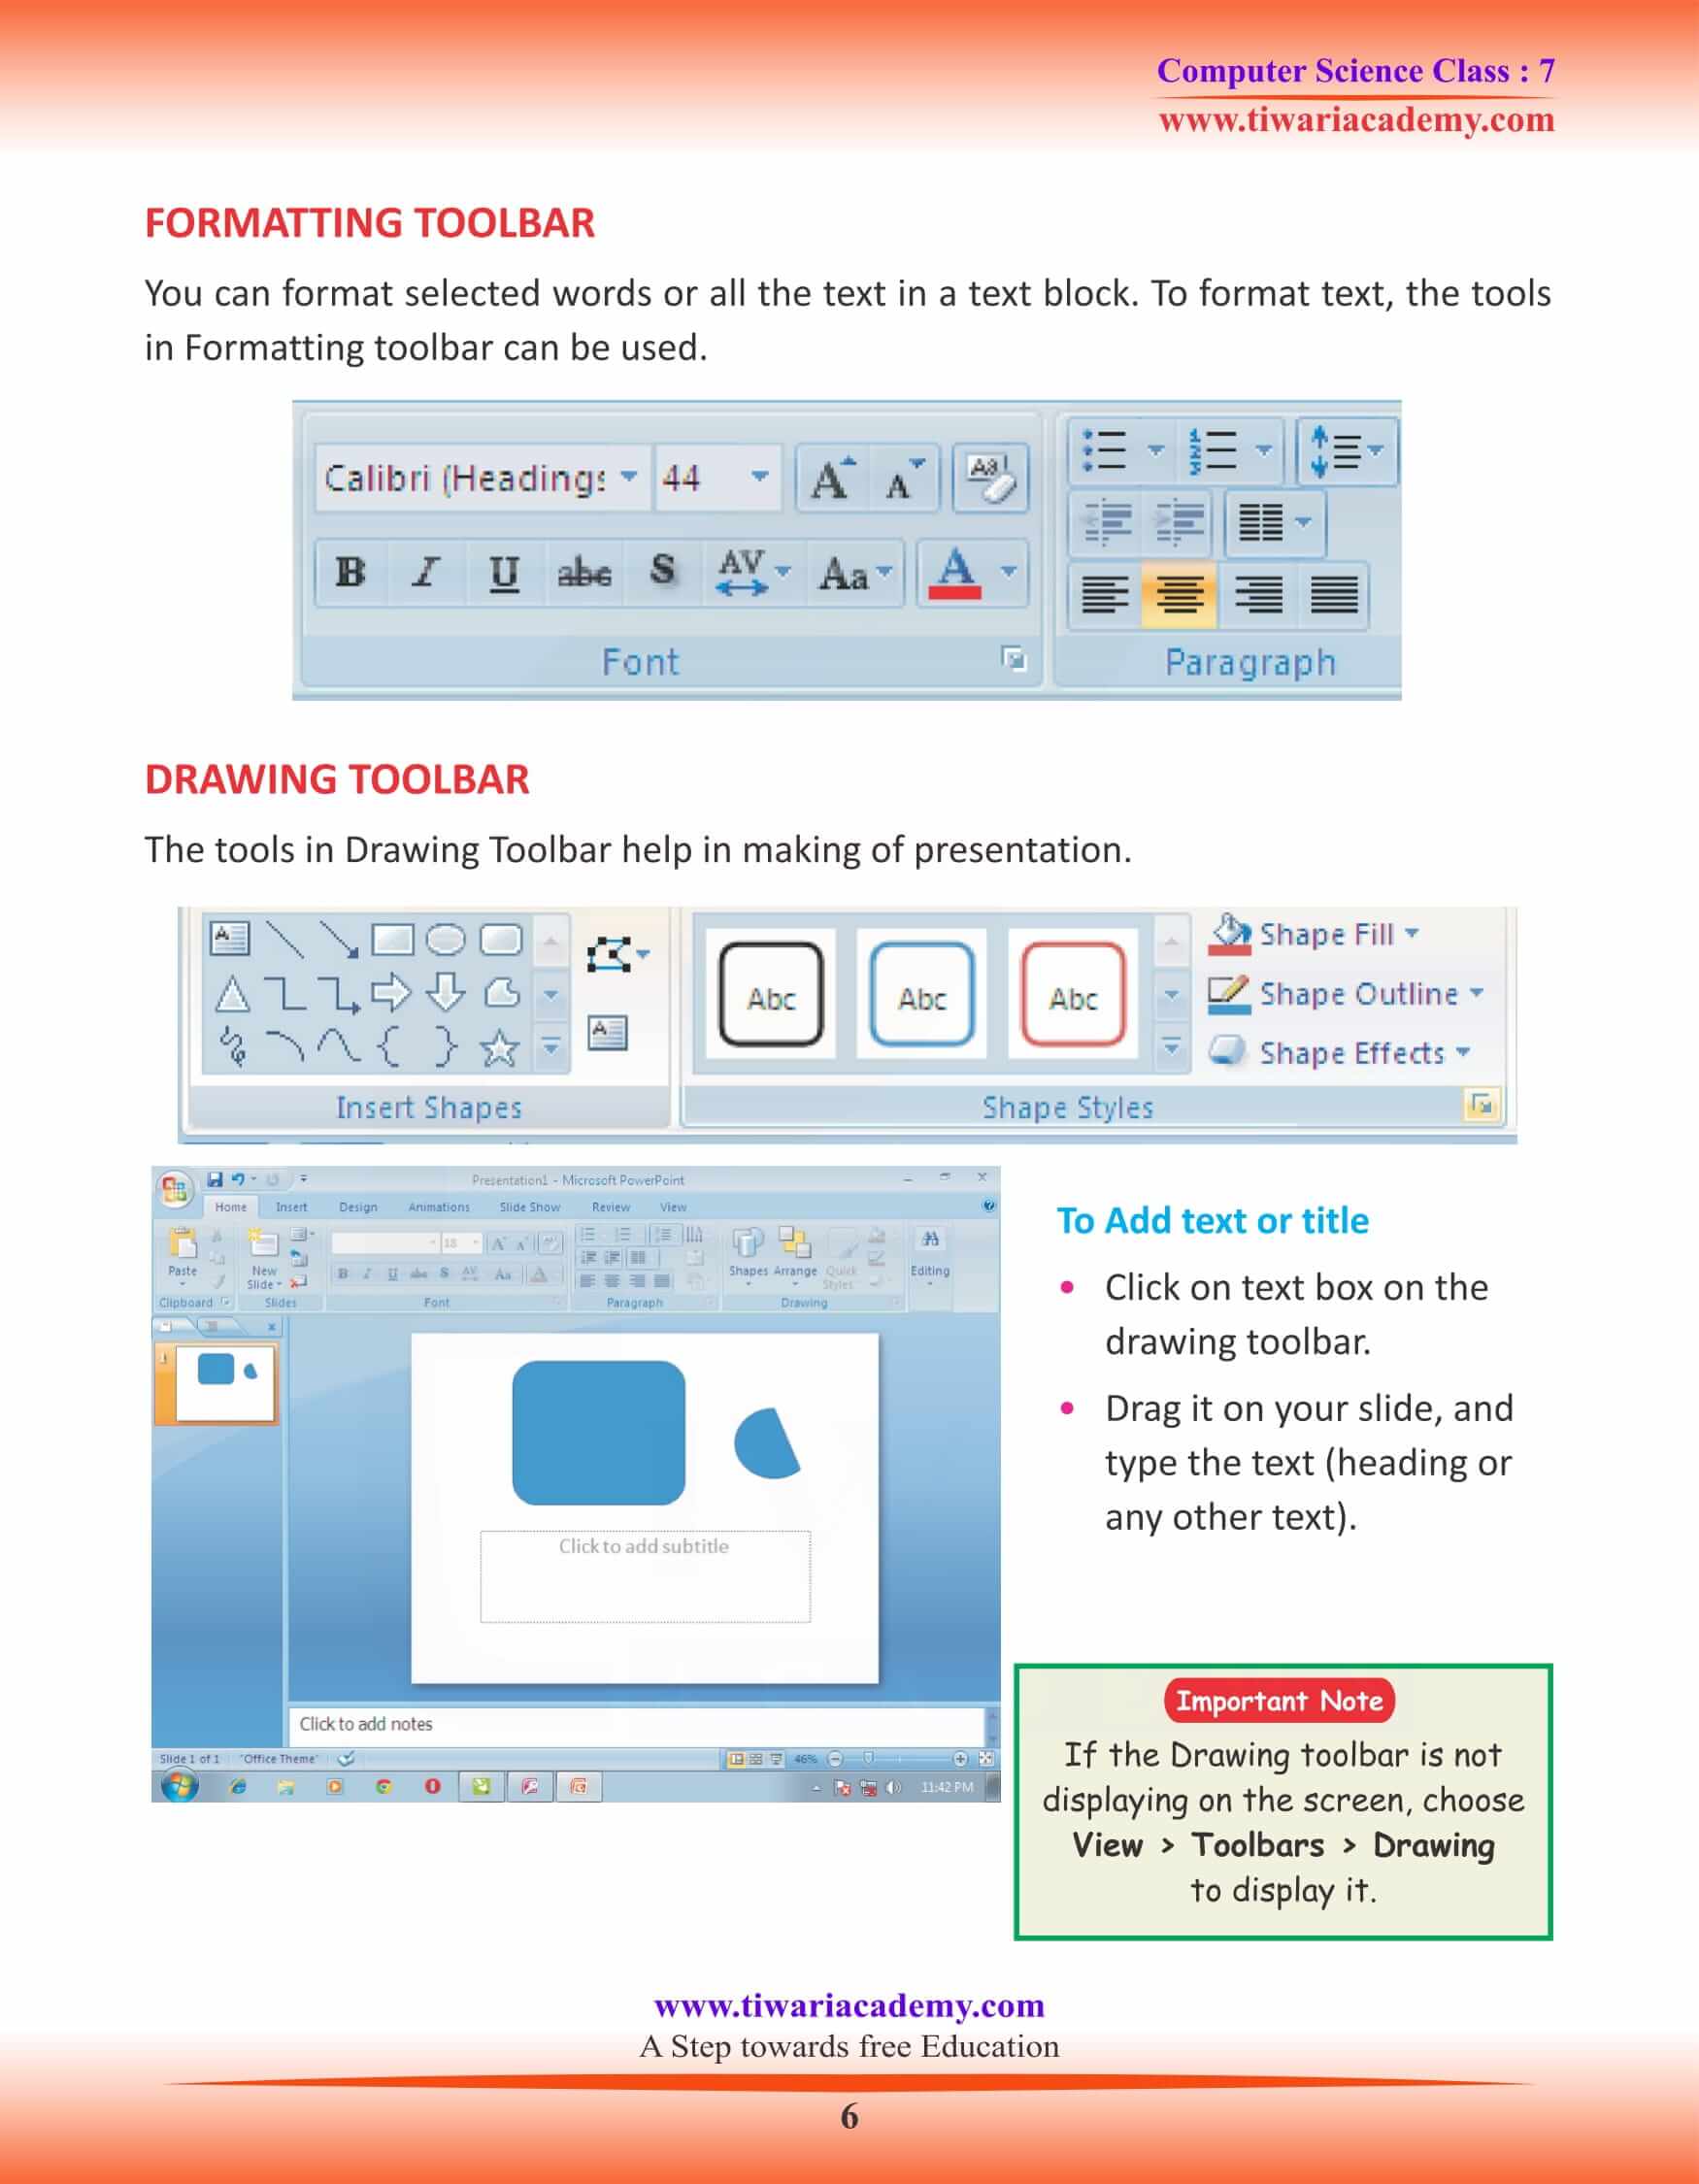
You can format selected words or all the text in a text block. To format text, the tools in Formatting toolbar can be used.
INSERTING A NEW SLIDE
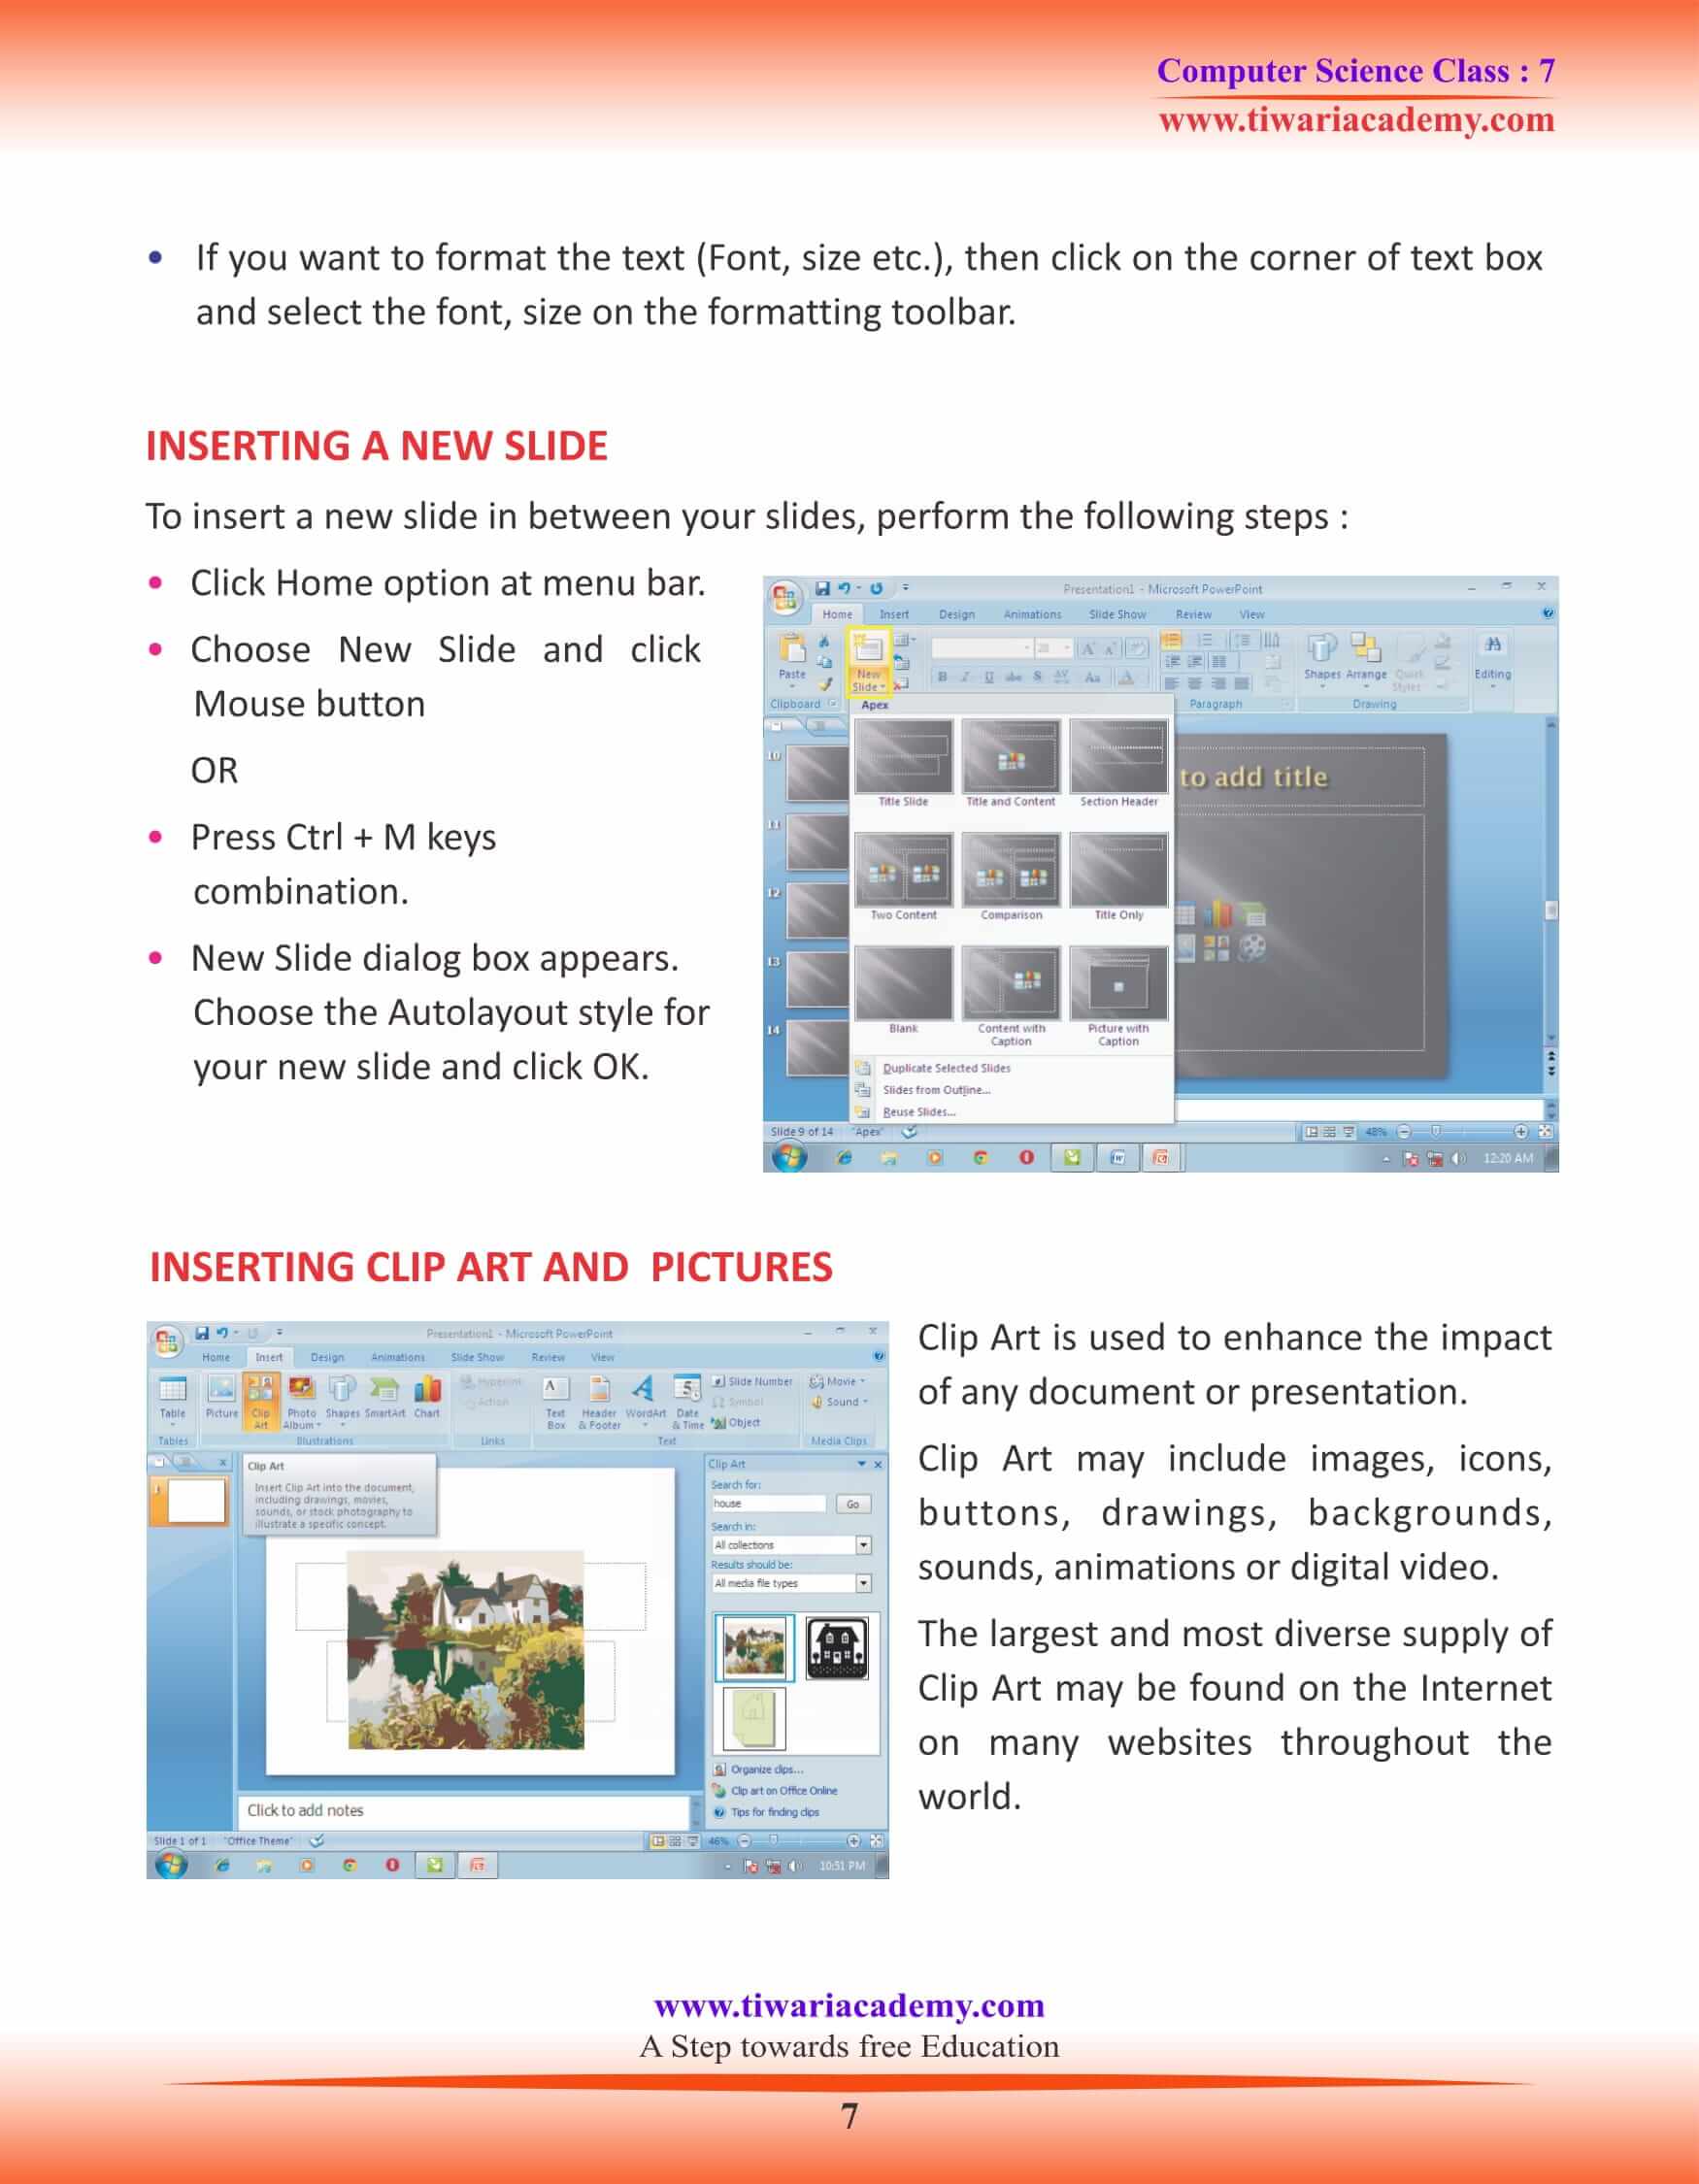
To insert a new slide in between your slides, perform the following steps :
• Click Home option at menu bar.
• Choose New Slide and click Mouse button
OR
• Press Ctrl + M keys combination.
• New Slide dialog box appears. Choose the Autolayout style for your new slide and click OK.
INSERTING CLIP ART AND PICTURES
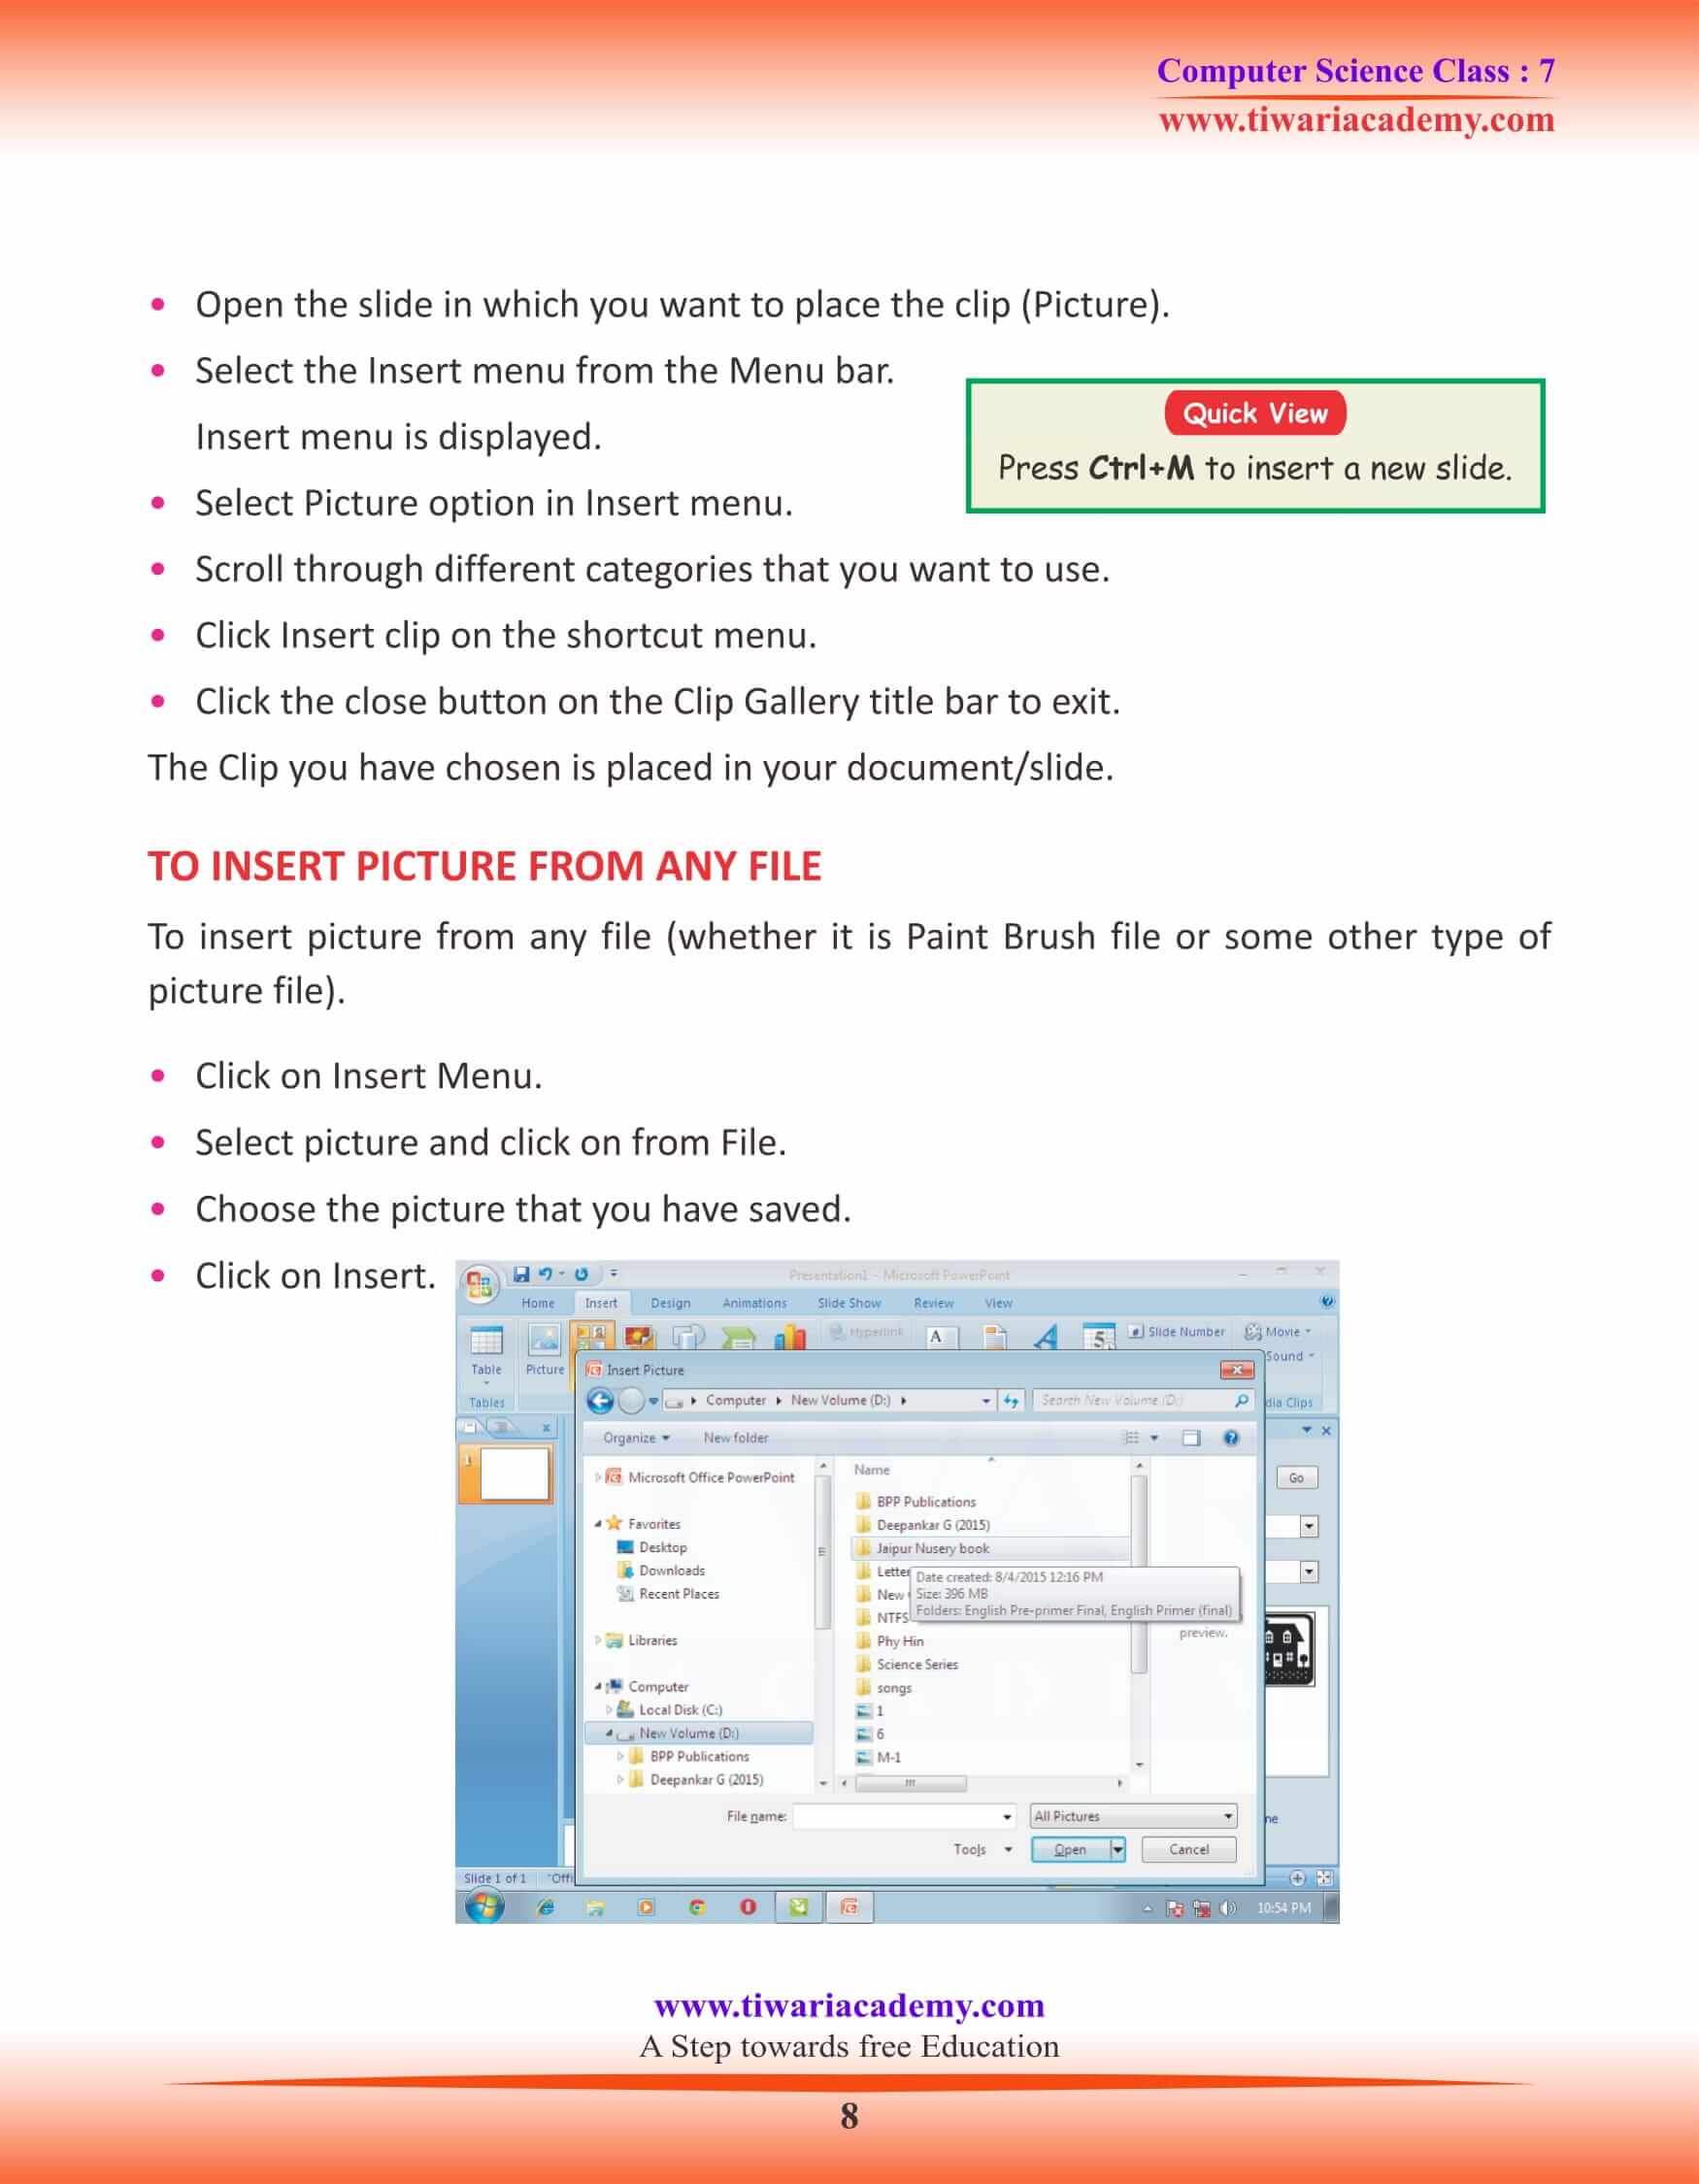
Clip Art is used to enhance the impact of any document or presentation. Clip Art may include images, icons, buttons, drawings, backgrounds, sounds, animations or digital video. The largest and most diverse supply of Clip Art may be found on the Internet on many websites throughout the world.
• Open the slide in which you want to place the clip (Picture).
• Select the Insert menu from the Menu bar.
Insert menu is displayed.
• Select Picture option in Insert menu.
• Scroll through different categories that you want to use.
• Click Insert clip on the shortcut menu.
• Click the close button on the Clip Gallery title bar to exit.
The Clip you have chosen is placed in your document/slide.
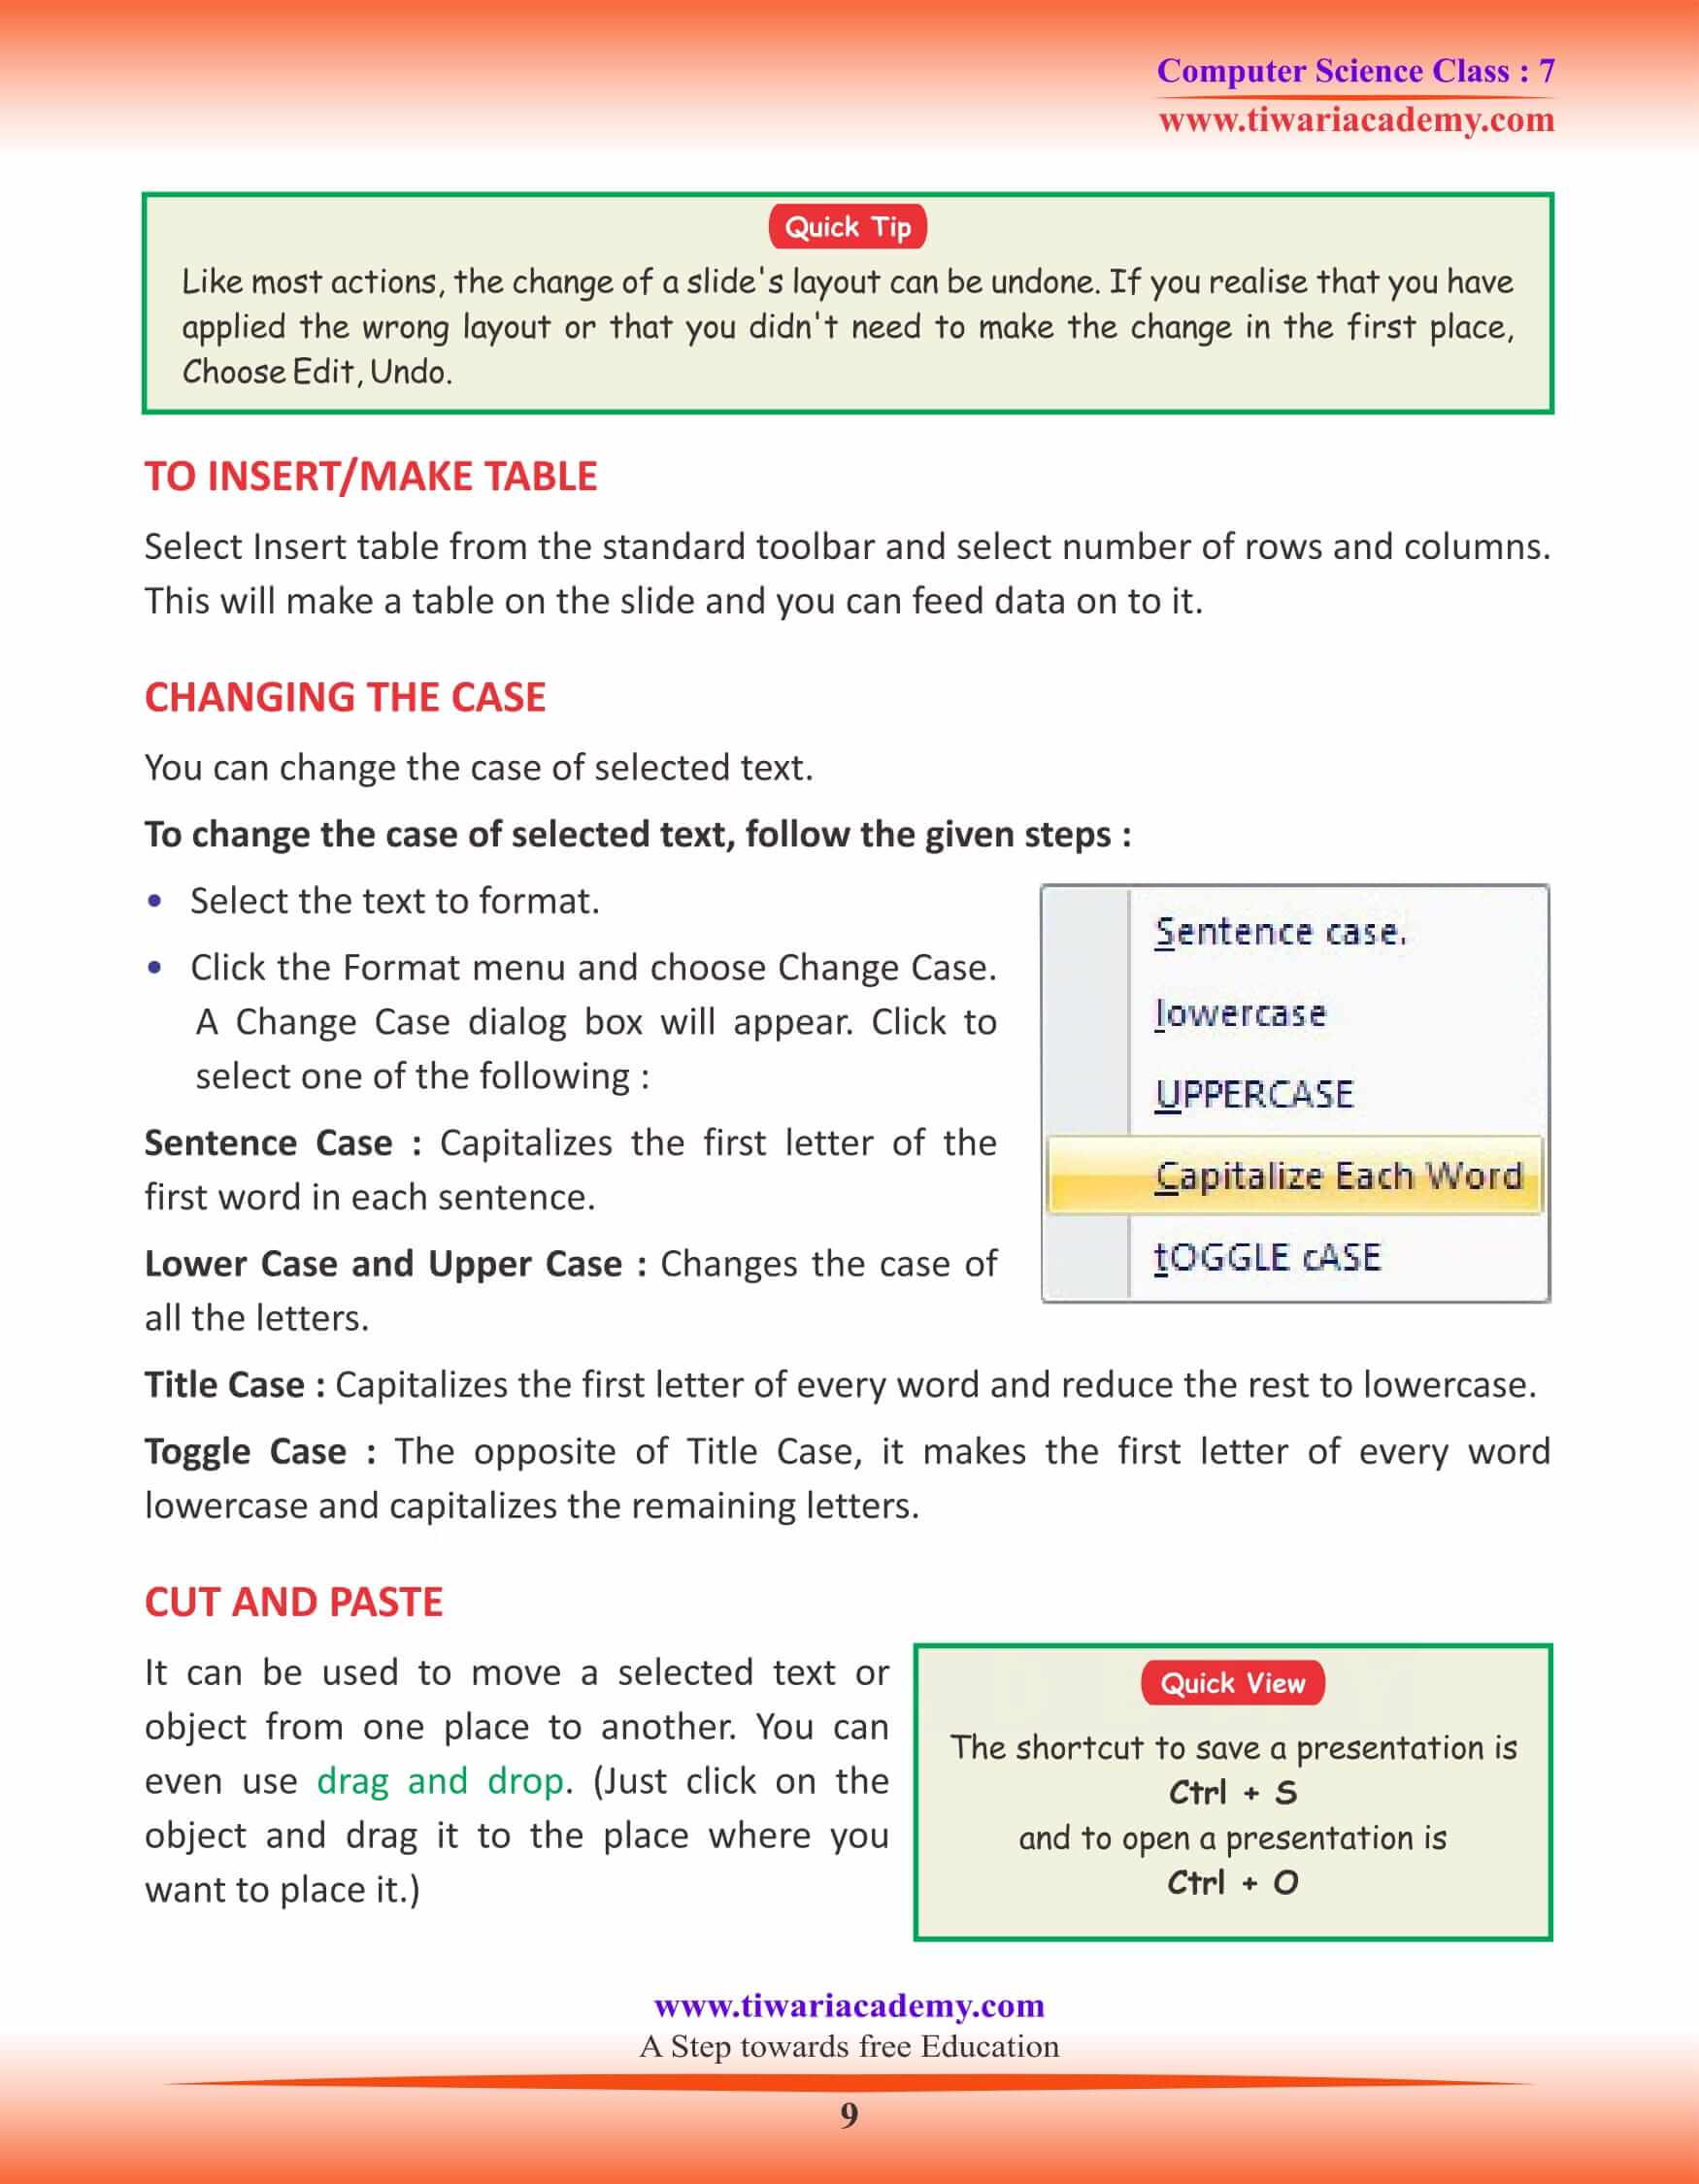
TO INSERT/MAKE TABLE
Select Insert table from the standard toolbar and select number of rows and columns.
This will make a table on the slide and you can feed data on to it.
CUT AND PASTE
It can be used to move a selected text or object from one place to another. You can even use drag and drop. (Just click on the object and drag it to the place where you want to place it.)
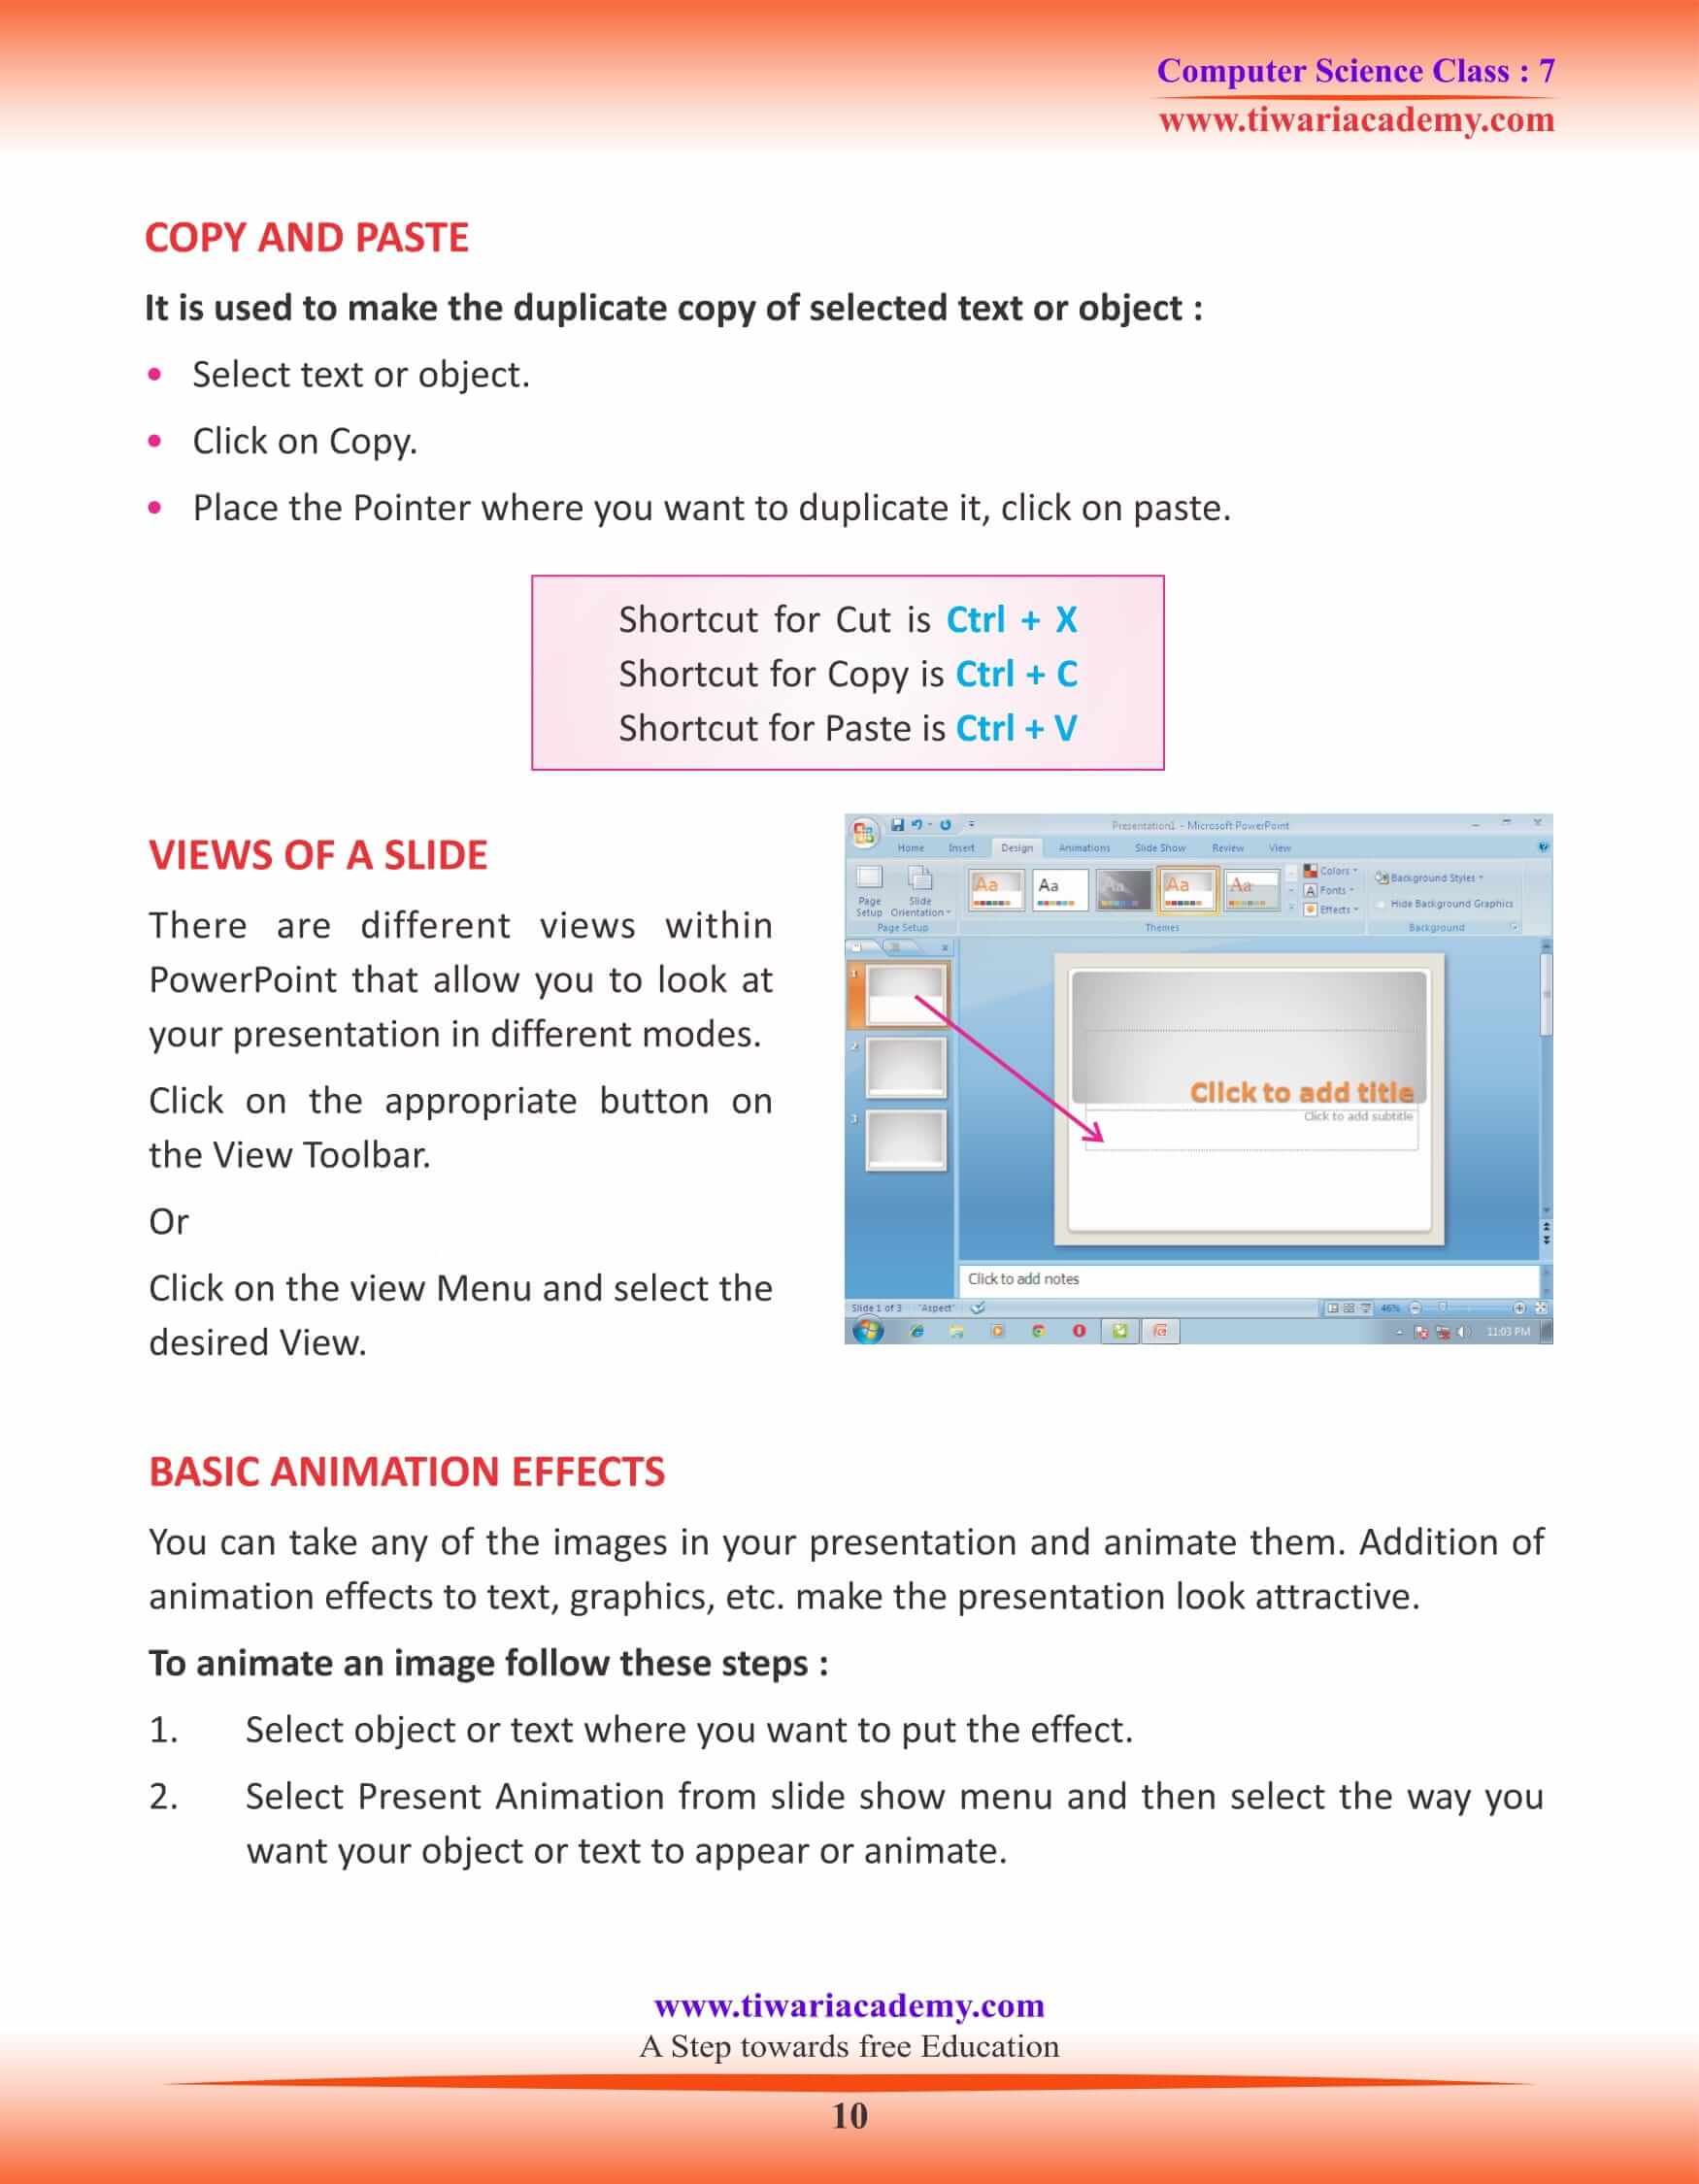
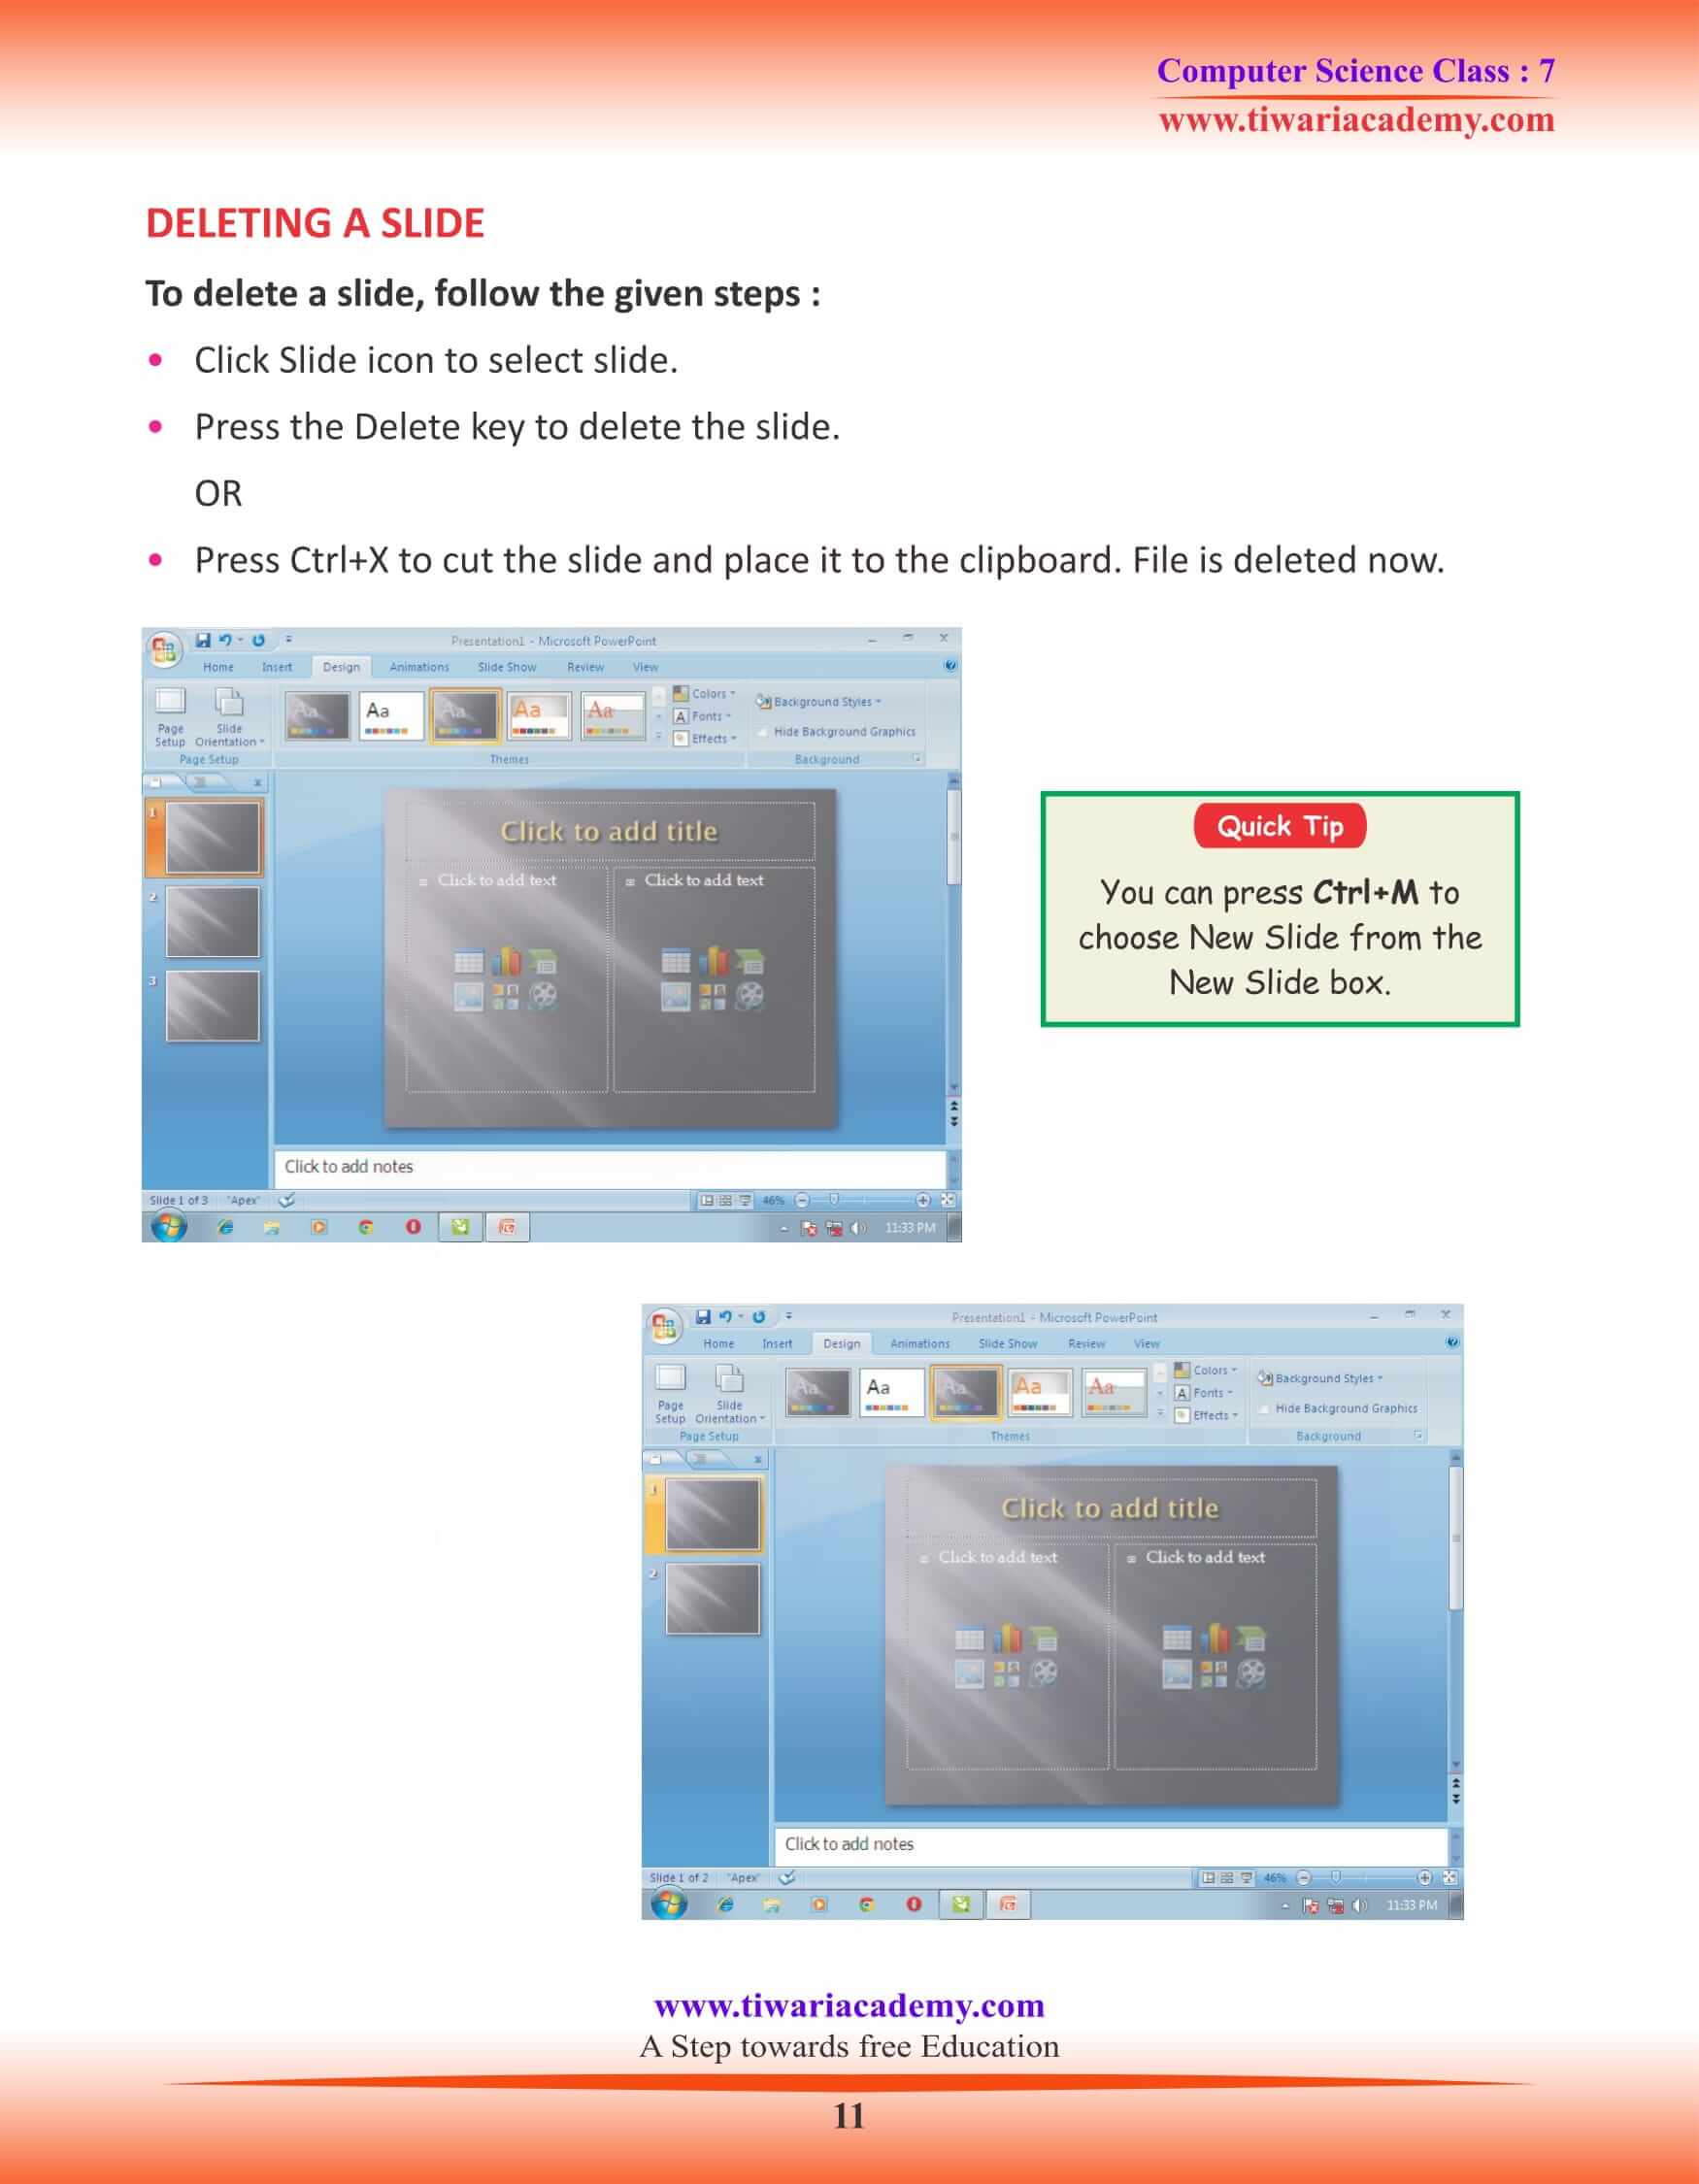
VIEWS OF A SLIDE
There are different views within PowerPoint that allow you to look at your presentation in different modes. Click on the appropriate button on the View Toolbar. Or Click on the view Menu and select the desired View.
COPY AND PASTE
It is used to make the duplicate copy of selected text or object:
• Select text or object.
• Click on Copy.
• Place the Pointer where you want to duplicate it, click on paste.
BASIC ANIMATION EFFECTS
You can take any of the images in your presentation and animate them. Addition of animation effects to text, graphics, etc. make the presentation look attractive.
To animate an image follow these steps:
1. Select object or text where you want to put the effect.
2. Select Present Animation from slide show menu and then select the way you want your object or text to appear or animate.
