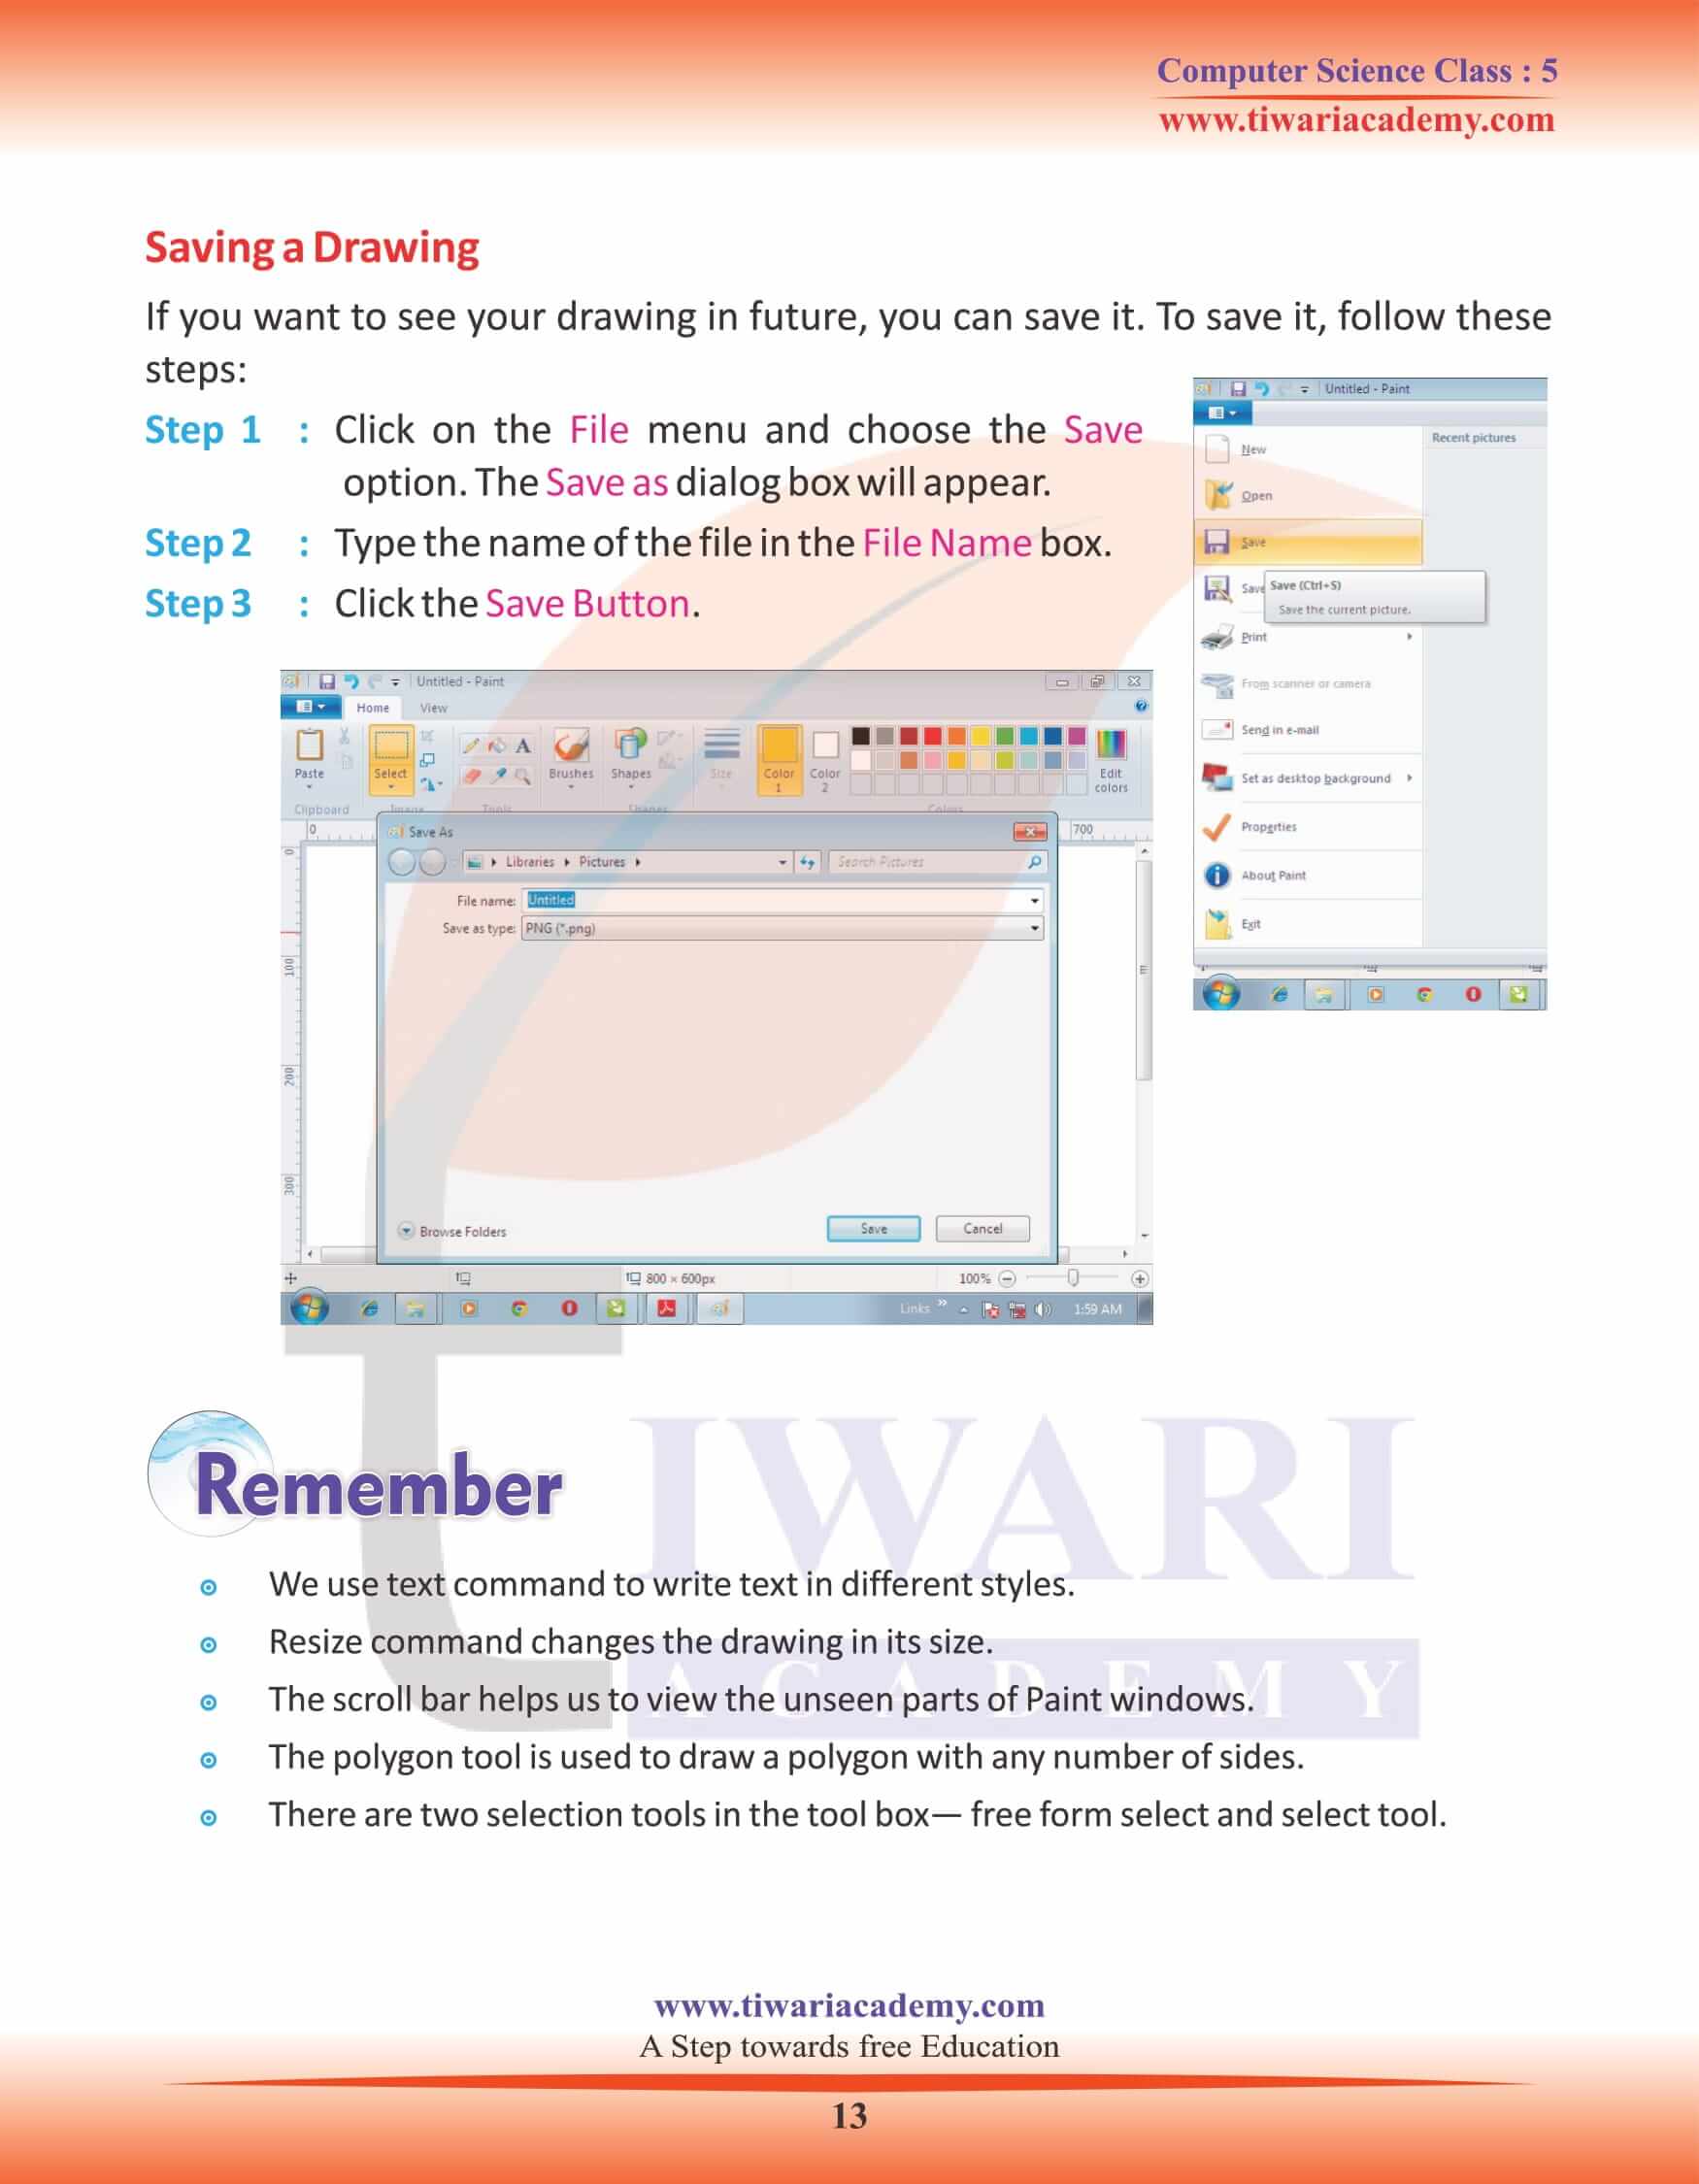
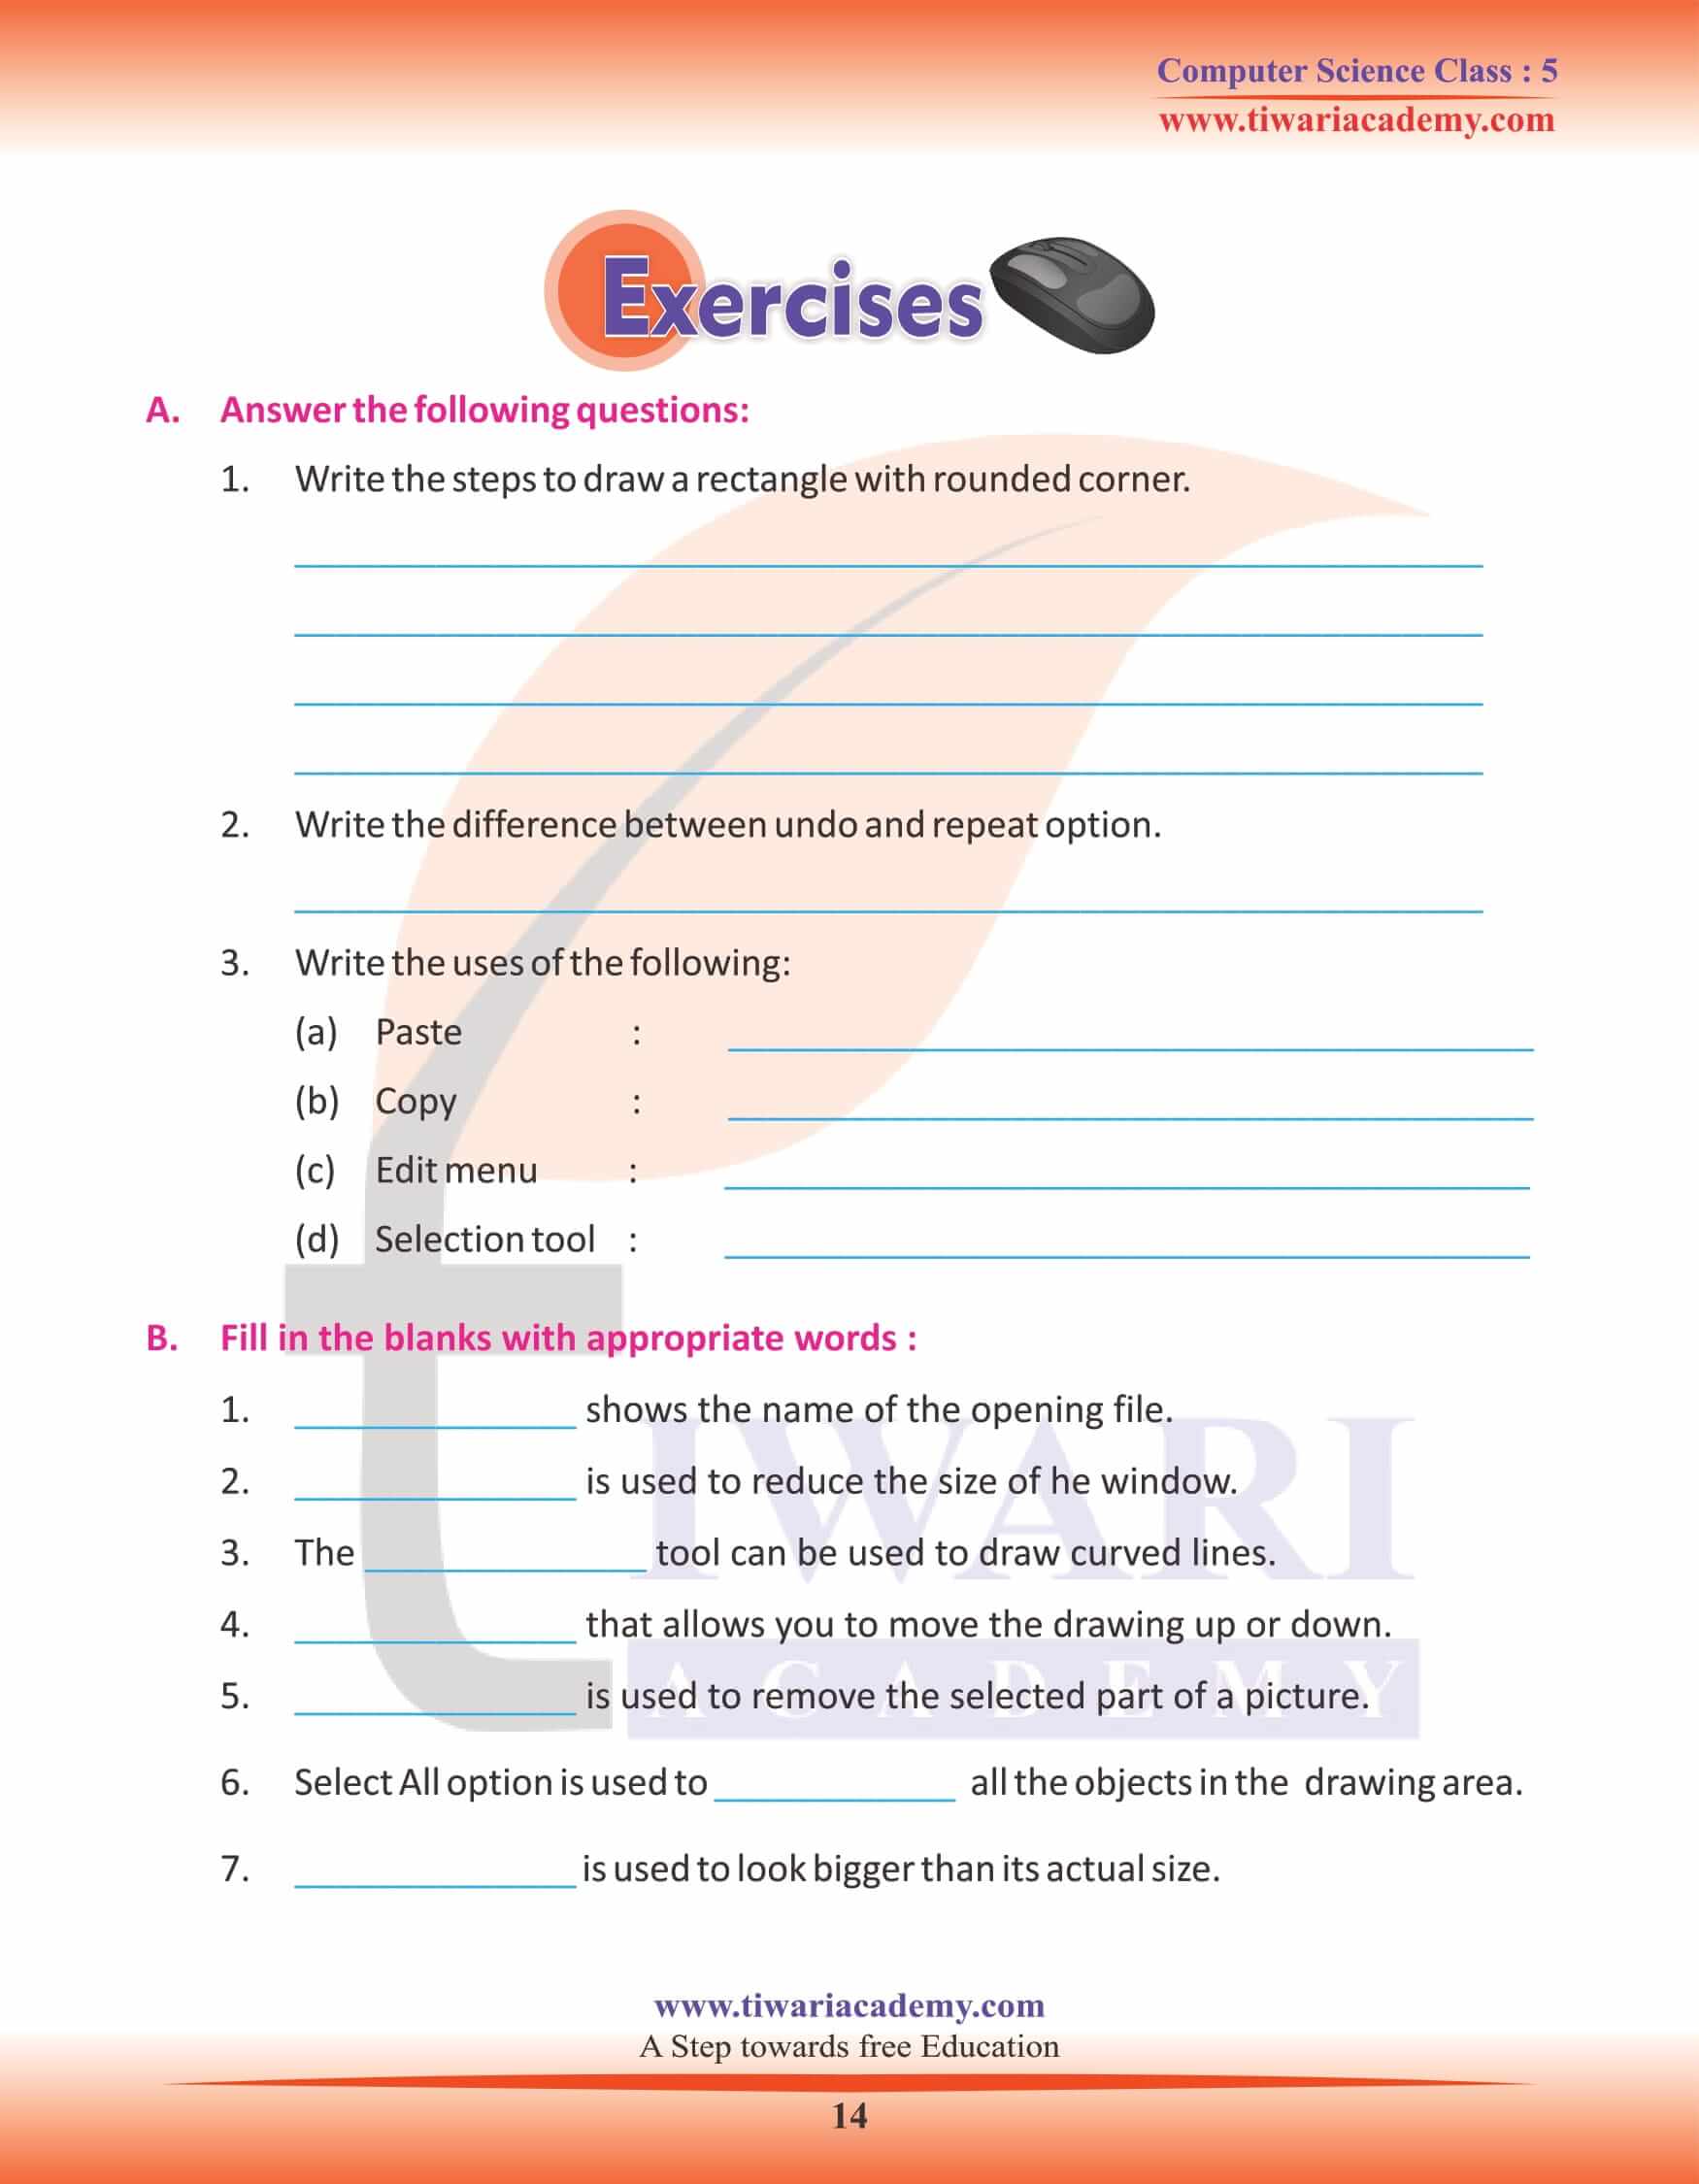
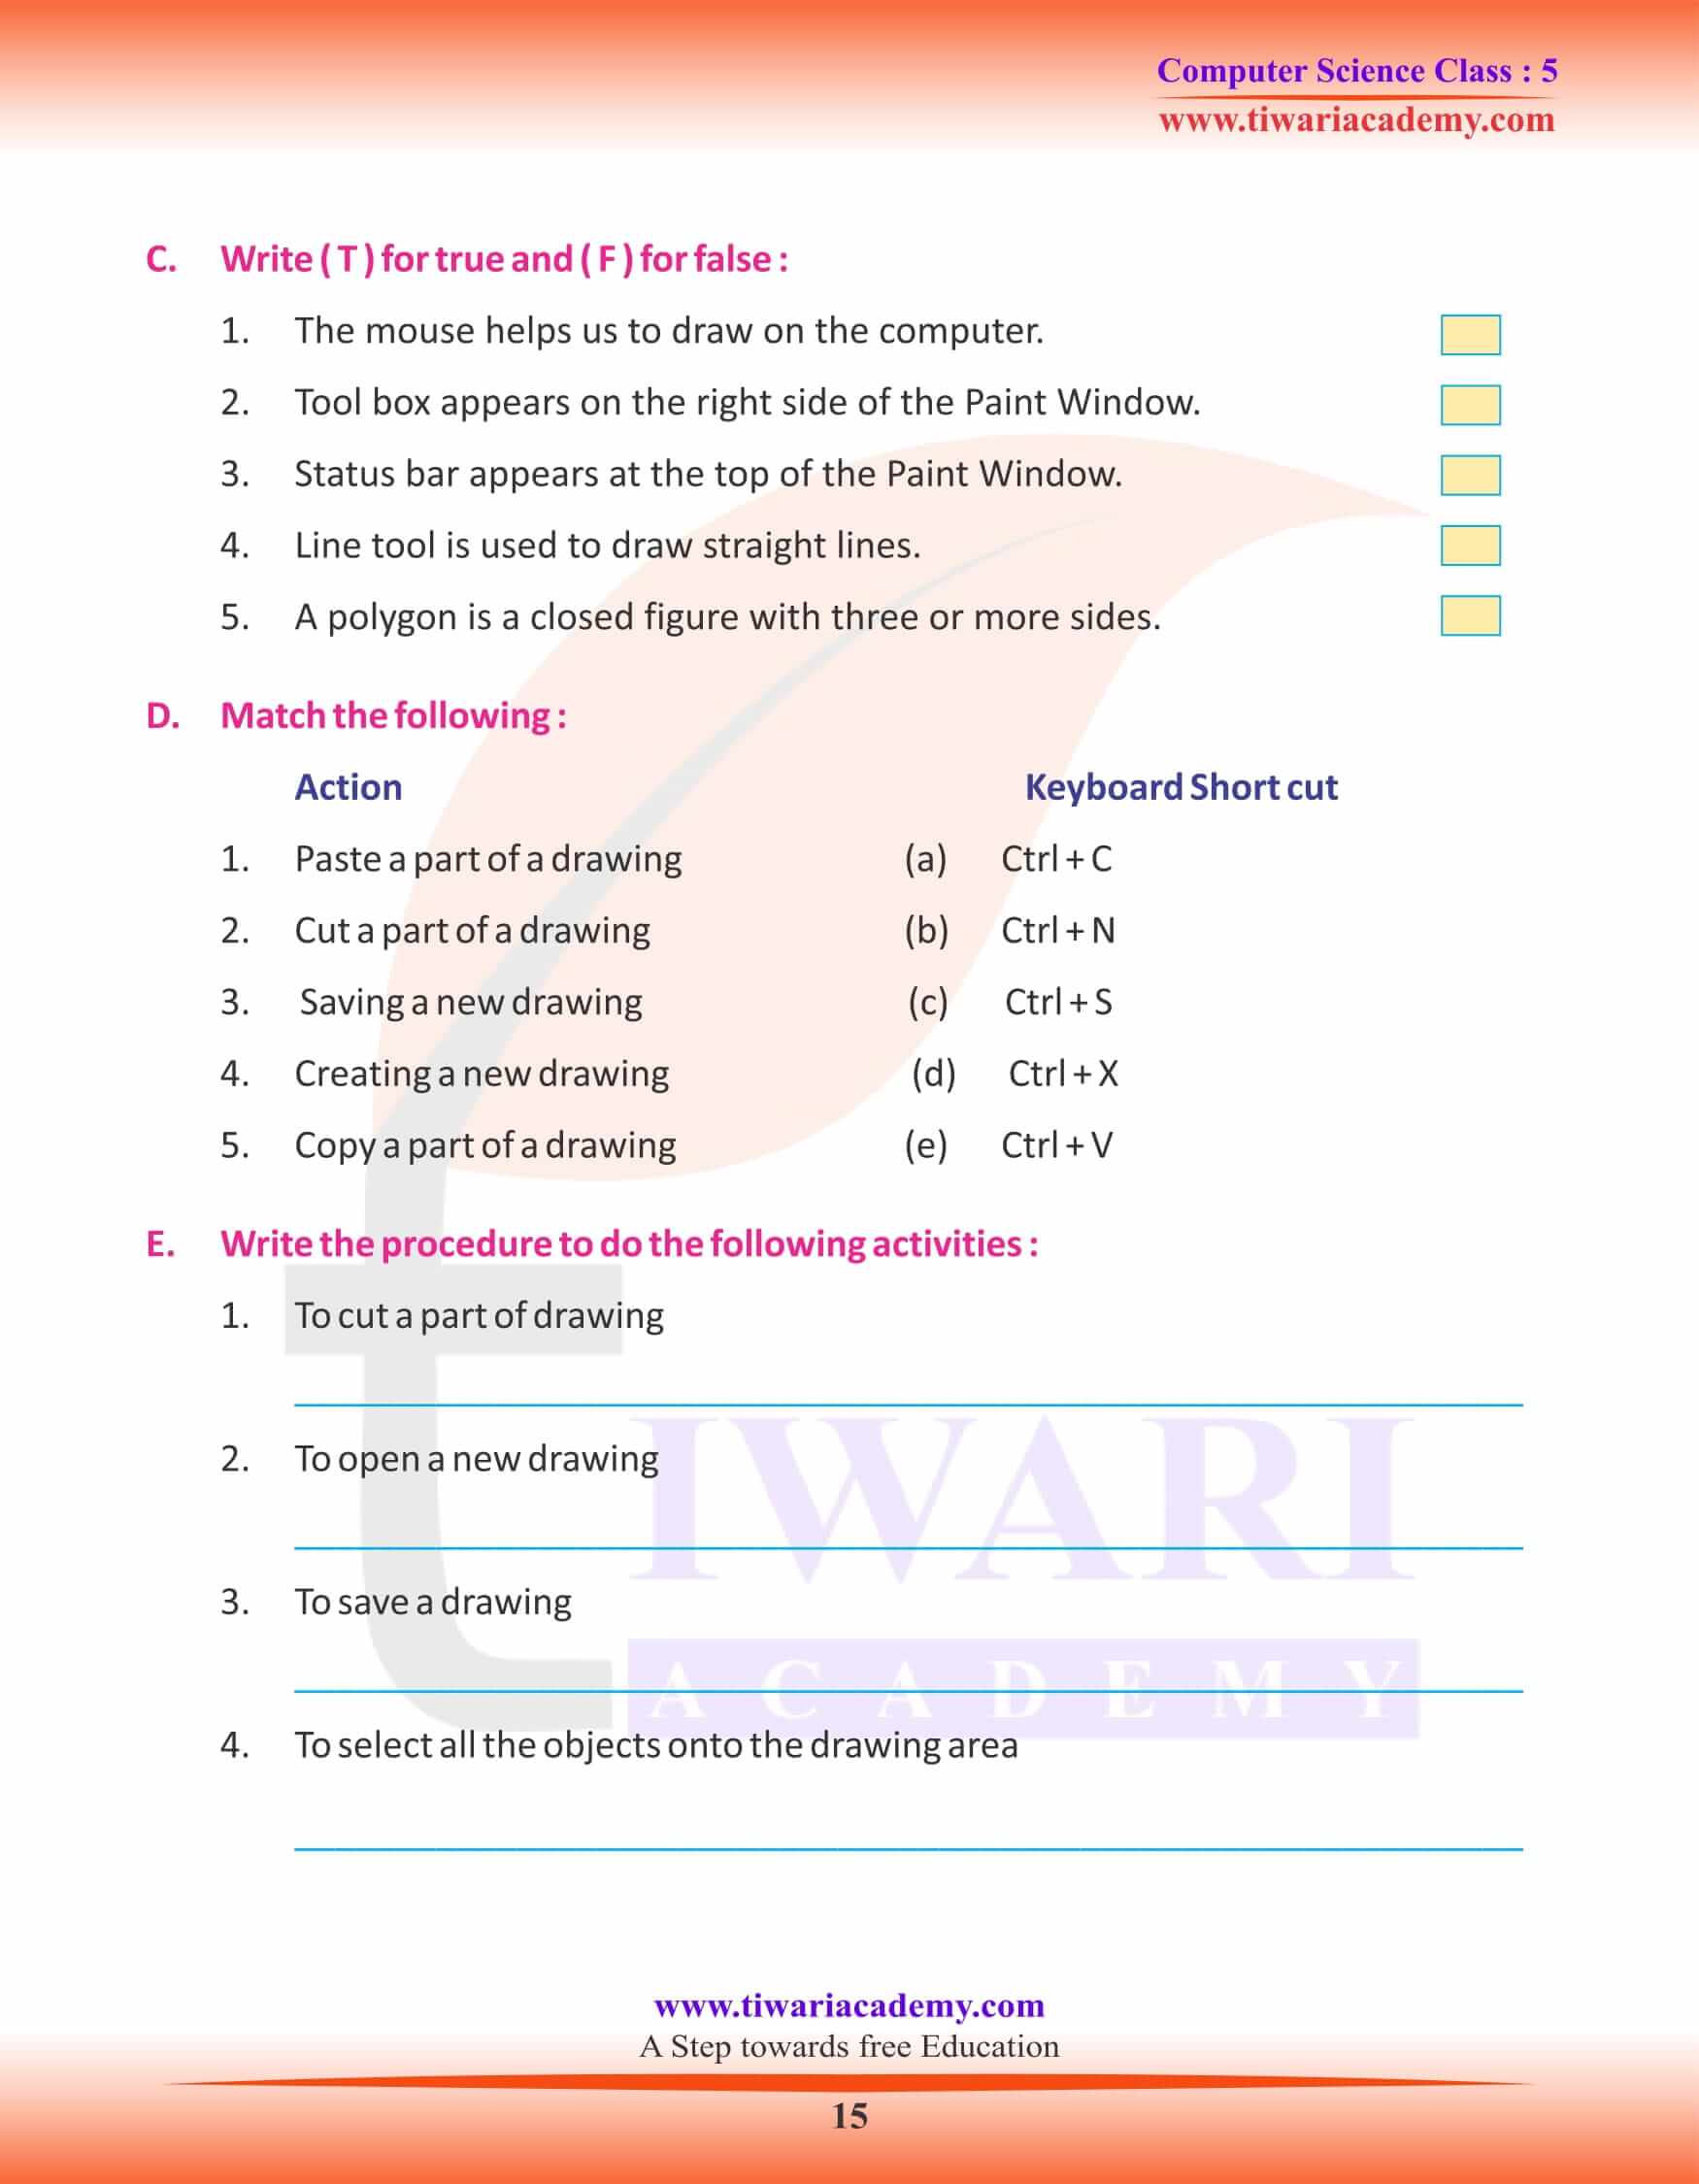
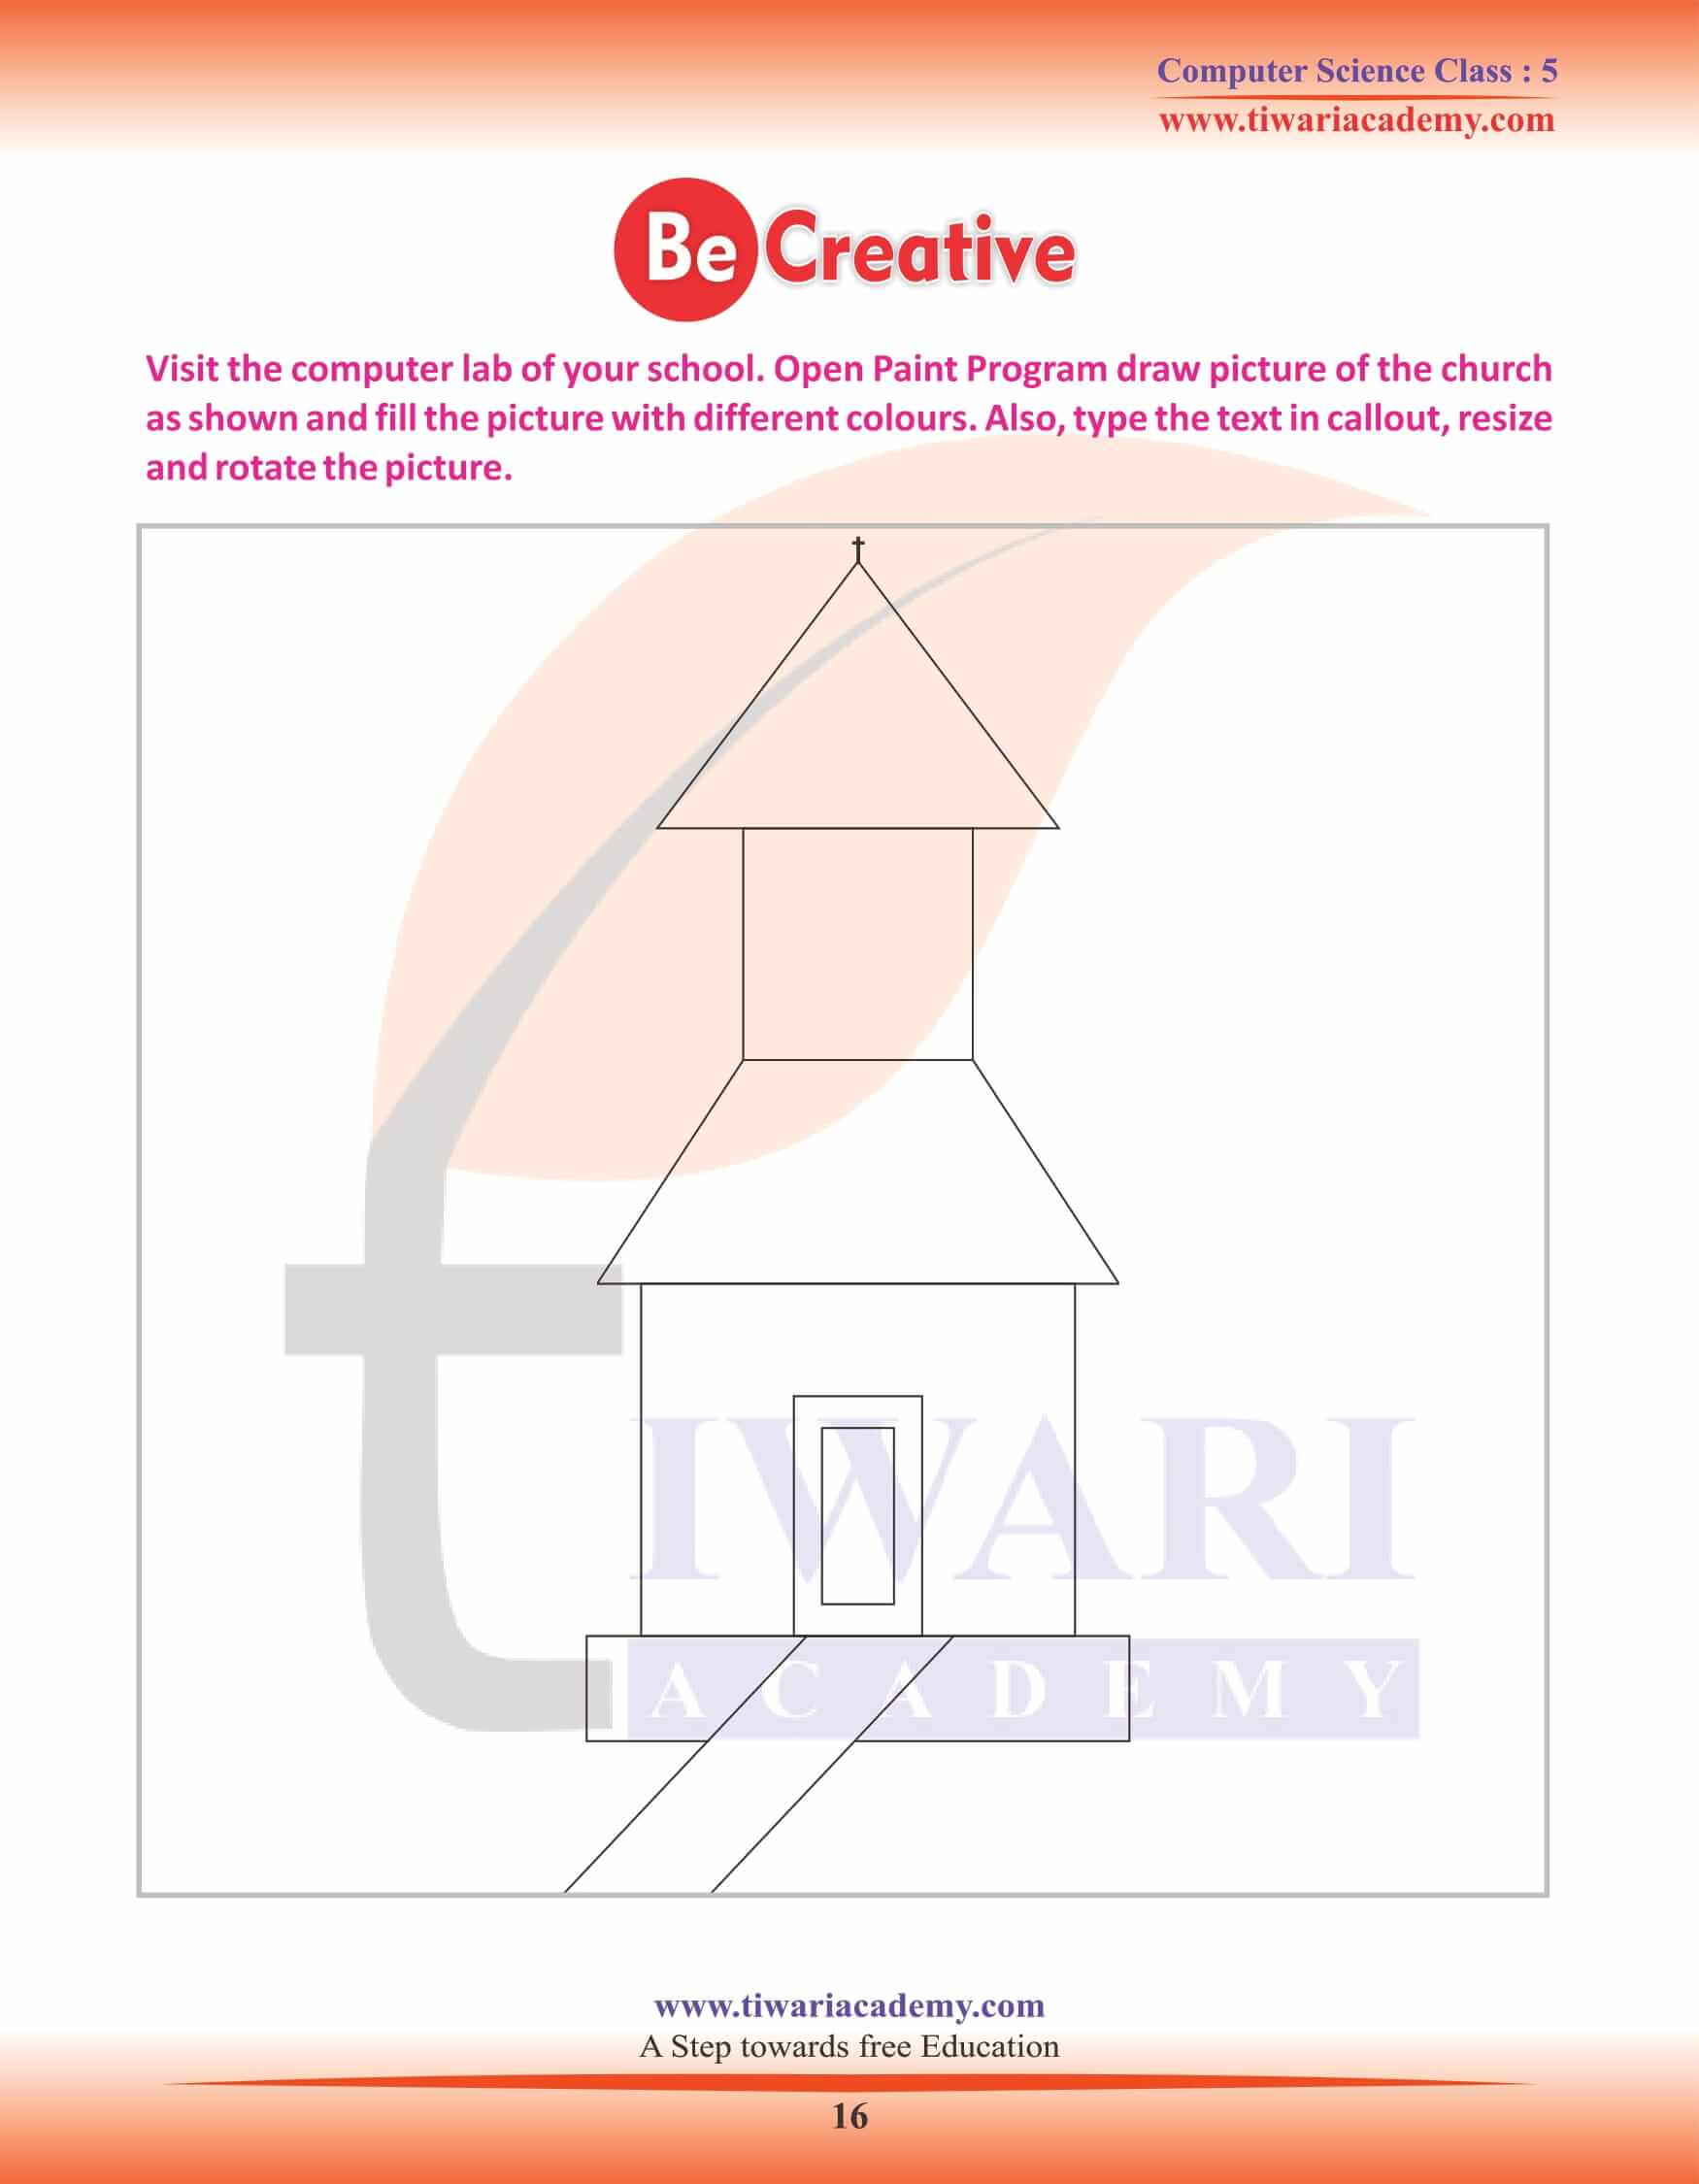
NCERT Solutions for Class 5 Computer Science Chapter 6 Paint updated for CBSE as well as other state board academic session 2025-26. In grade 5 Computer book, you will learn about the utilities of MS Paint program and learn it through activities.
Class 5 Computer Science Chapter 6 Paint Program
Microsoft Paint
Paint Program is used to draw pictures. It helps you to draw beautiful pictures and colour them using various tools. In previous classes, we have learnt about some tools of the toolbox. In this chapter, we shall learn more about paint program and recall it.
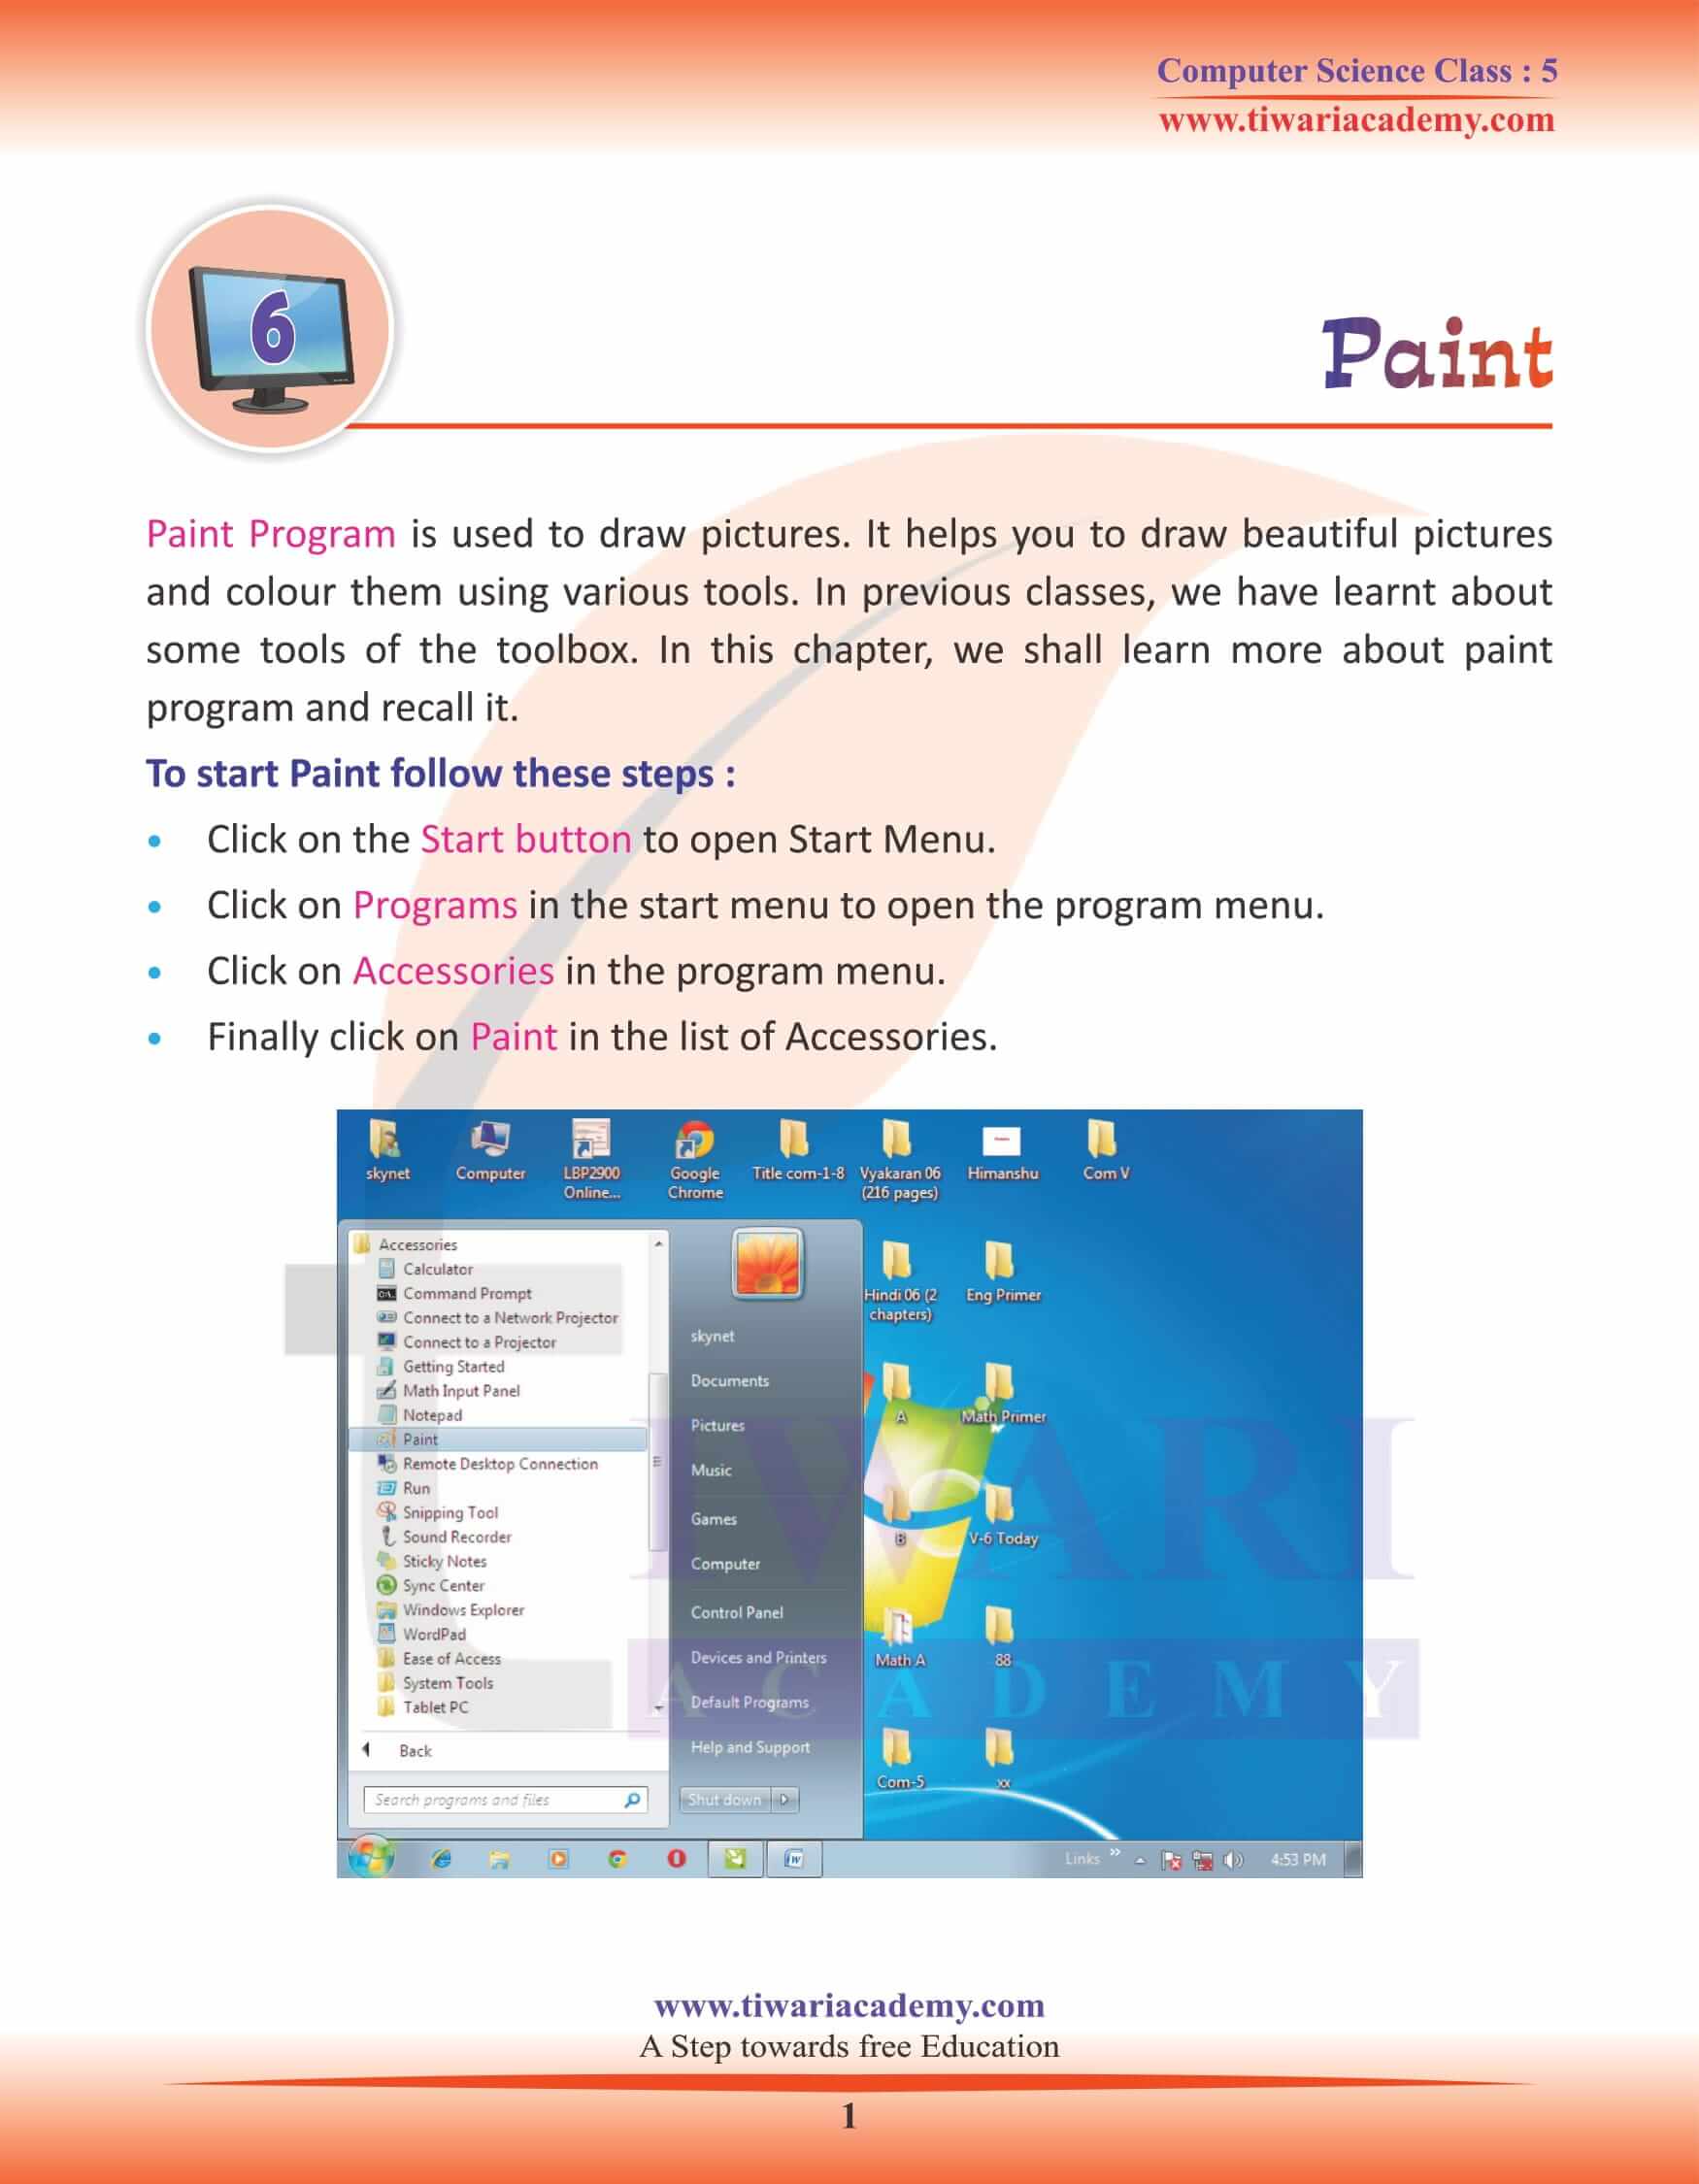
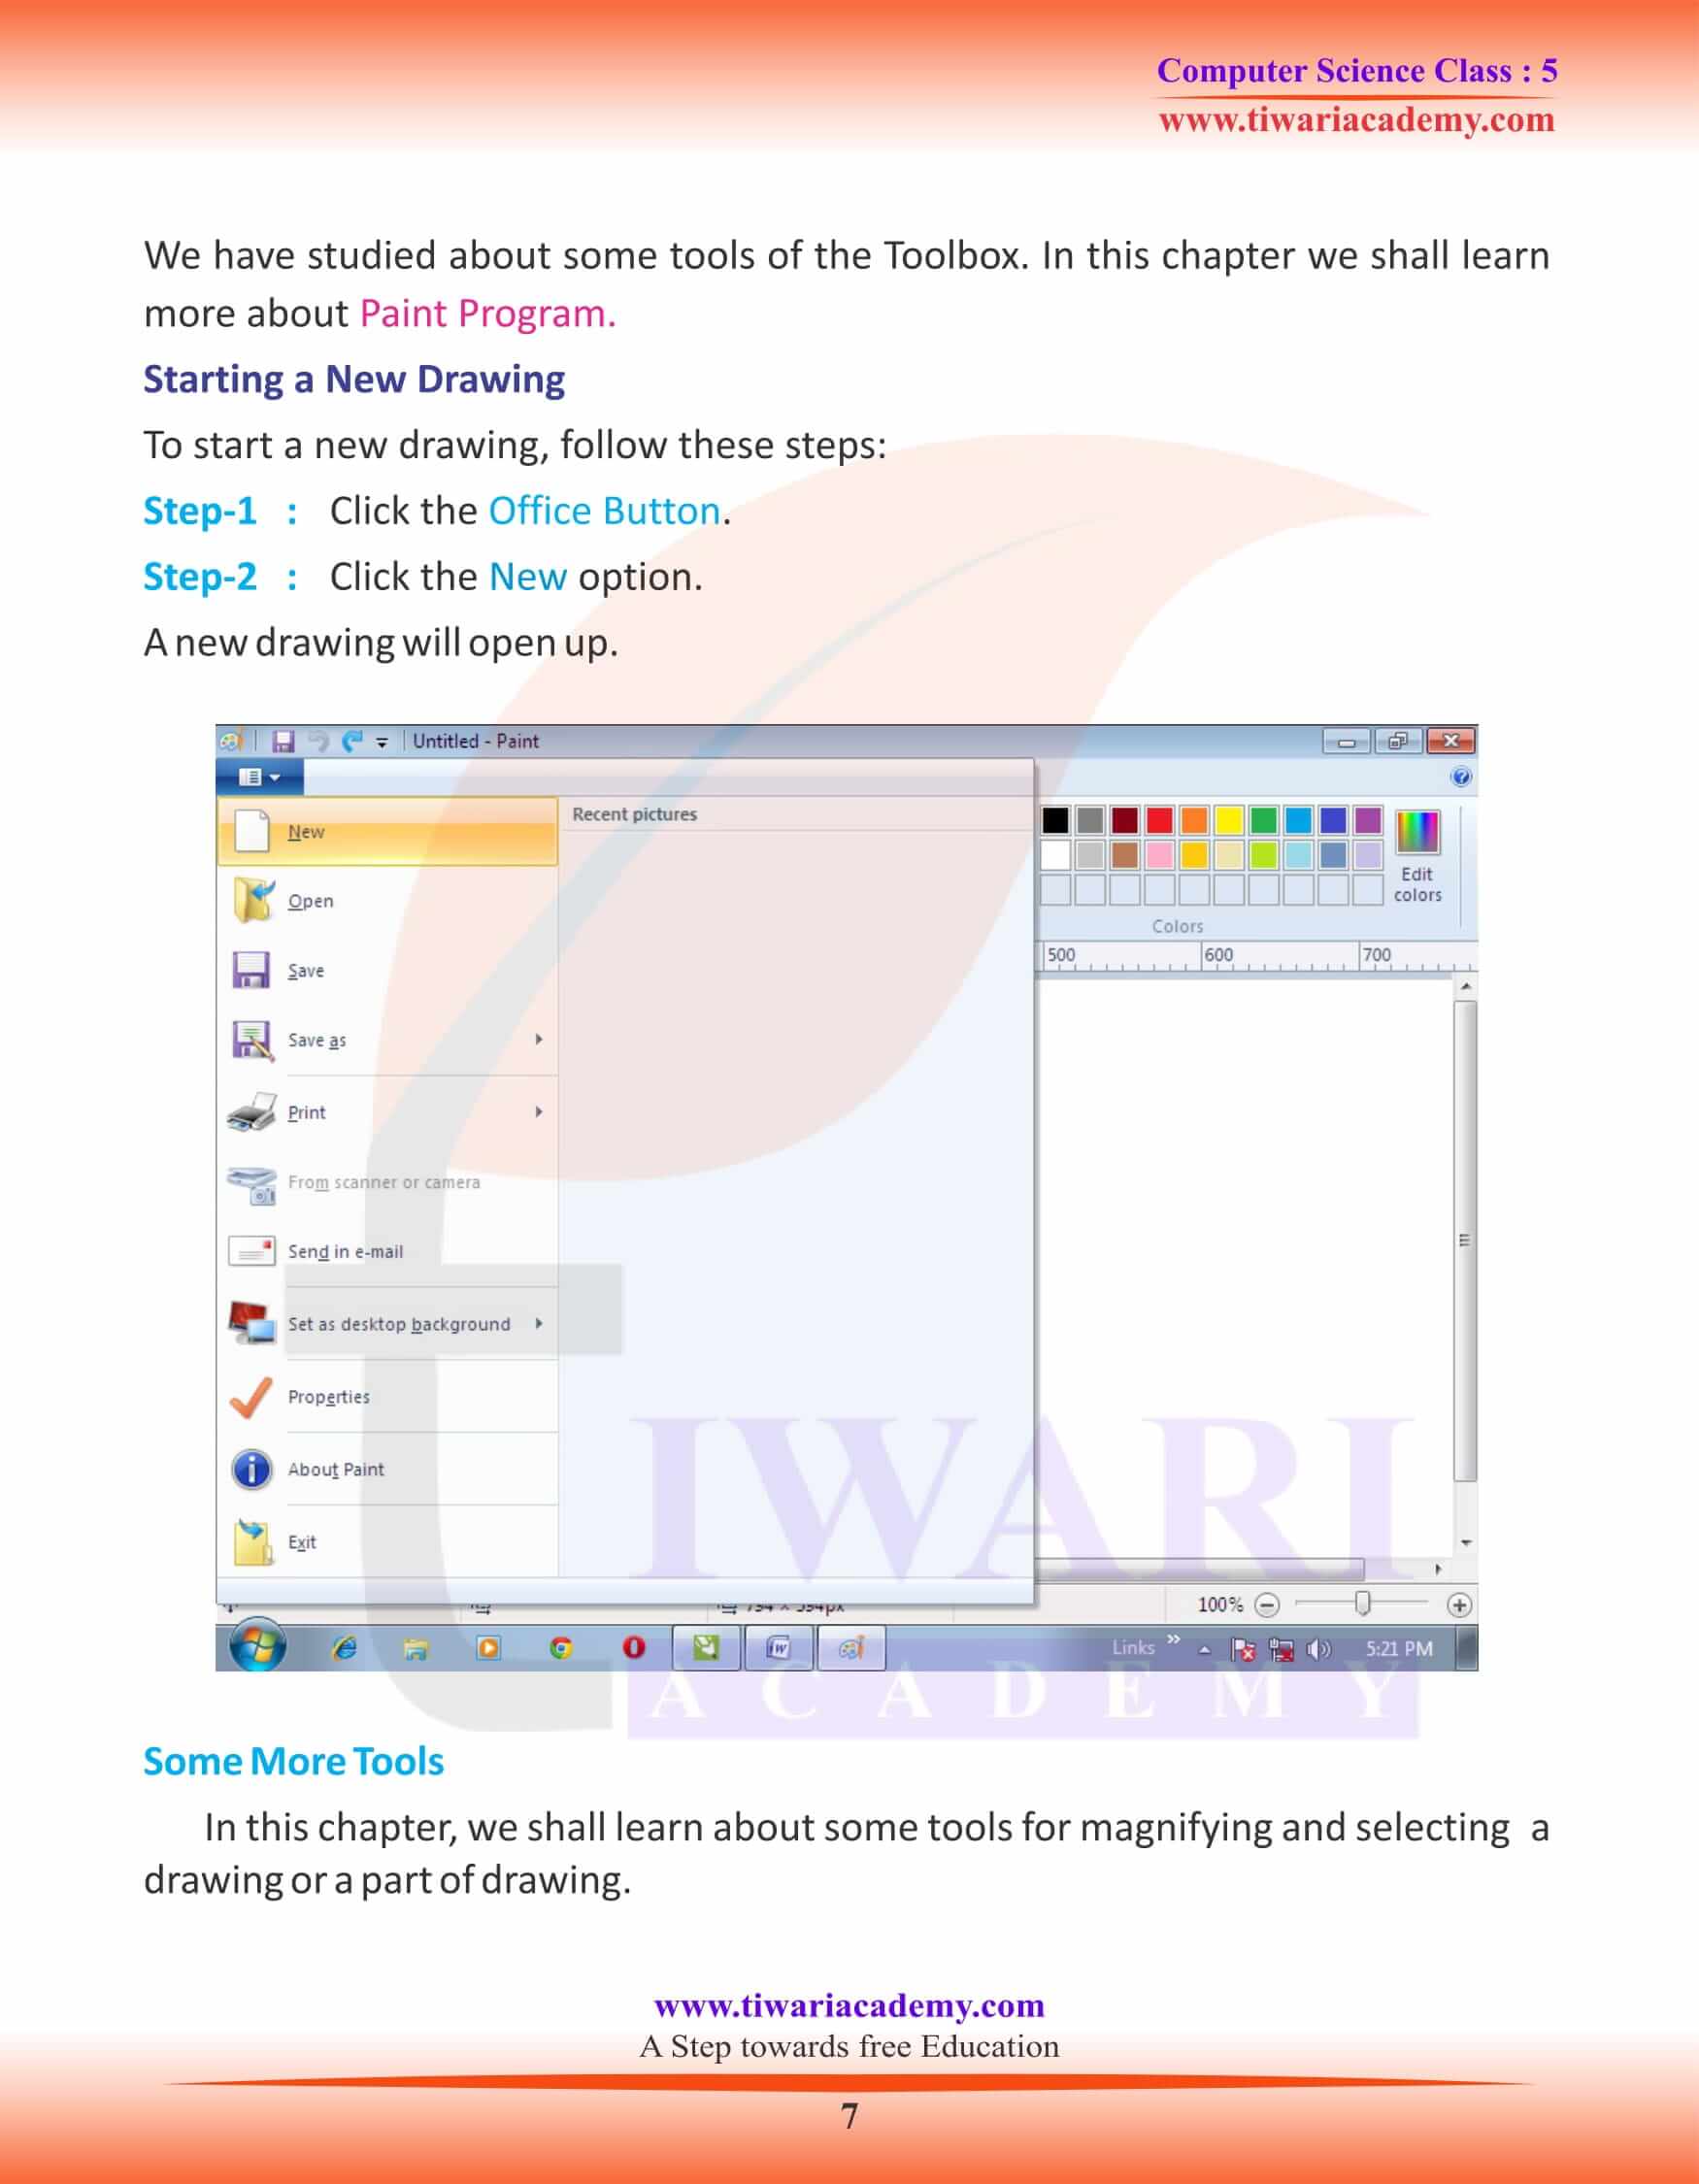
To start Paint follow these steps:
- Click on the Start button to open Start Menu.
- Click on Programs in the start menu to open the program menu.
- Click on Accessories in the program menu.
- Finally click on Paint in the list of Accessories.
Paint Windows
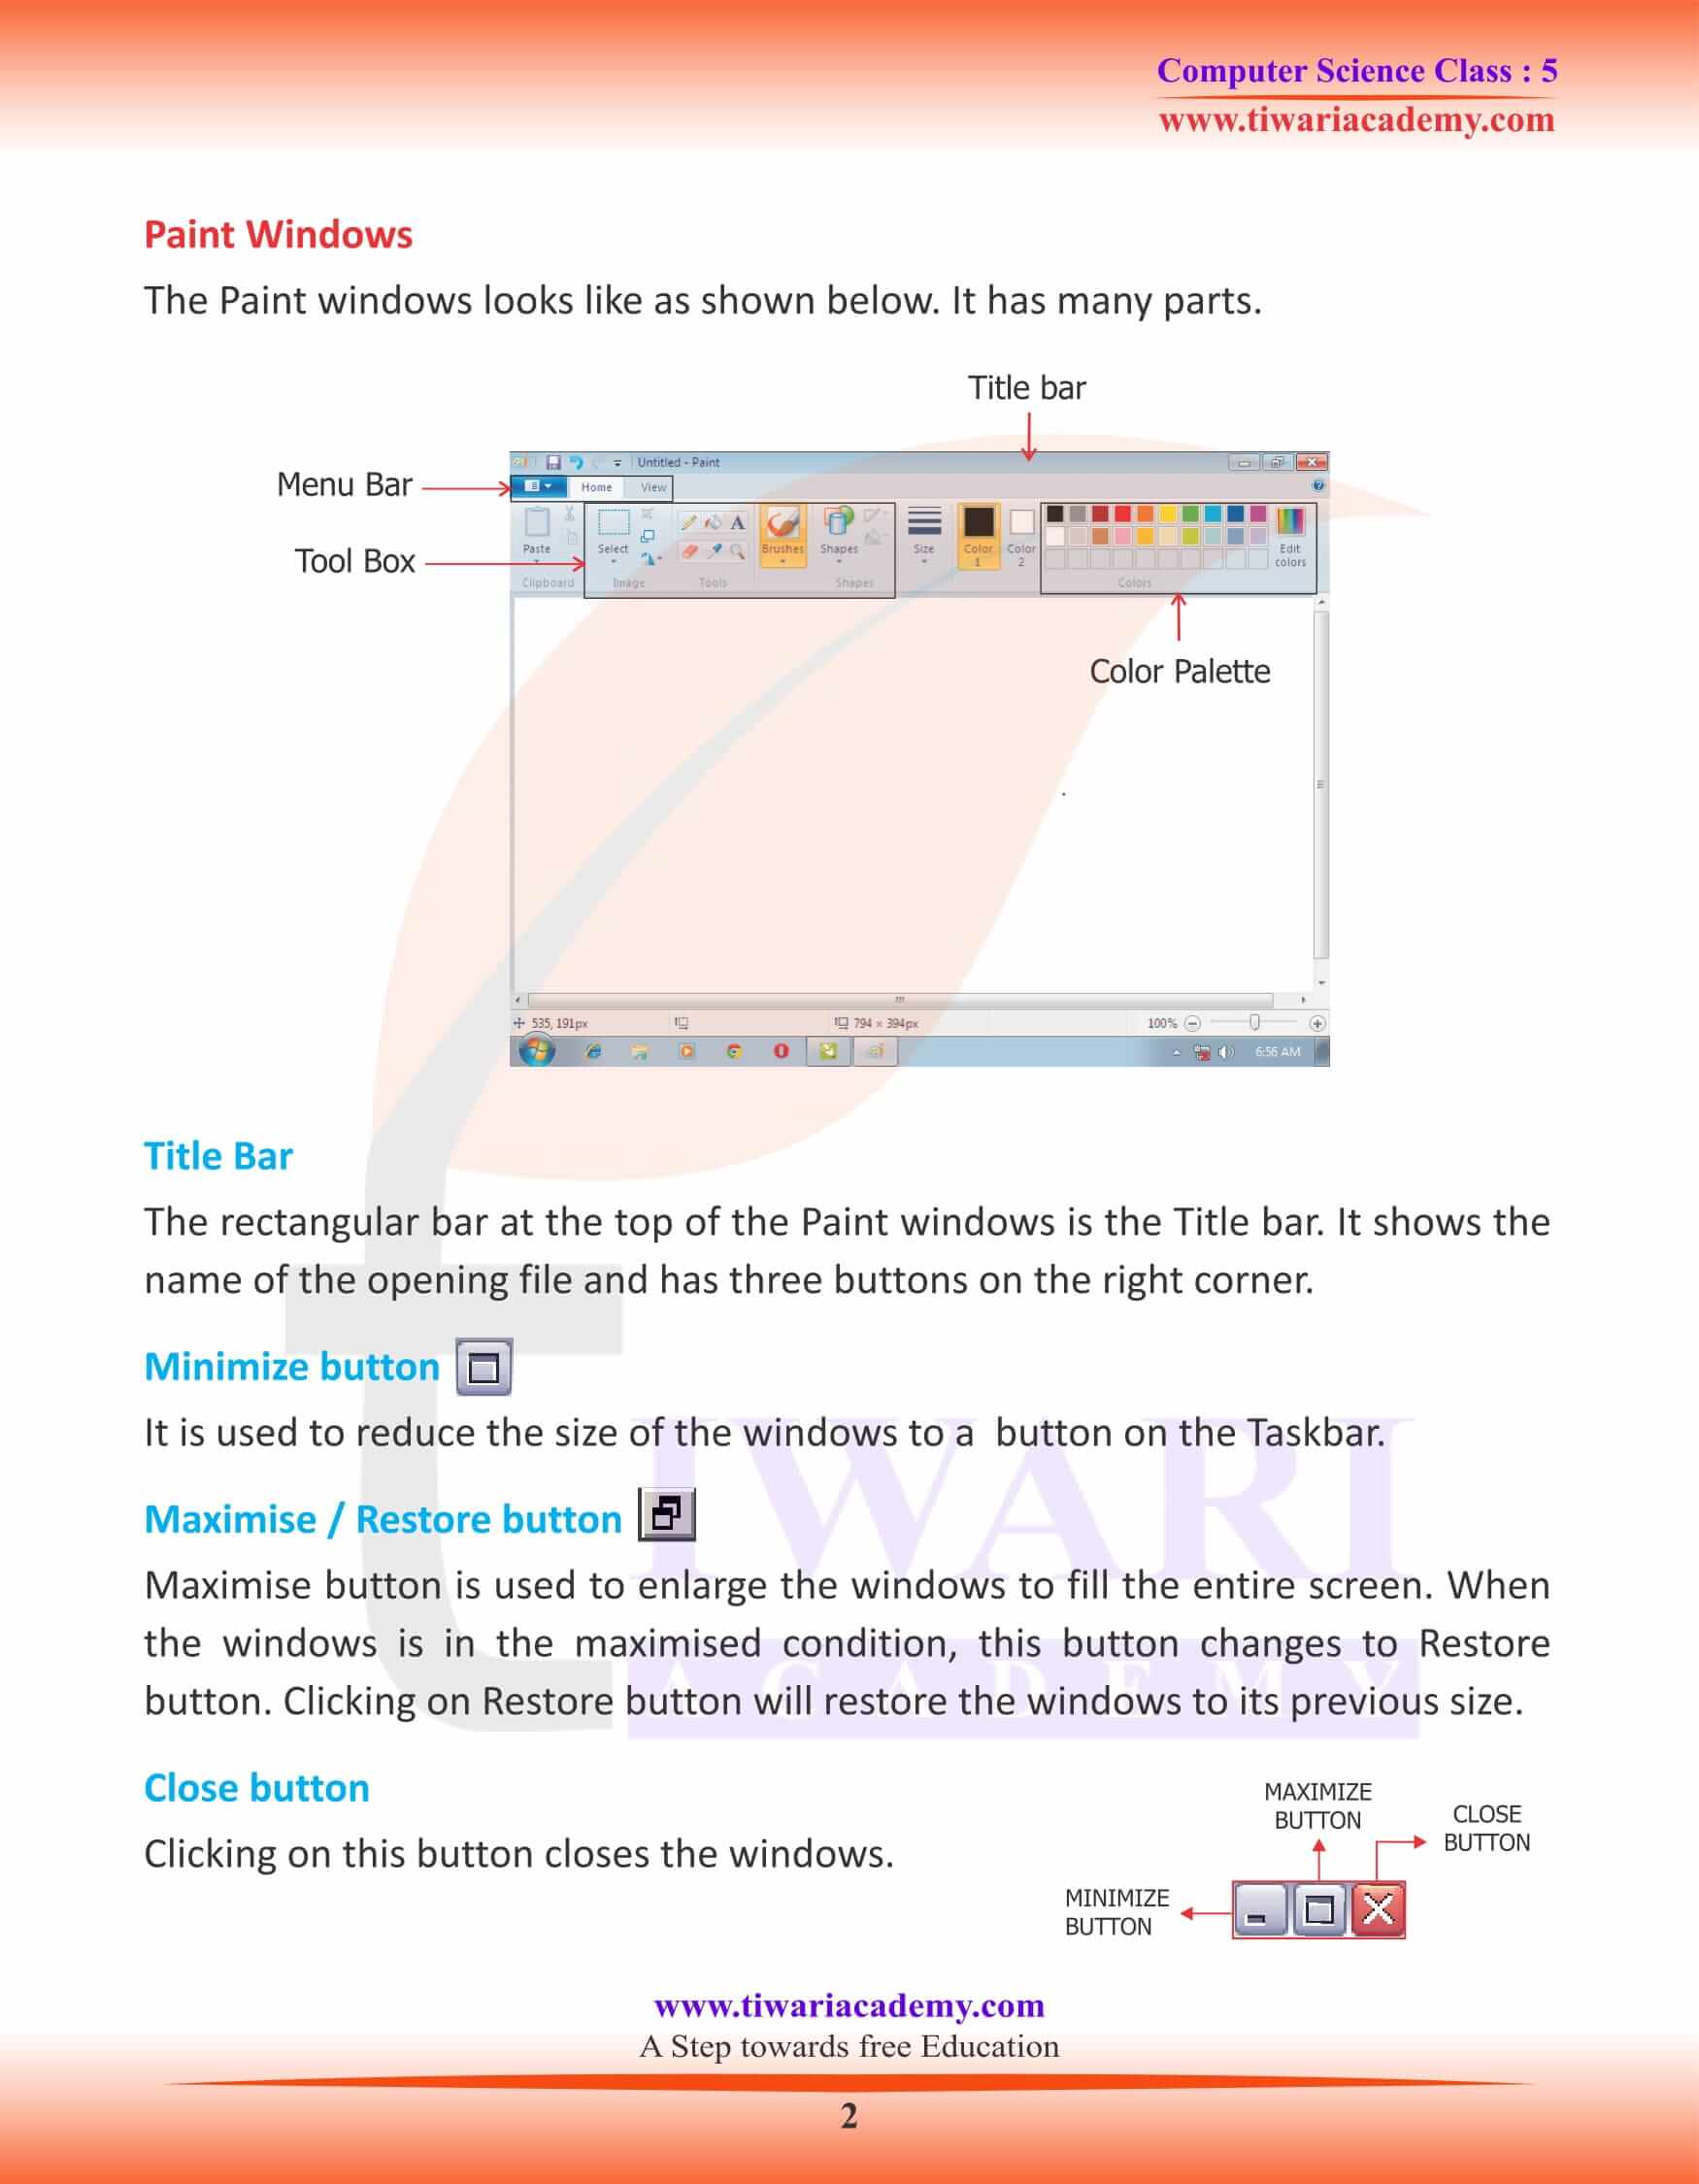
The Paint windows looks like as shown below. It has many parts.
Title Bar
The rectangular bar at the top of the Paint windows is the Title bar. It shows the name of the opening file and has three buttons on the right corner.
Minimize button
It is used to reduce the size of the windows to a button on the Taskbar.
Maximise / Restore button
Maximise button is used to enlarge the windows to fill the entire screen. When the windows is in the maximised condition, this button changes to Restore button. Clicking on Restore button will restore the windows to its previous size.
Close button
Clicking on this button closes the windows.
Menu Bar in MS Paint
It is a rectangular bar just below the Title bar. Menu bar shows various menus available in Paint.
When we click on a menu name, a list of options drops down. This list is called Drop down menu.
Drawing Board
It is the blank space in the centre of the screen. We draw and colour pictures on the Drawing Board.
Tool Box
It appears on the left side of the Paint Windows. It contains various tools to help you draw the pictures and colour them.
Colour Box
It gives you options to select a colour for drawing and colouring. It is located below the drawing board.
Scroll Bar
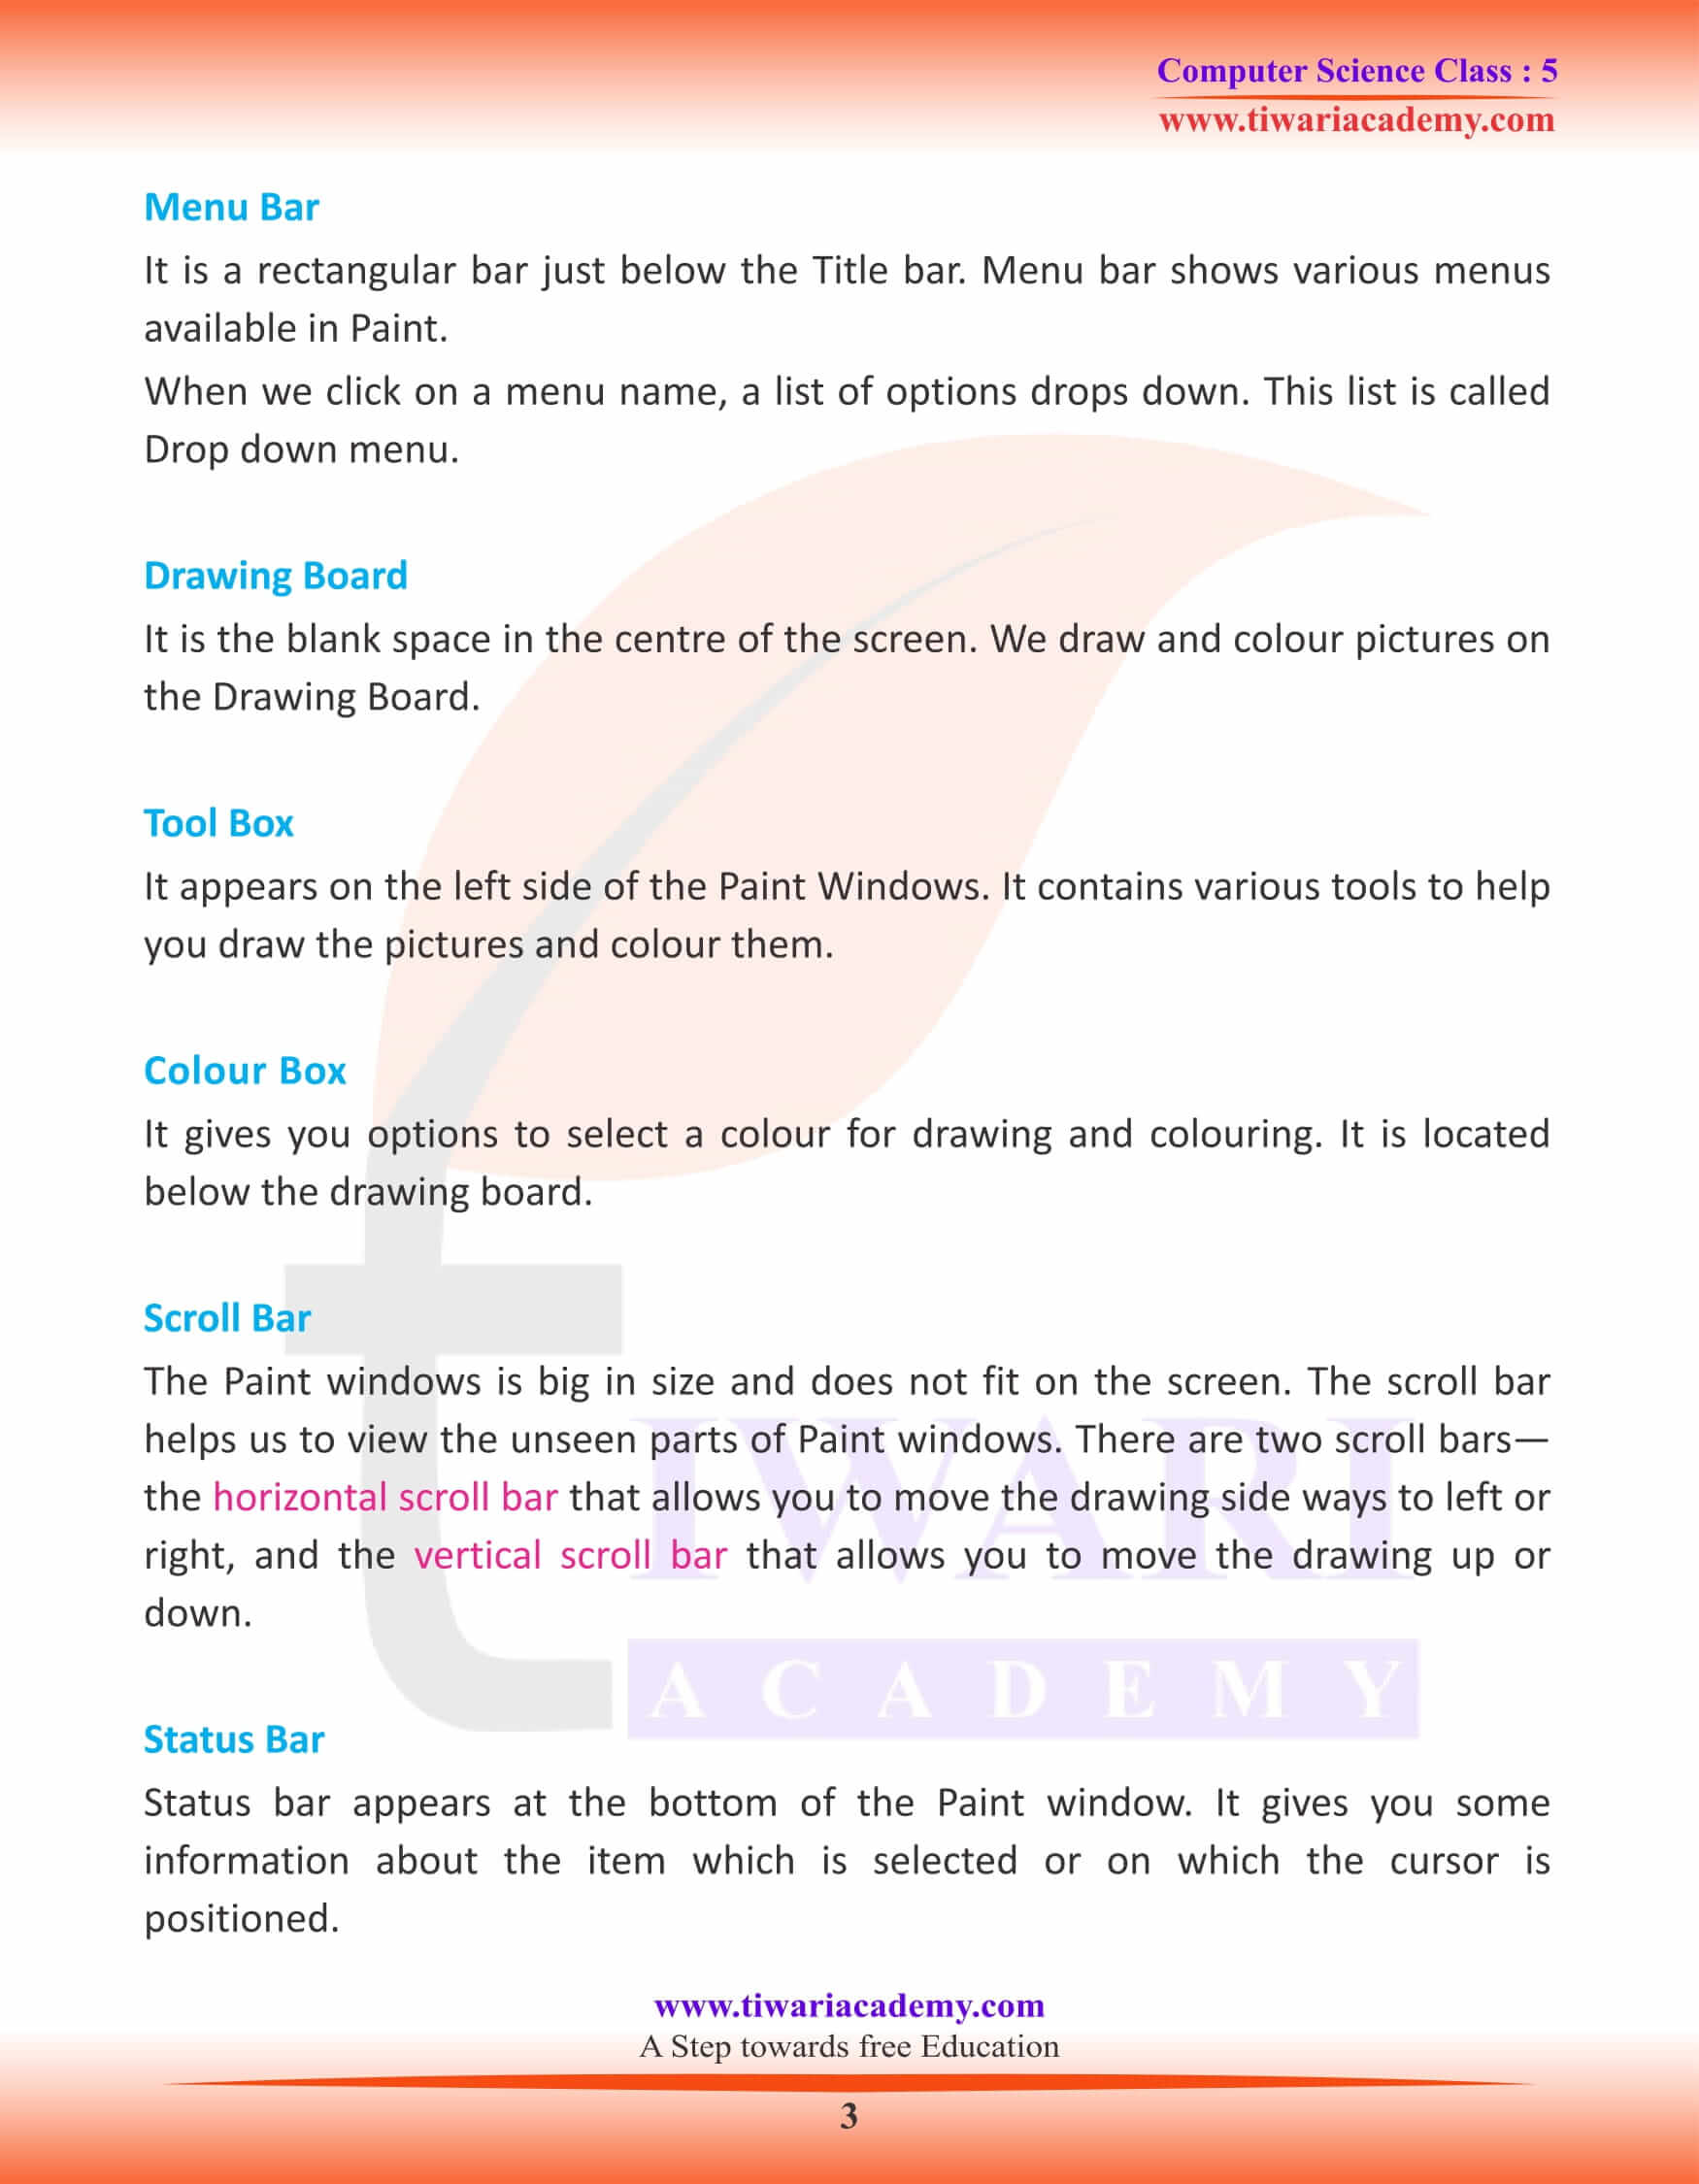
The Paint windows is big in size and does not fit on the screen. The scroll bar helps us to view the unseen parts of Paint windows. There are two scroll bars— the horizontal scroll bar that allows you to move the drawing side ways to left or right, and the vertical scroll bar that allows you to move the drawing up or down.
Status Bar
Status bar appears at the bottom of the Paint window. It gives you some information about the item which is selected or on which the cursor is positioned.
Let us now learn about some more tools in the Tool Box.
Rounded Rectangle Tool in Paint
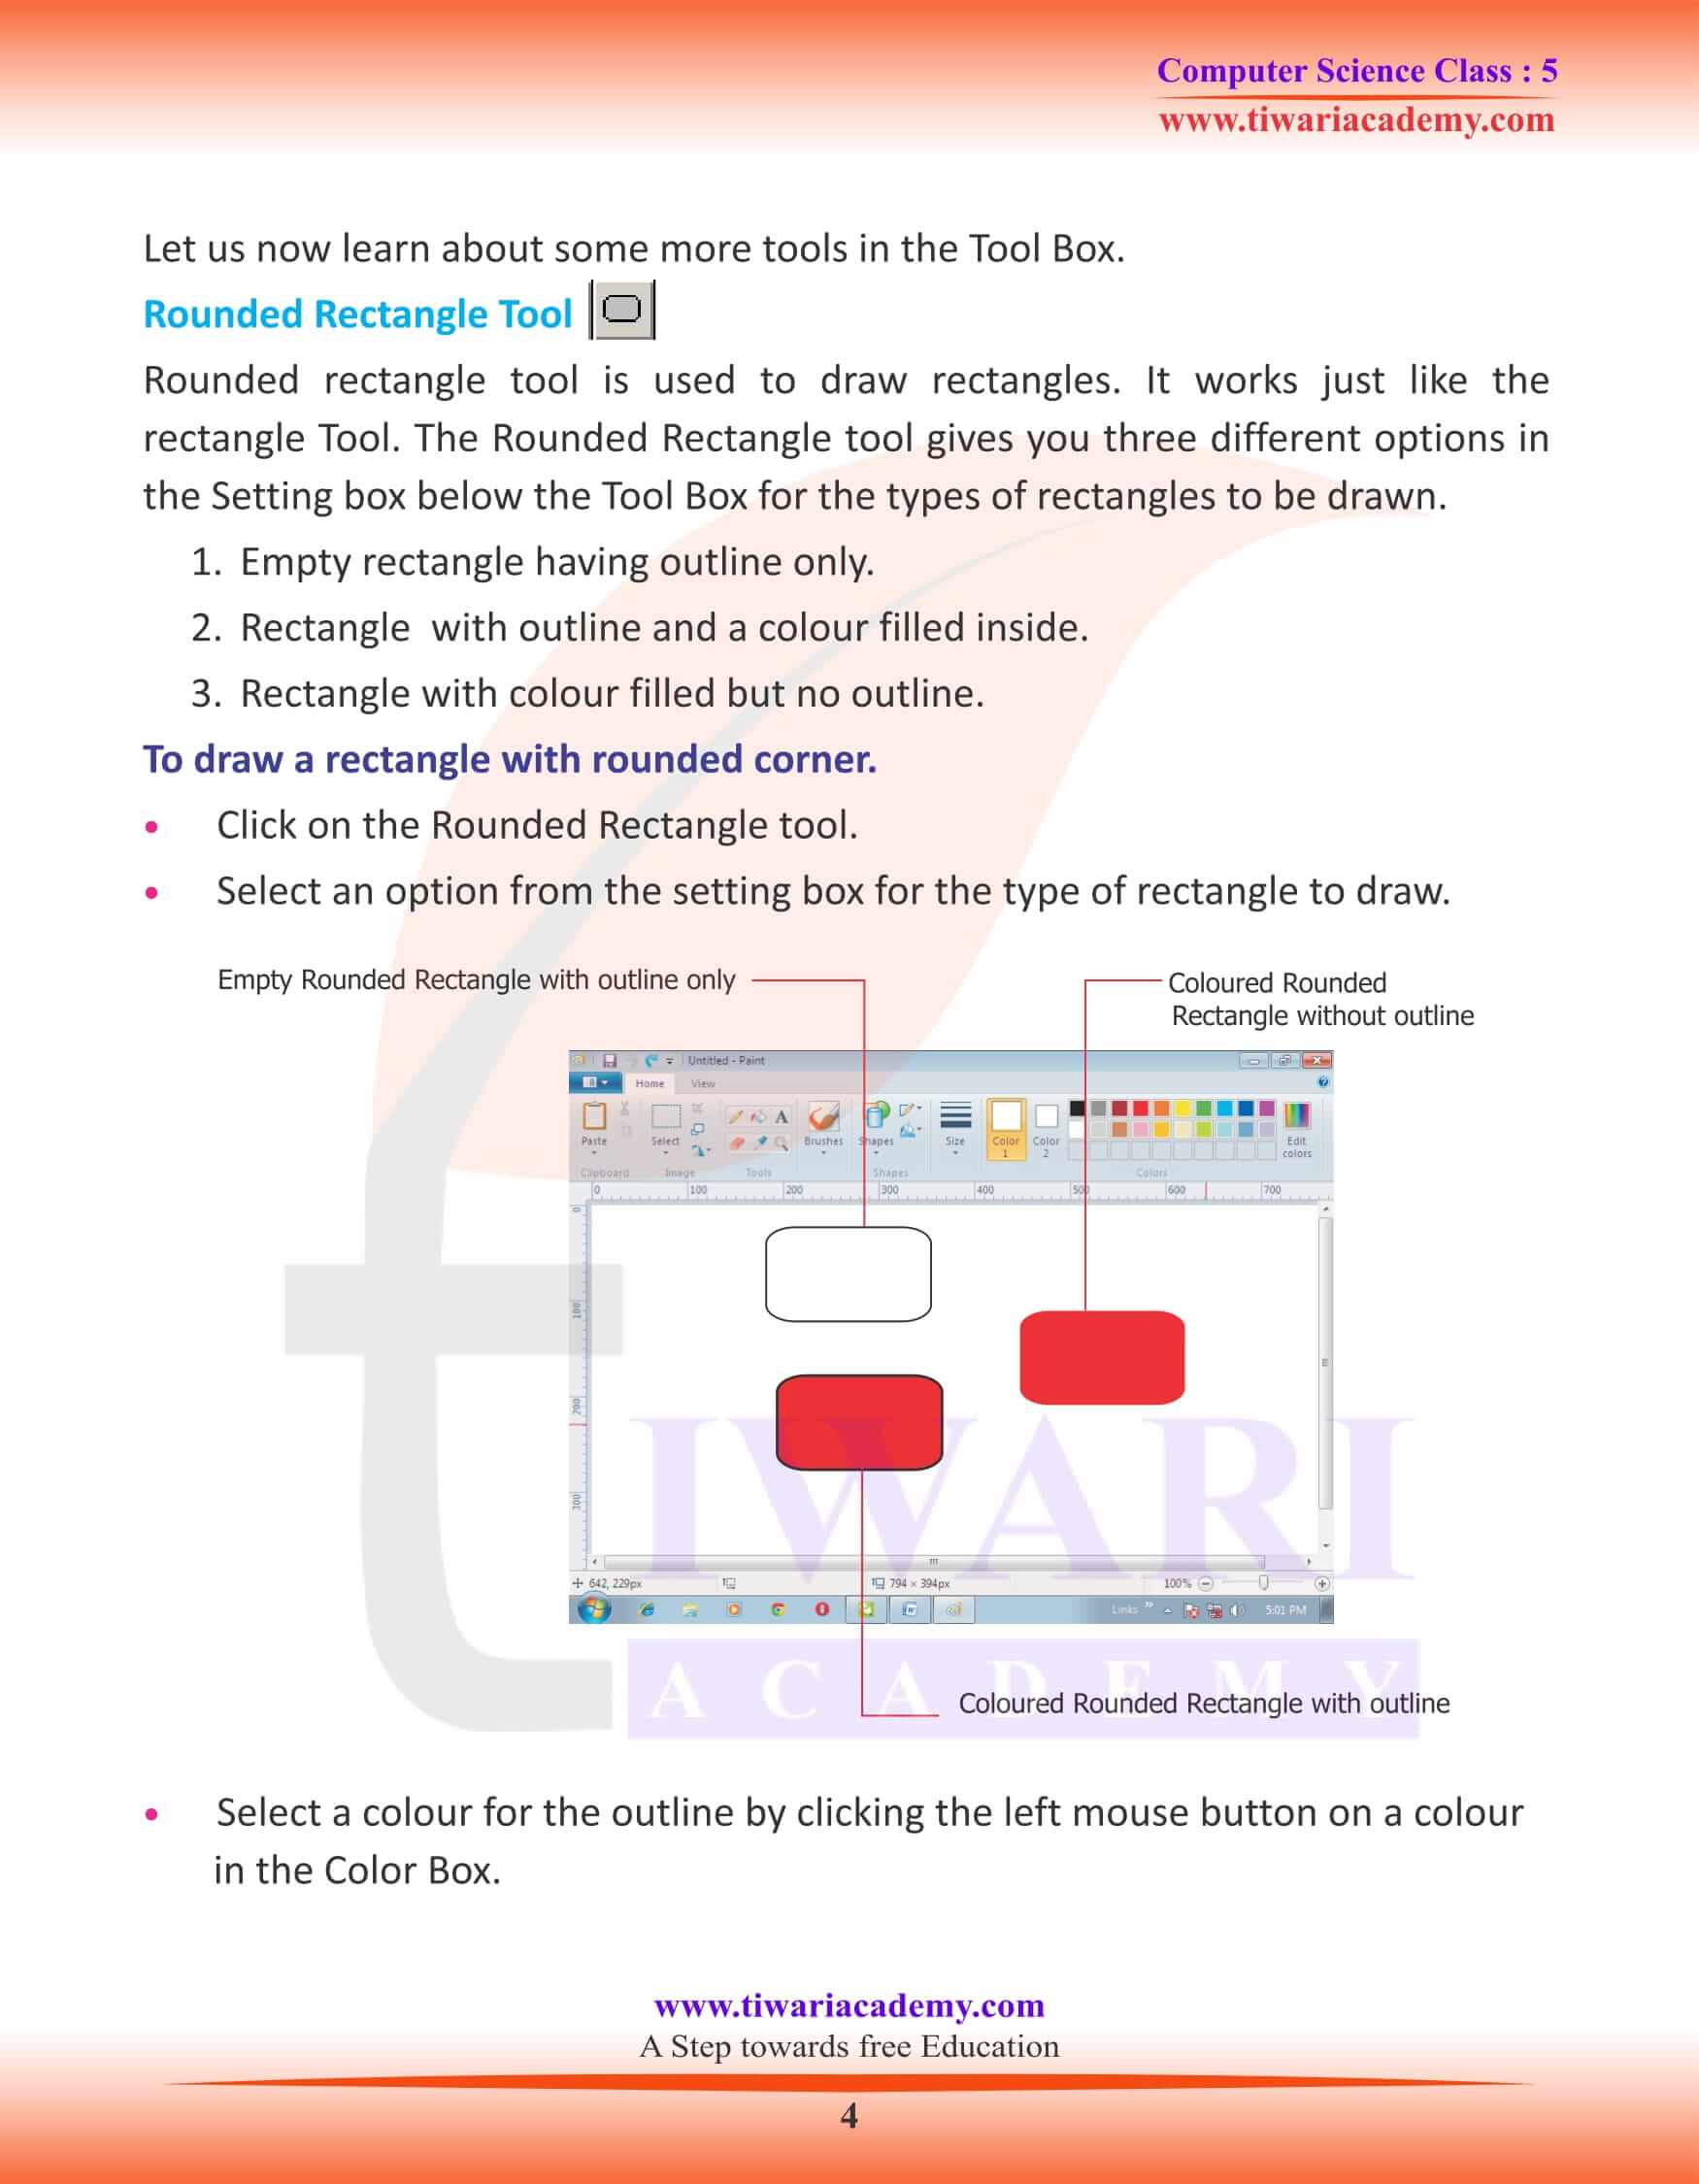
Rounded rectangle tool is used to draw rectangles. It works just like the rectangle Tool. The Rounded Rectangle tool gives you three different options in the Setting box below the Tool Box for the types of rectangles to be drawn.
1. Empty rectangle having outline only.
2. Rectangle with outline and a colour filled inside.
3. Rectangle with colour filled but no outline.
Polygon Tool
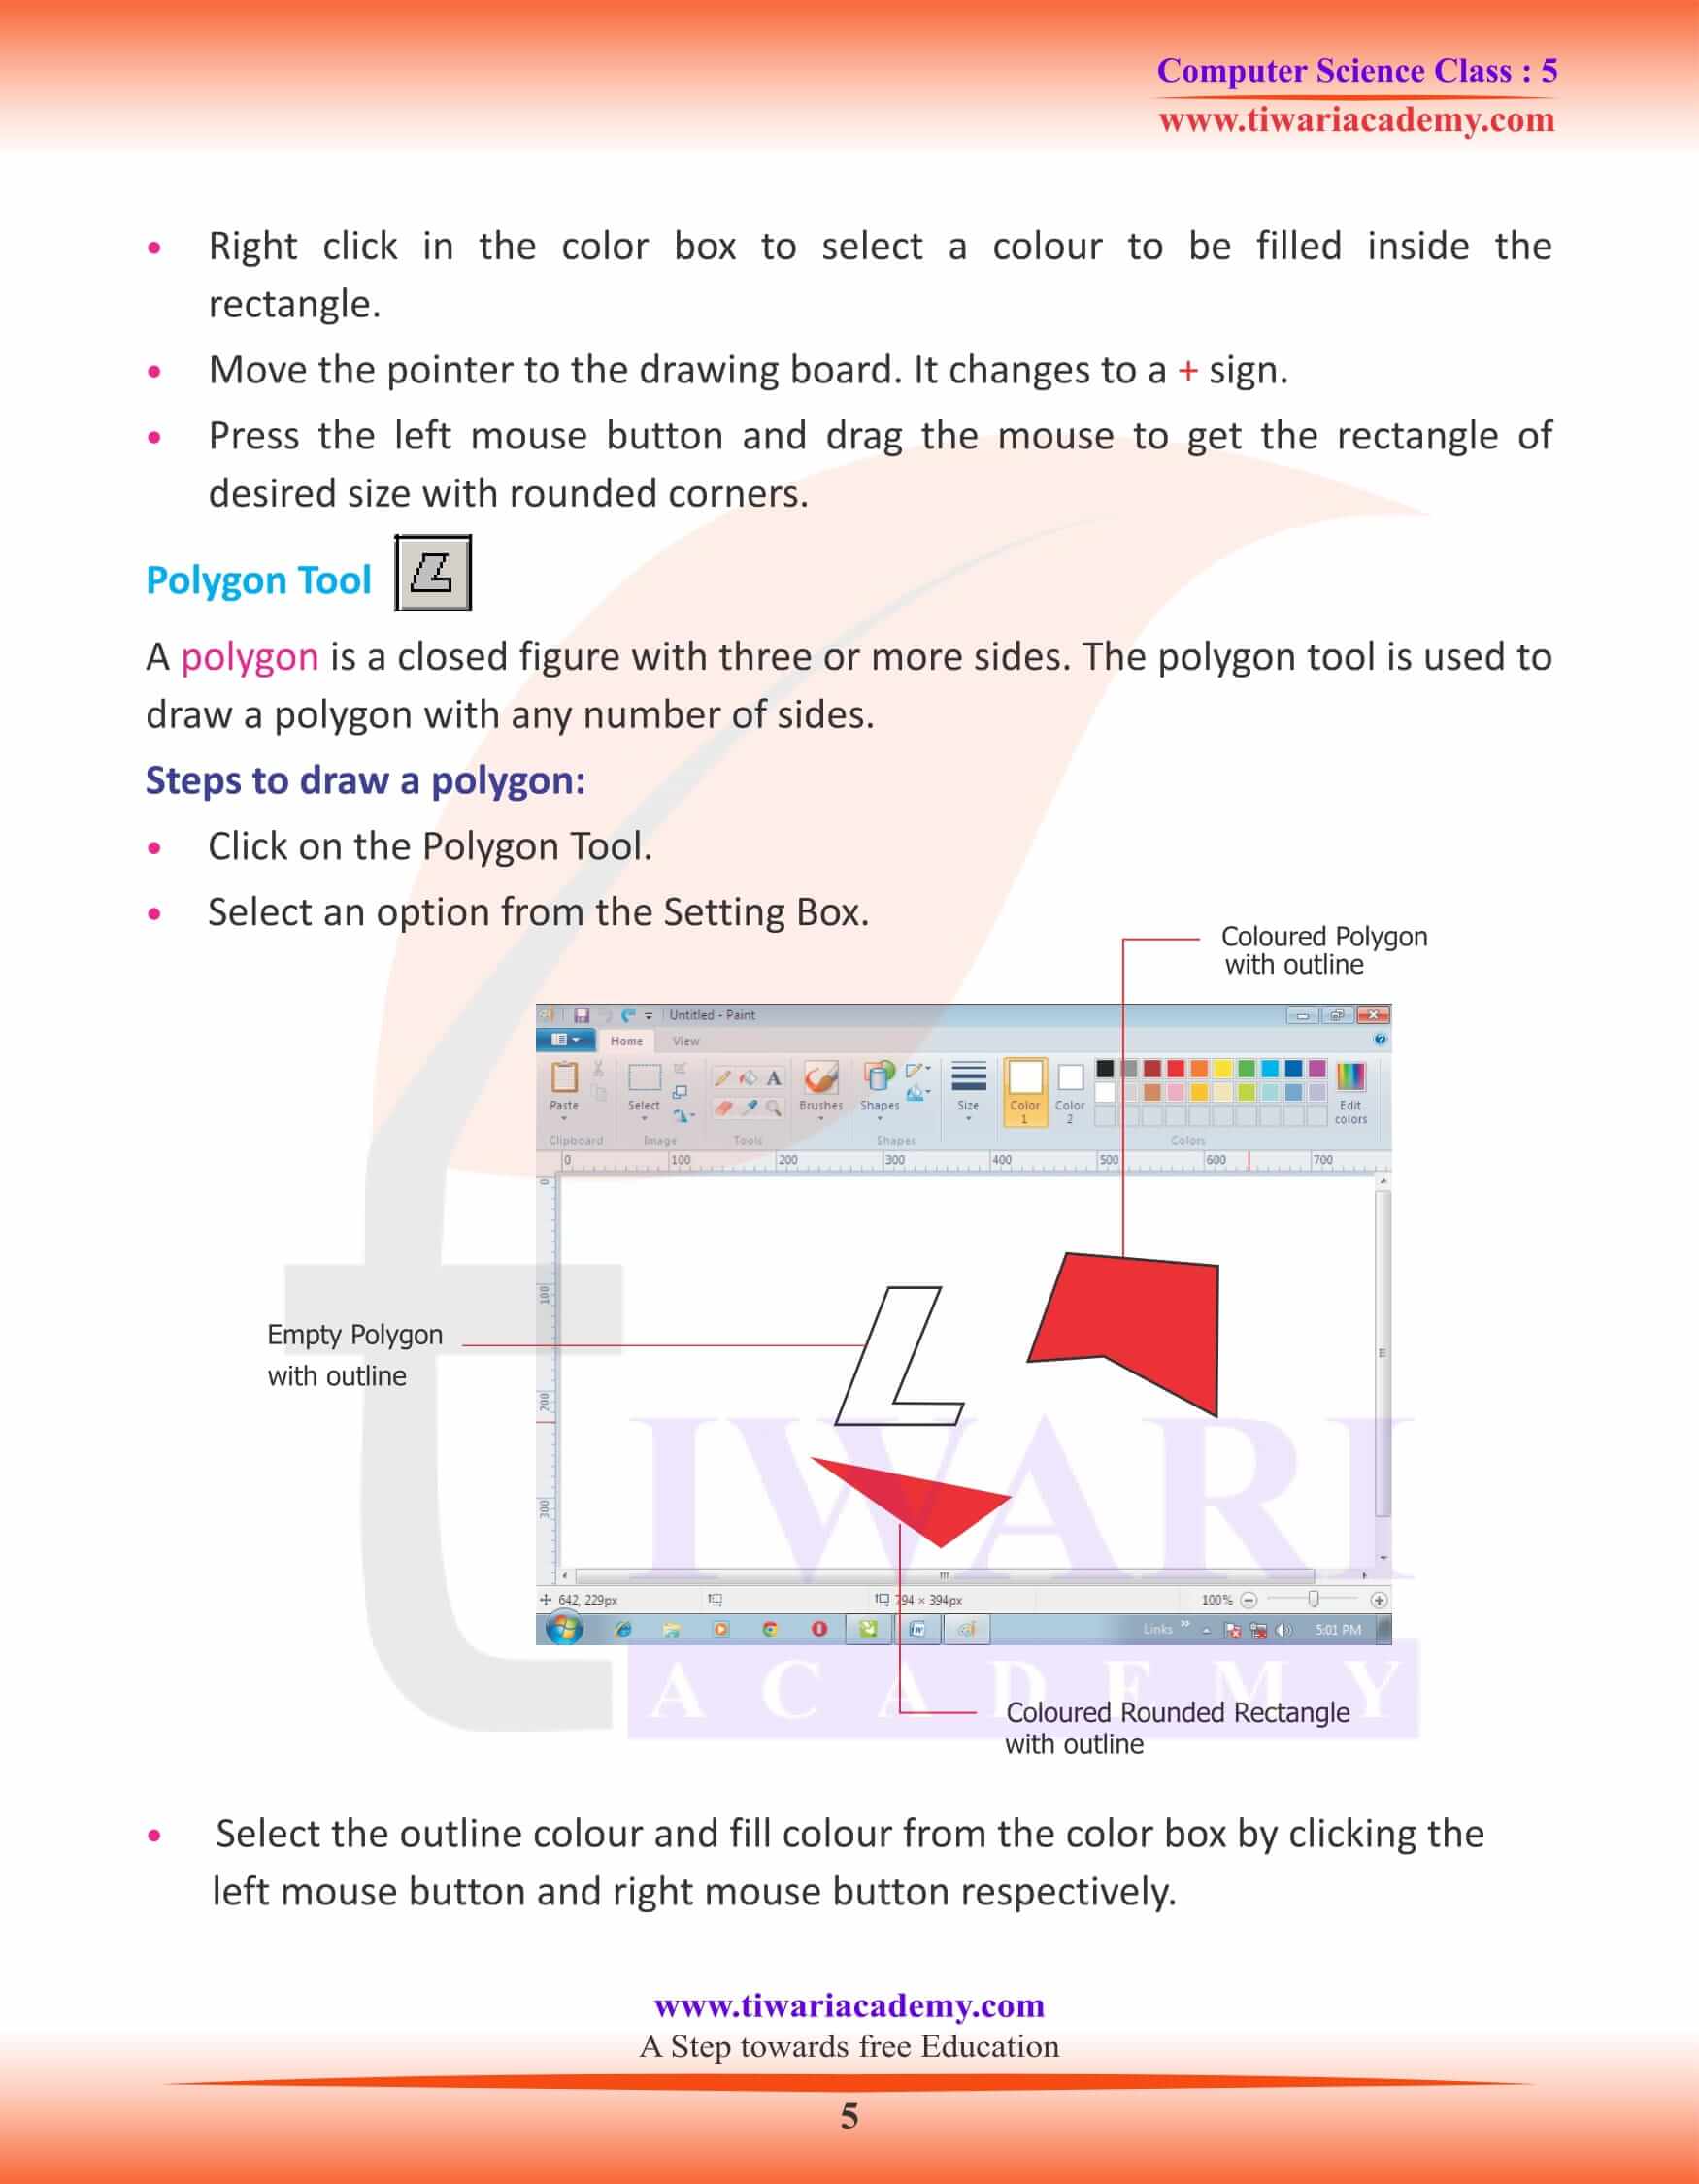
A polygon is a closed figure with three or more sides. The polygon tool is used to draw a polygon with any number of sides.
Steps to draw a polygon:
Click on the Polygon Tool.
Select an option from the Setting Box.
Select the outline colour and fill colour from the color box by clicking the left mouse button and right mouse button respectively.
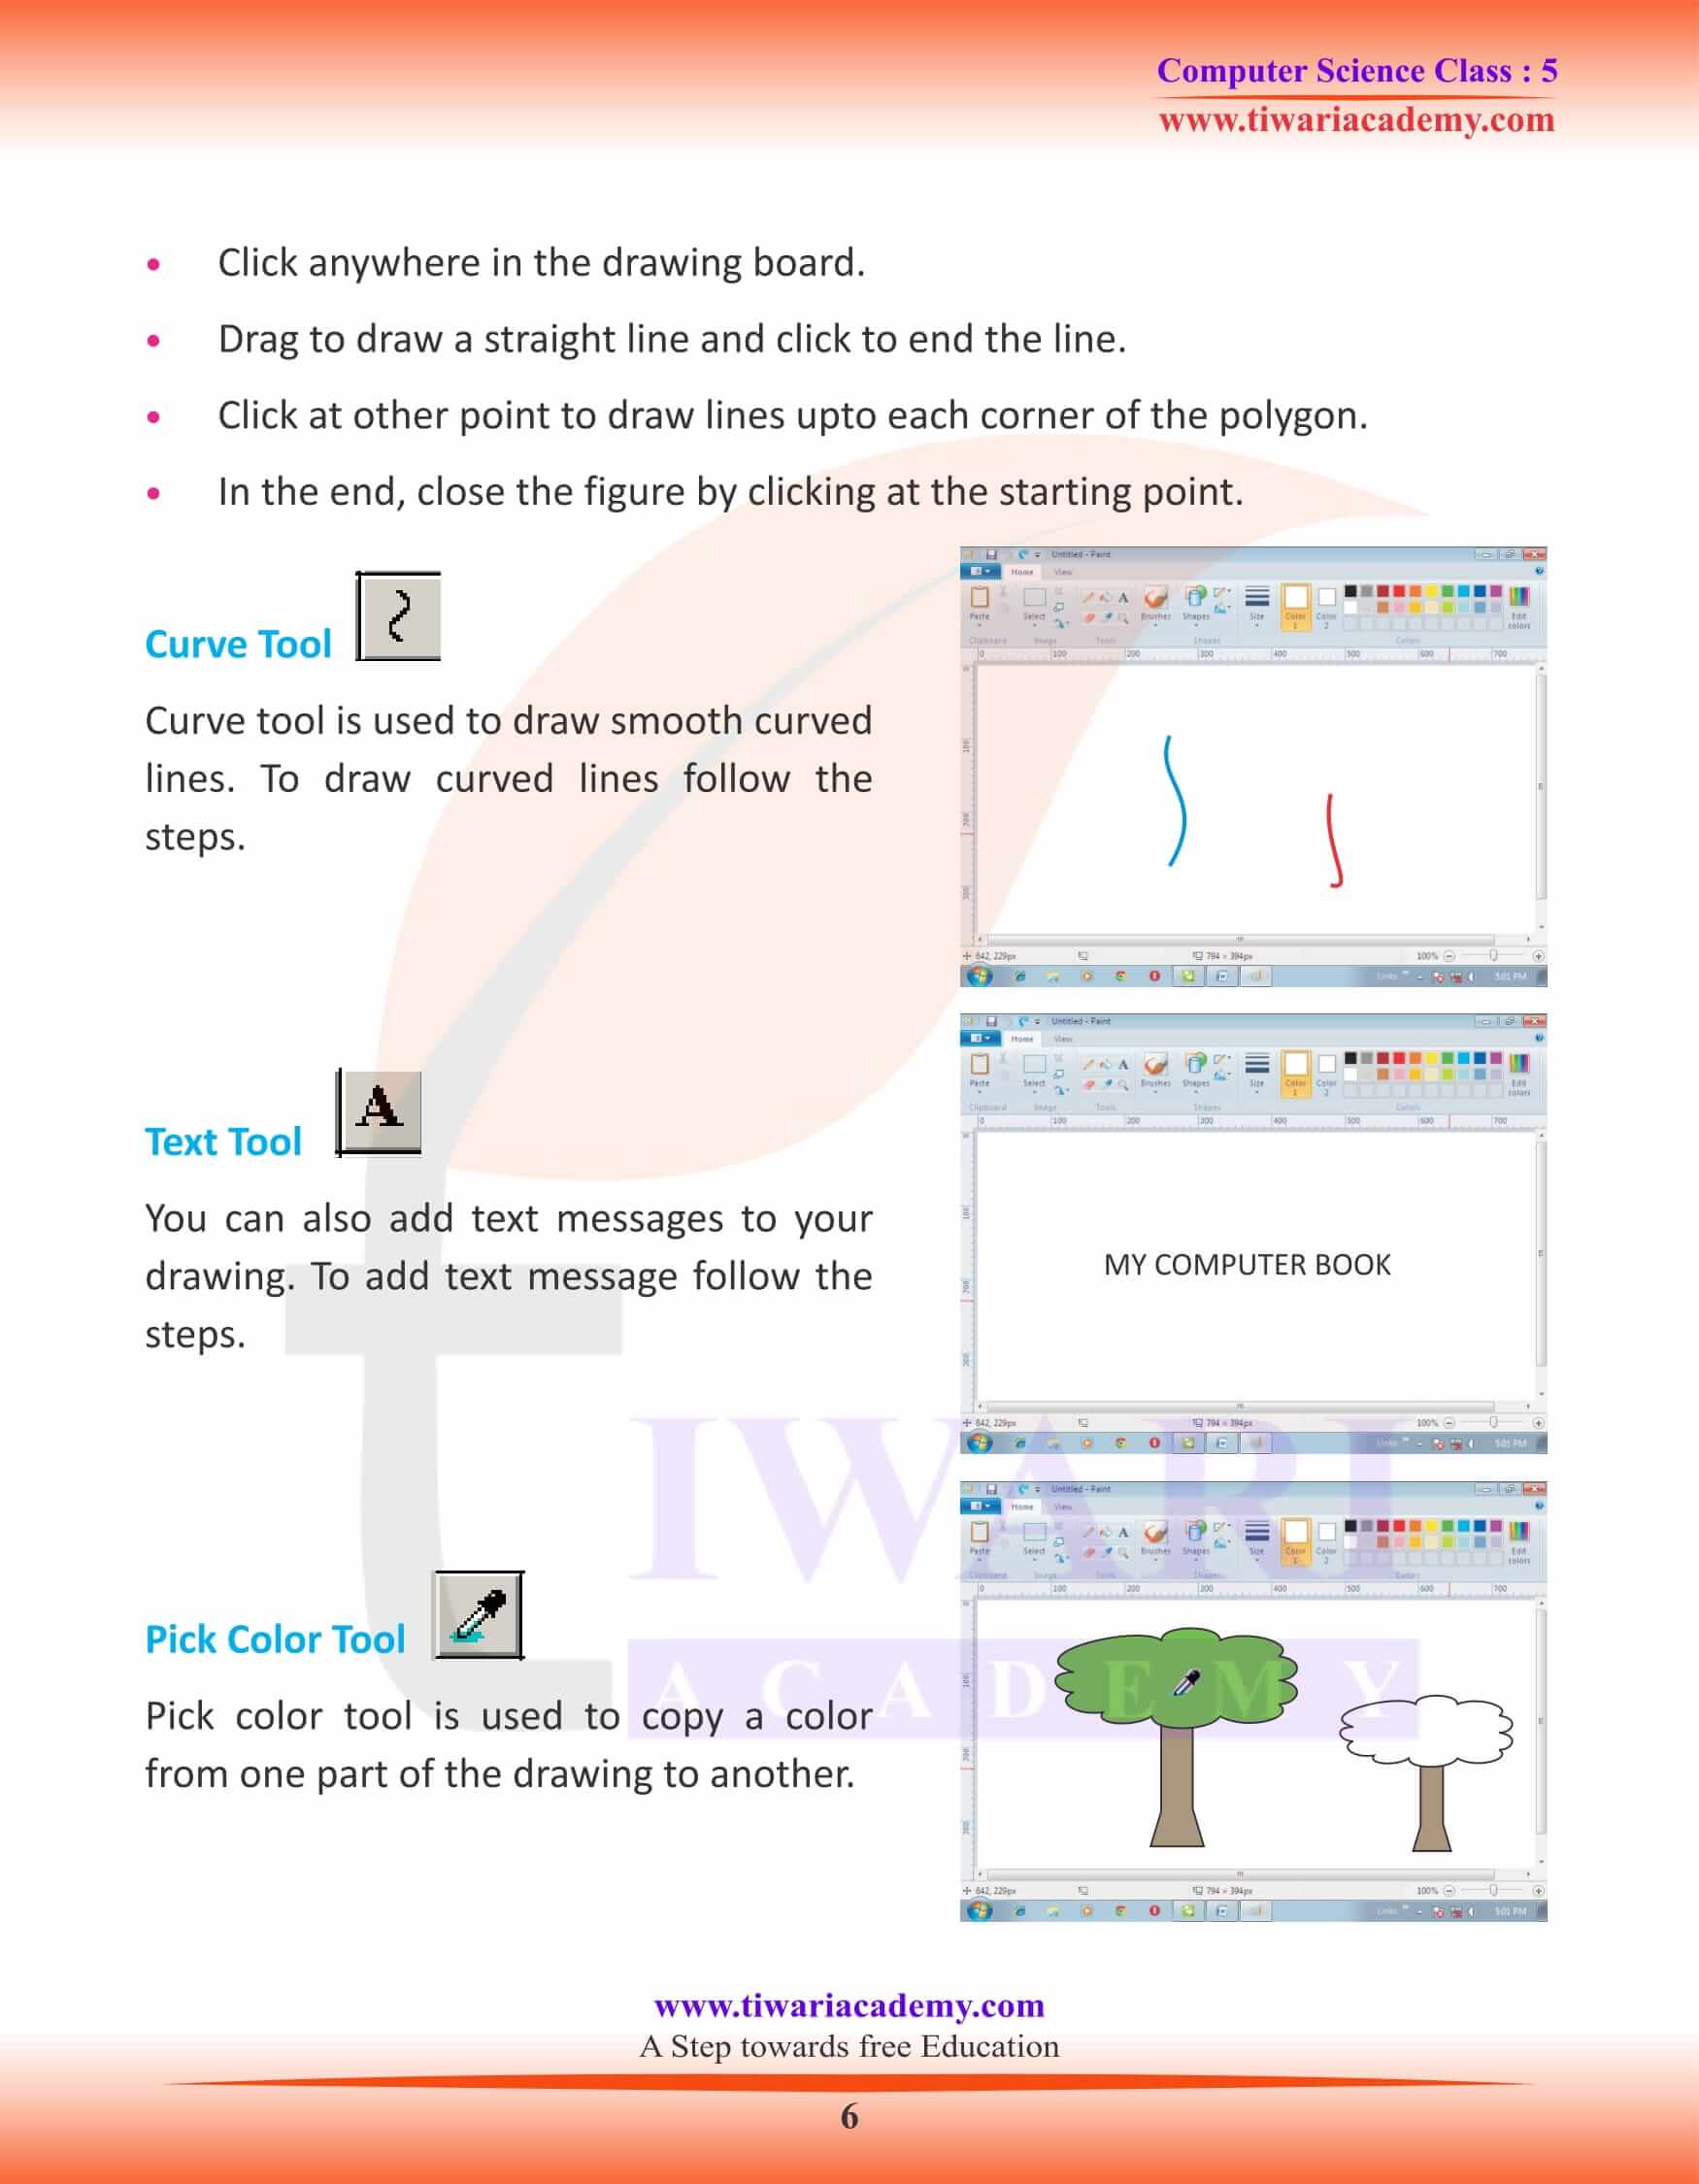
Click anywhere in the drawing board.
Drag to draw a straight line and click to end the line.
Click at other point to draw lines upto each corner of the polygon.
In the end, close the figure by clicking at the starting point.
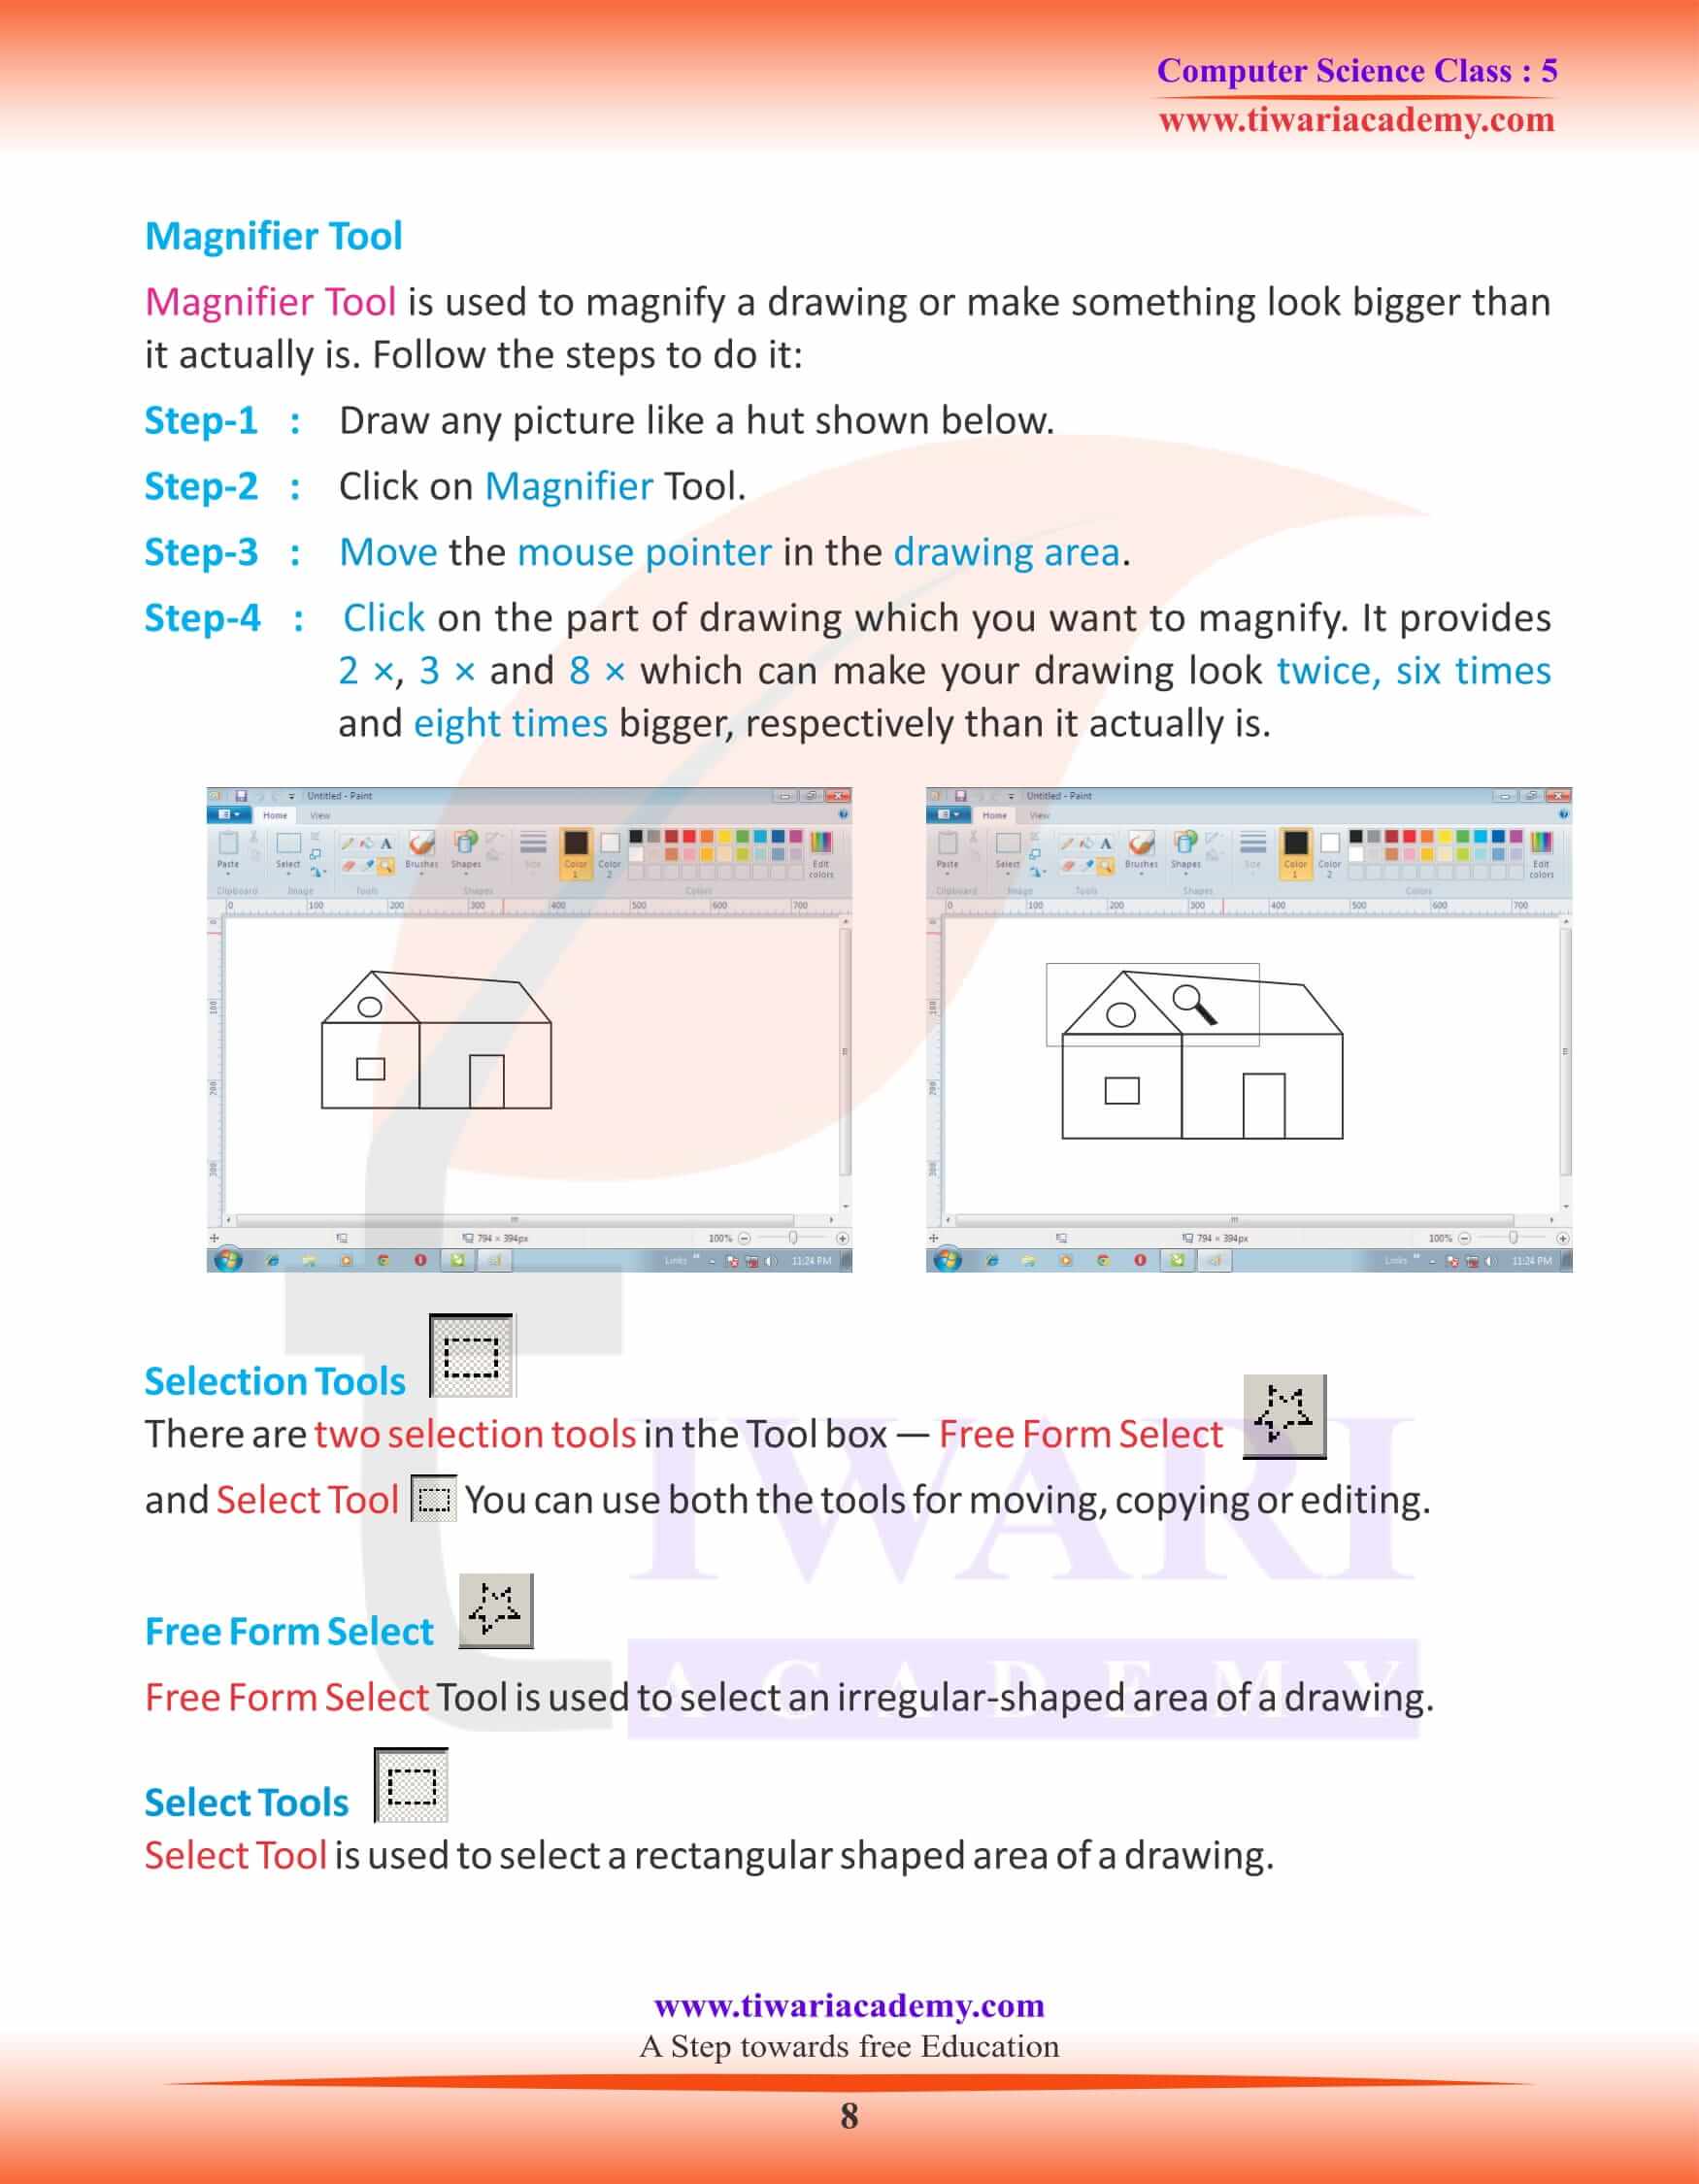
Selection Tools
There are two selection tools in the Tool box — Free Form Select
and Select Tool You can use both the tools for moving, copying or editing.
Free Form Select
Free Form Select Tool is used to select an irregular-shaped area of a drawing.
Select Tools
Select Tool is used to select a rectangular shaped area of a drawing.
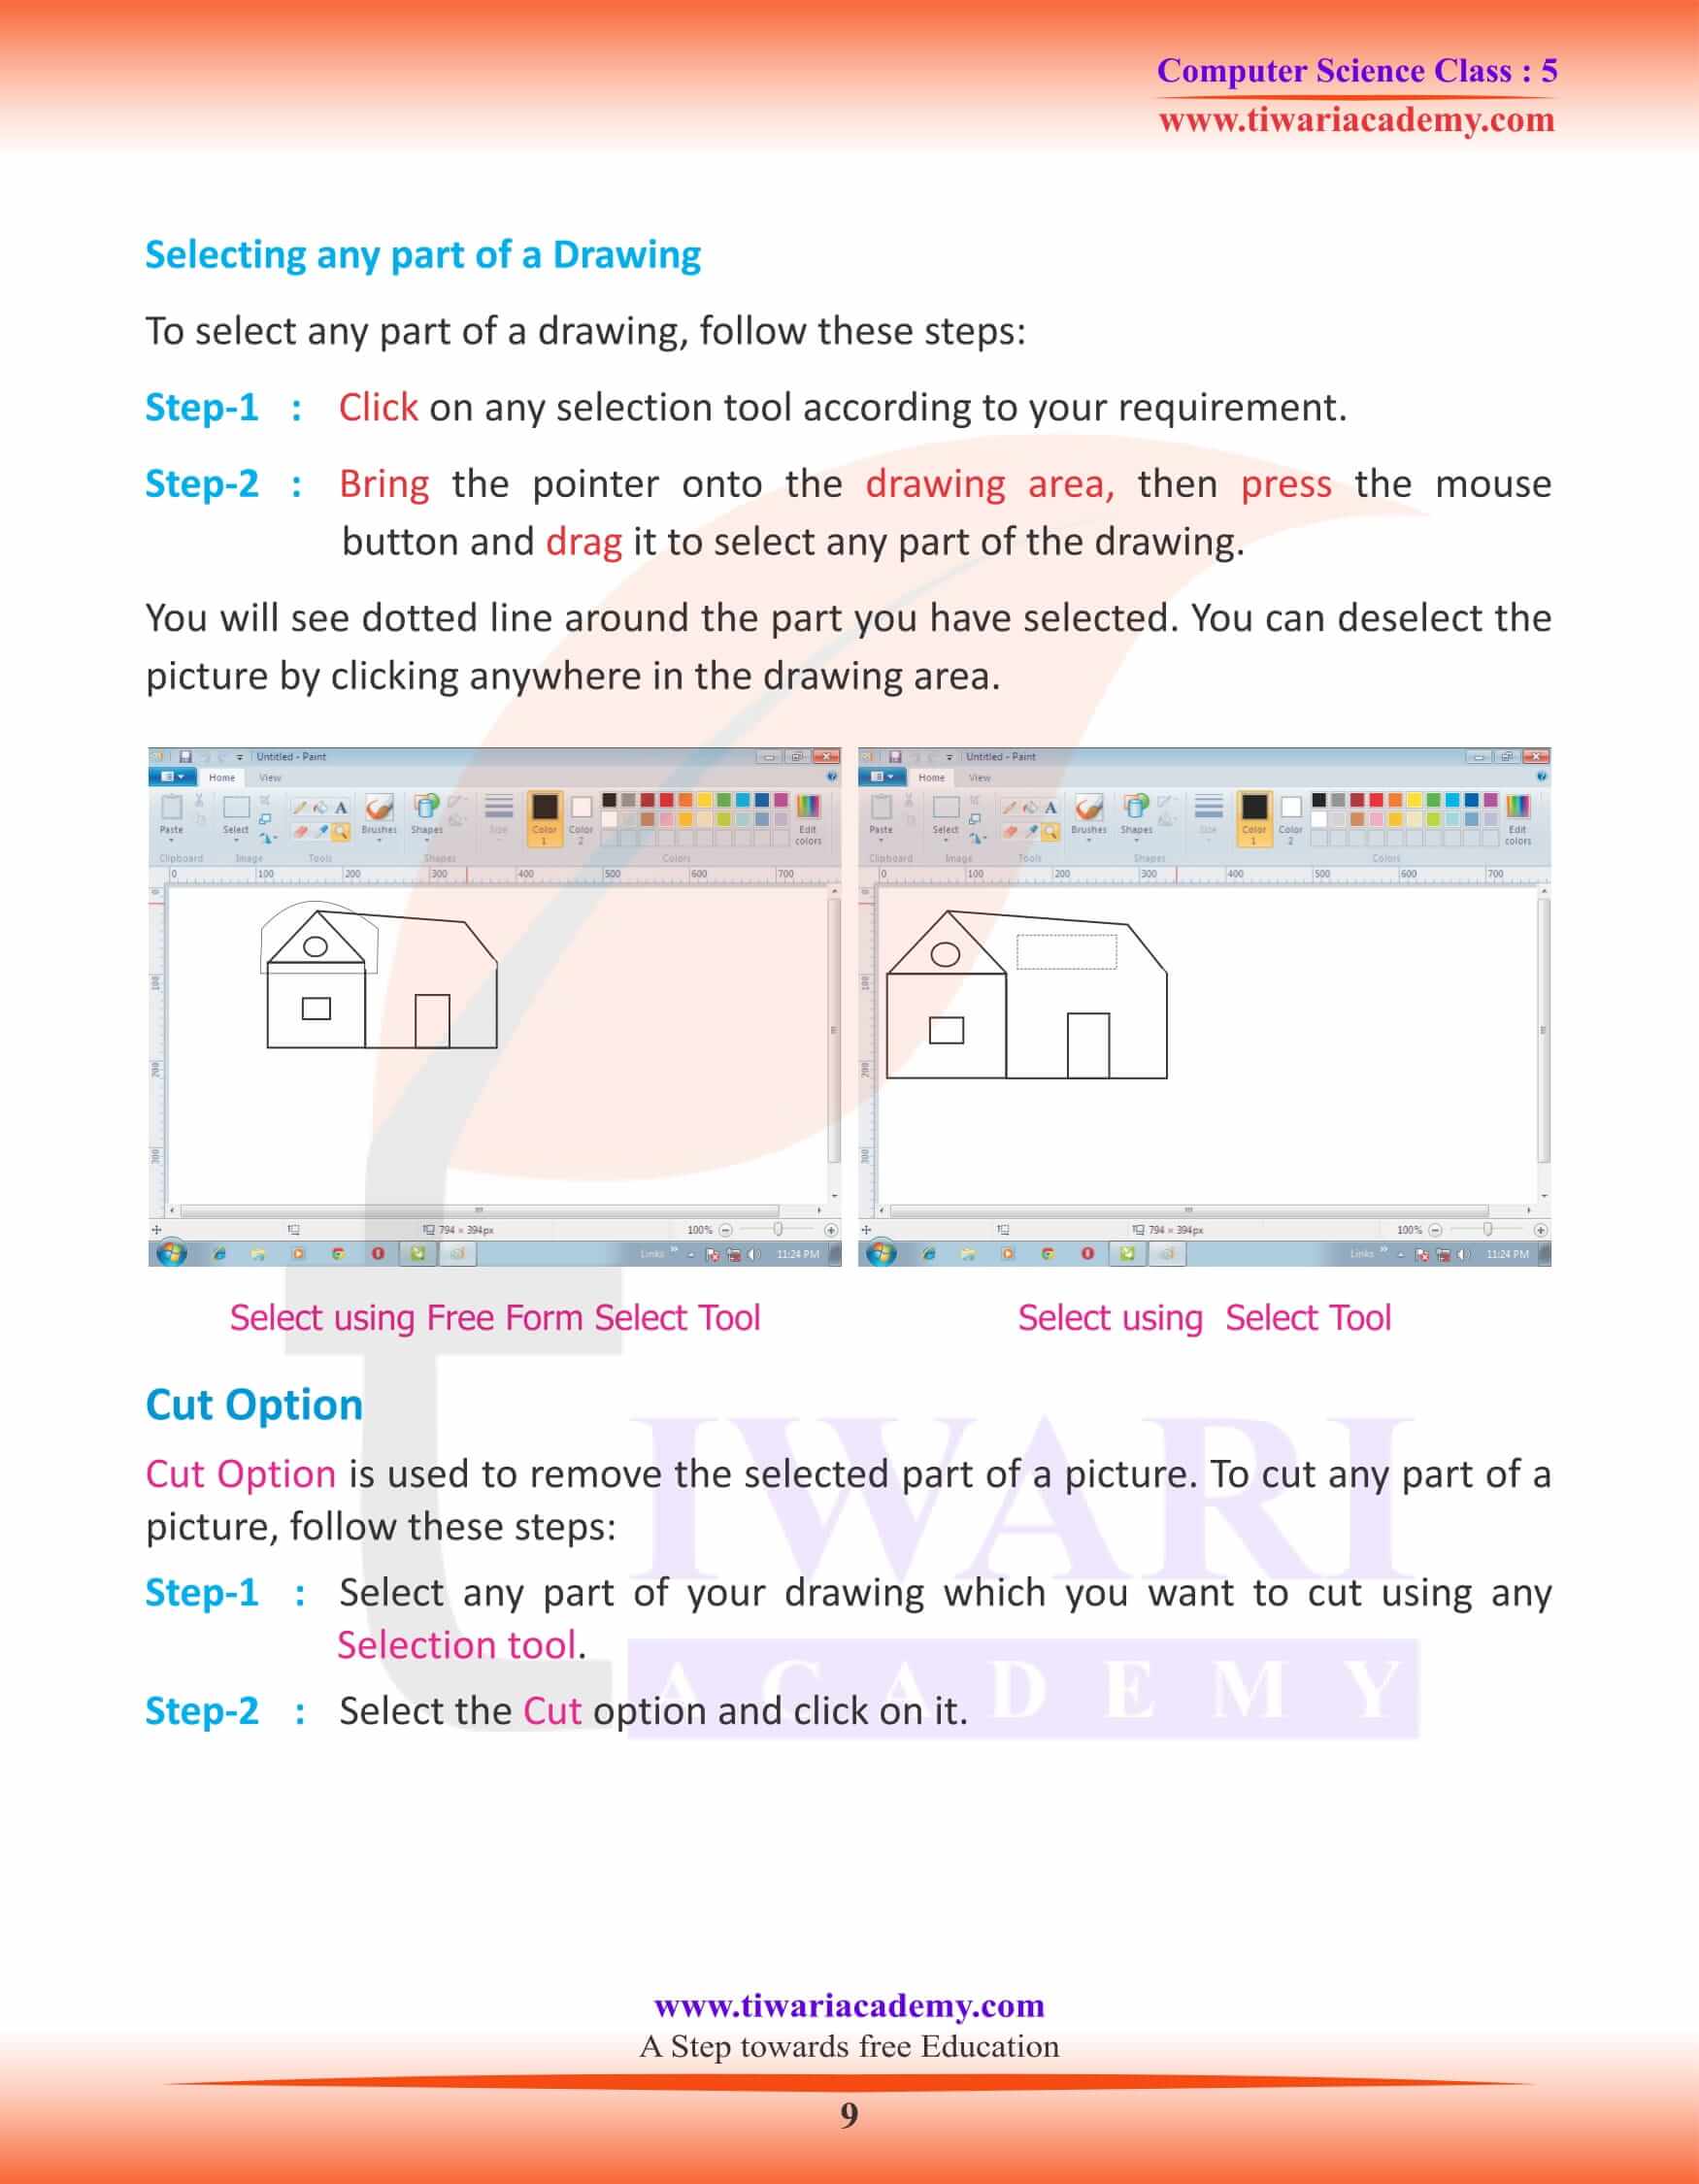
Selecting any part of a Drawing
To select any part of a drawing, follow these steps:
Step-1 : Click on any selection tool according to your requirement.
Step-2 : Bring the pointer onto the drawing area, then press the mouse button and drag it to select any part of the drawing.
You will see dotted line around the part you have selected. You can deselect the picture by clicking anywhere in the drawing area.
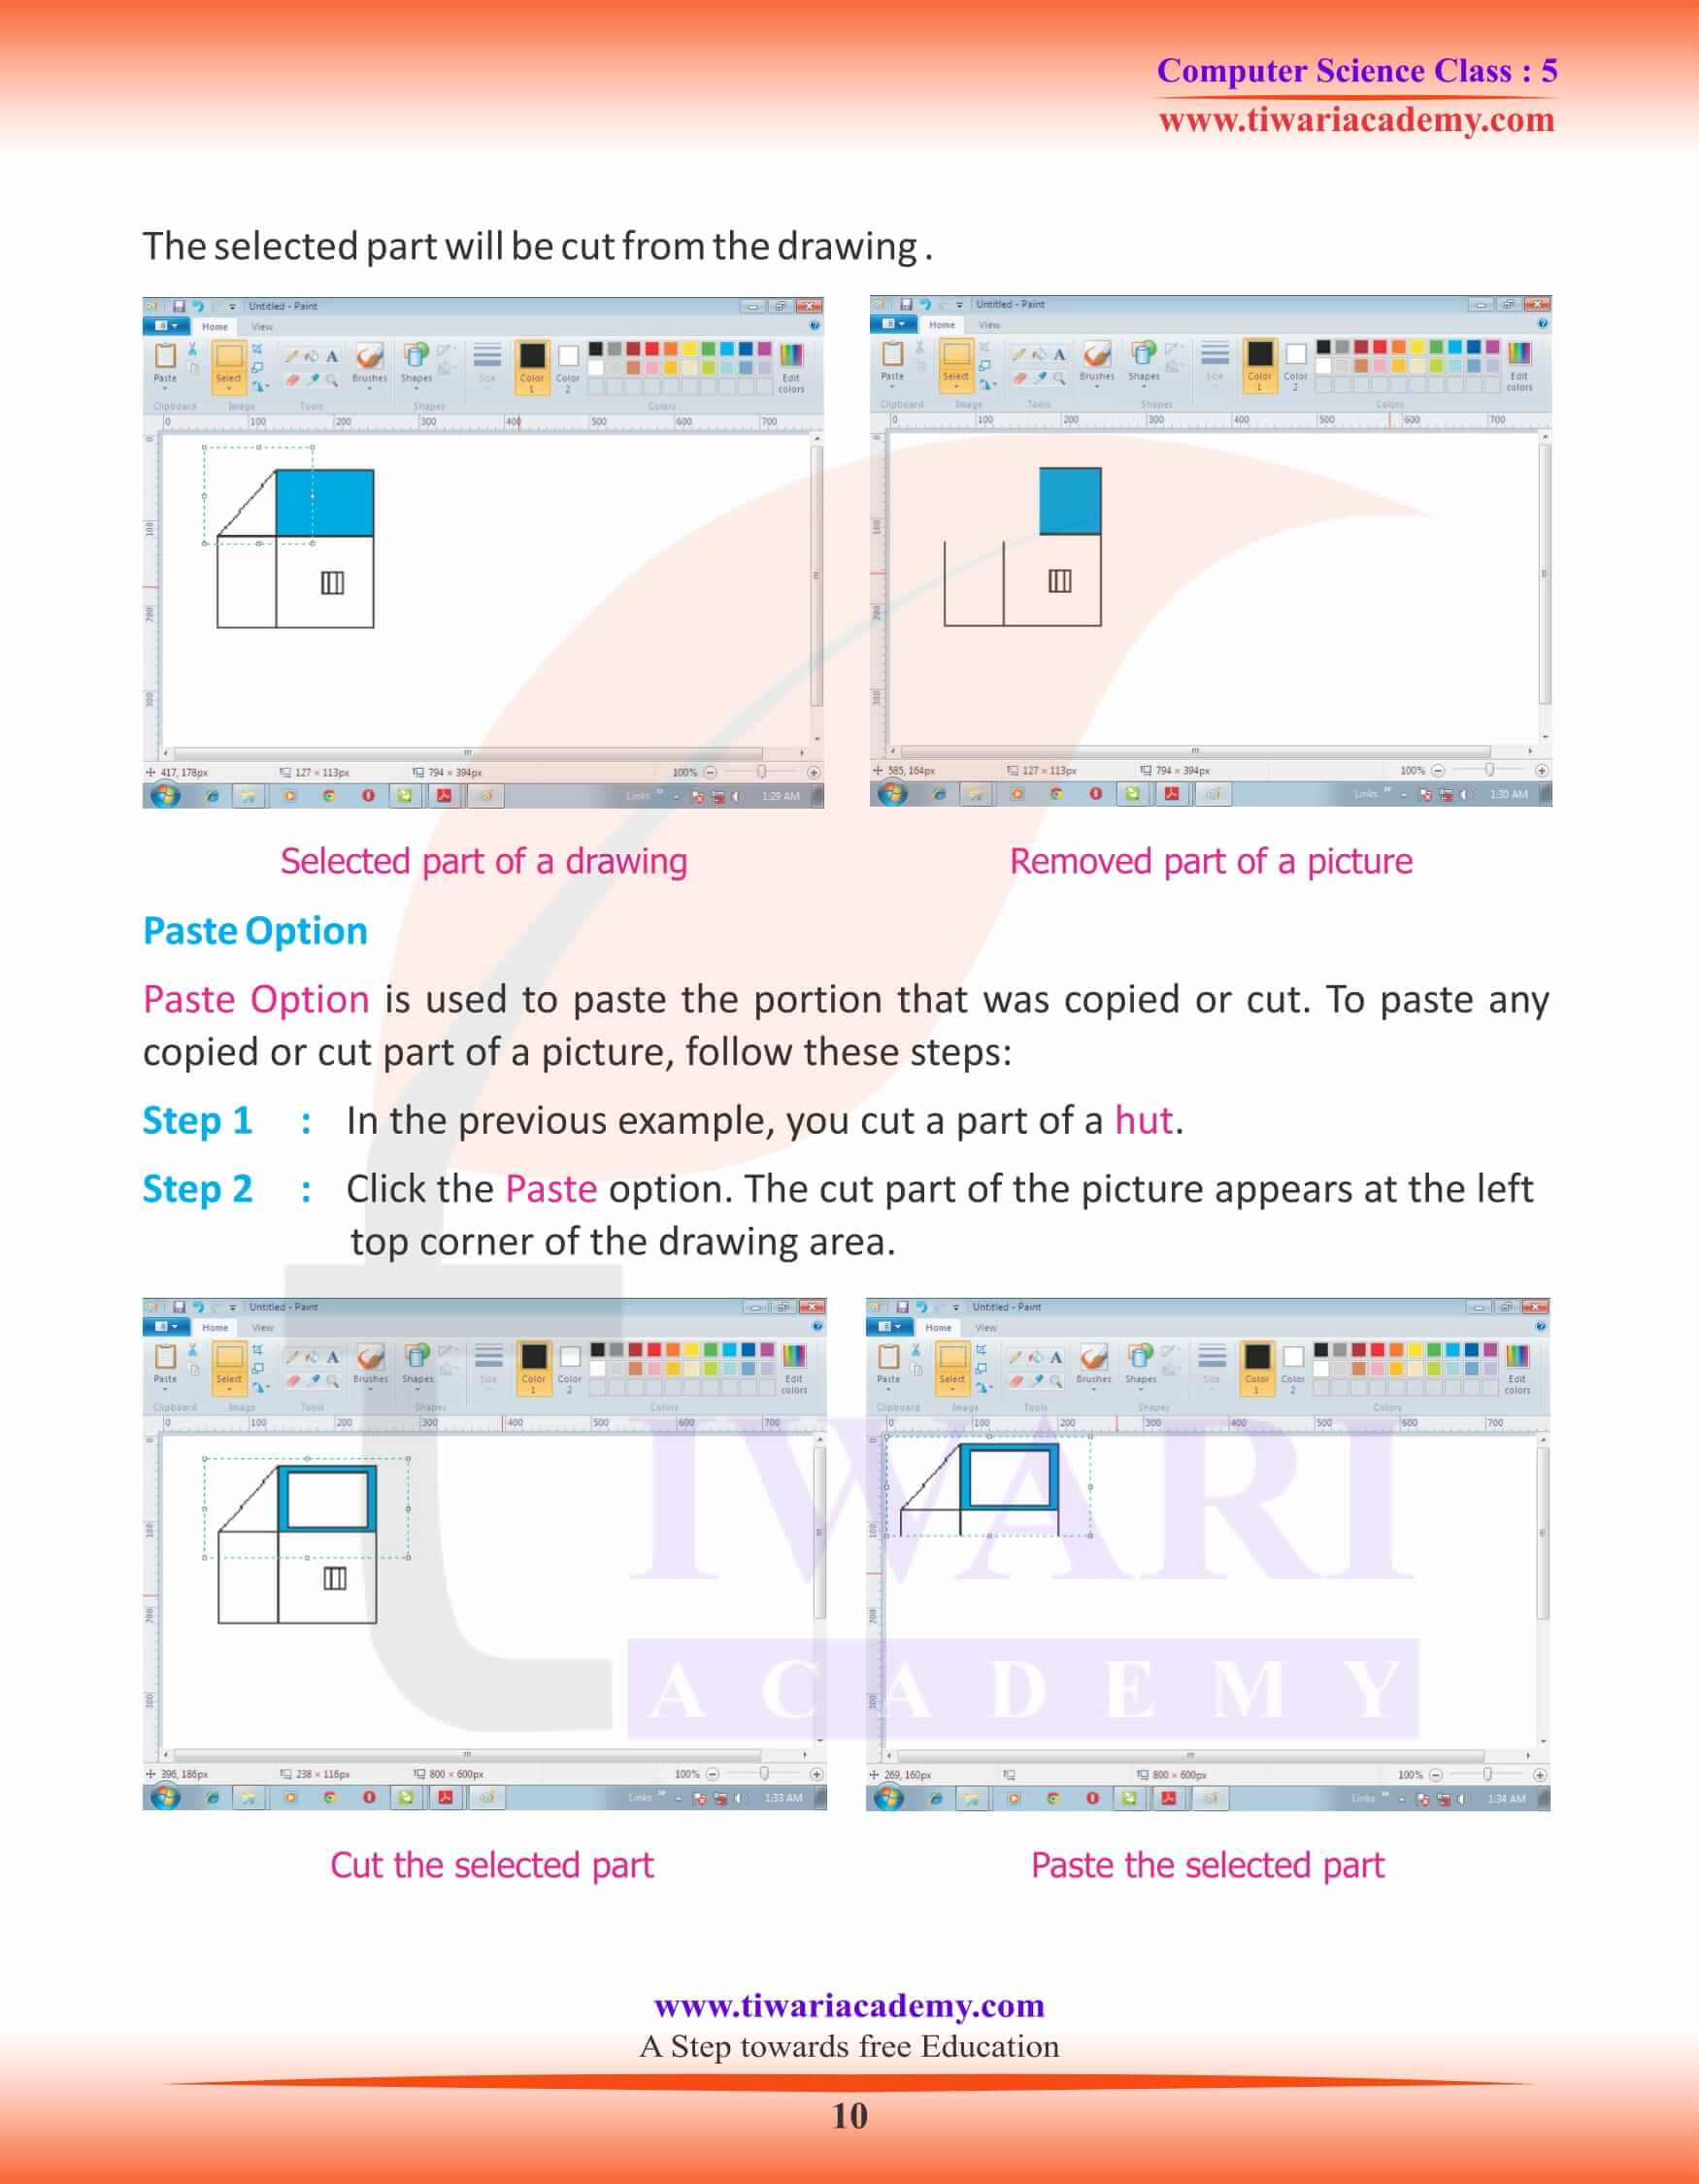
Cut Option
Cut Option is used to remove the selected part of a picture. To cut any part of a picture, follow these steps:
Step-1 : Select any part of your drawing which you want to cut using any Selection tool.
Step-2 : Select the Cut option and click on it.
The selected part will be cut from the drawing .
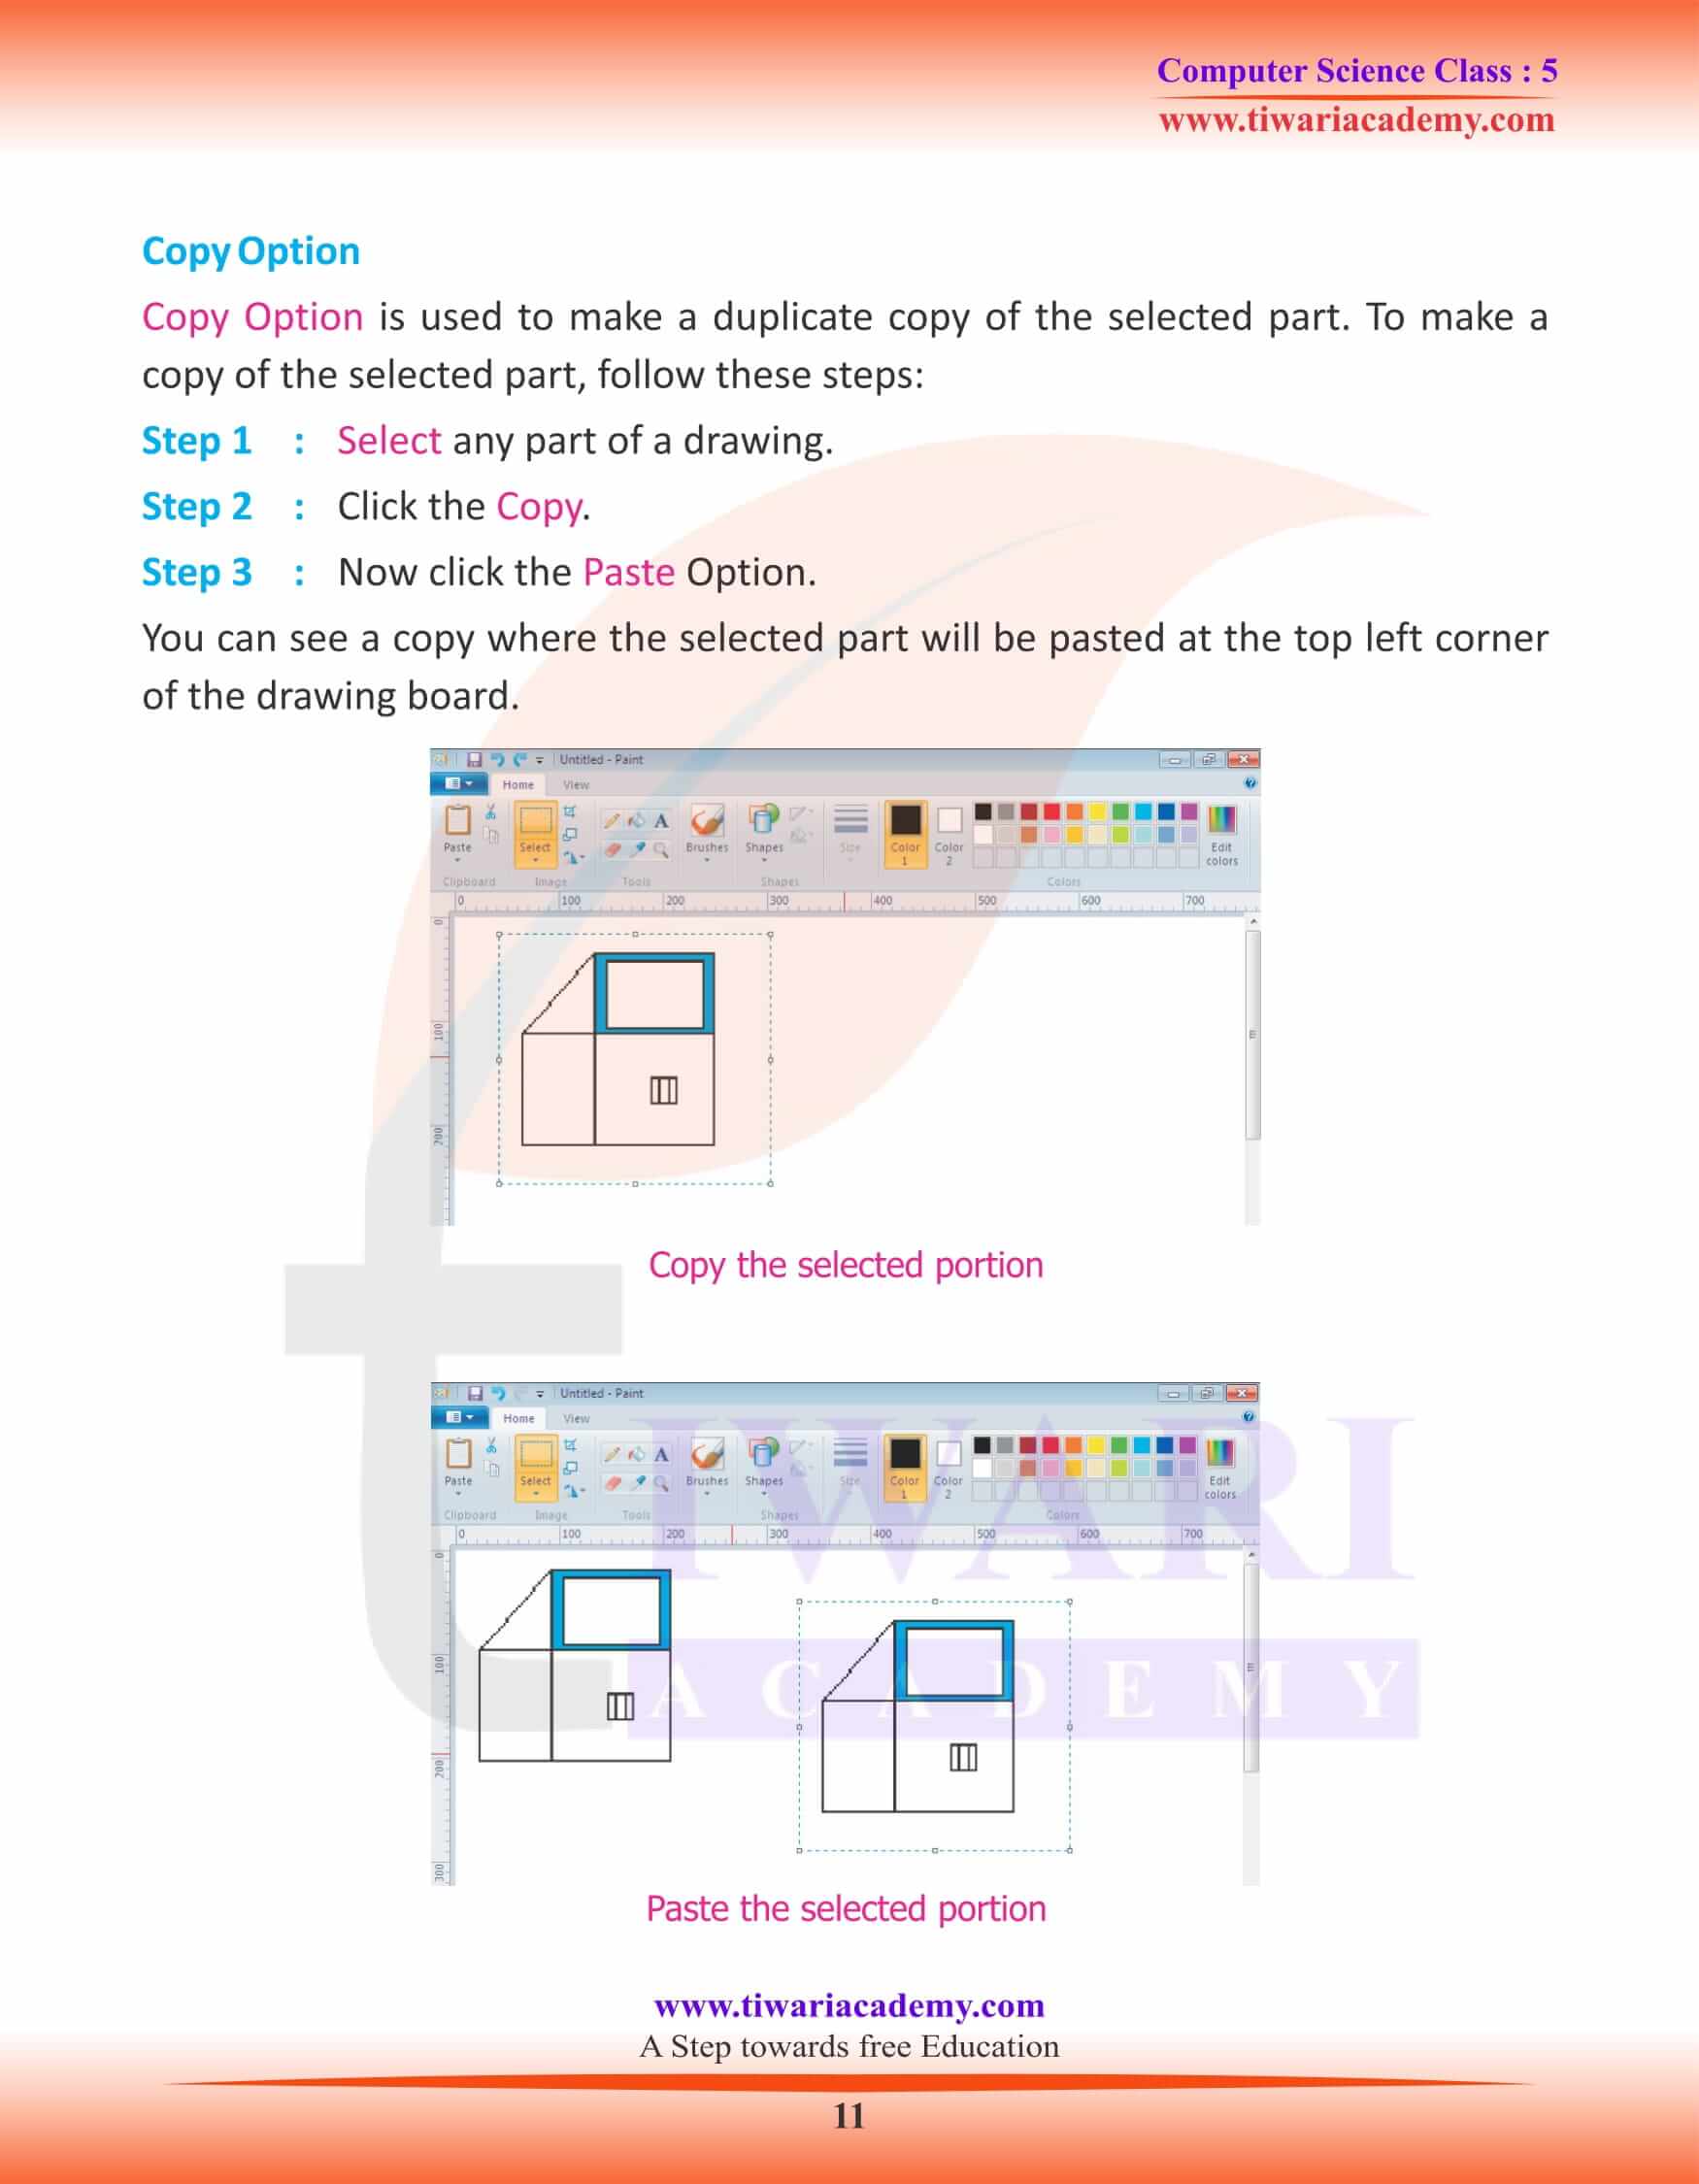
Paste Option
Paste Option is used to paste the portion that was copied or cut. To paste any copied or cut part of a picture, follow these steps:
Step 1 : In the previous example, you cut a part of a hut.
Step 2 : Click the Paste option. The cut part of the picture appears at the left top corner of the drawing area.
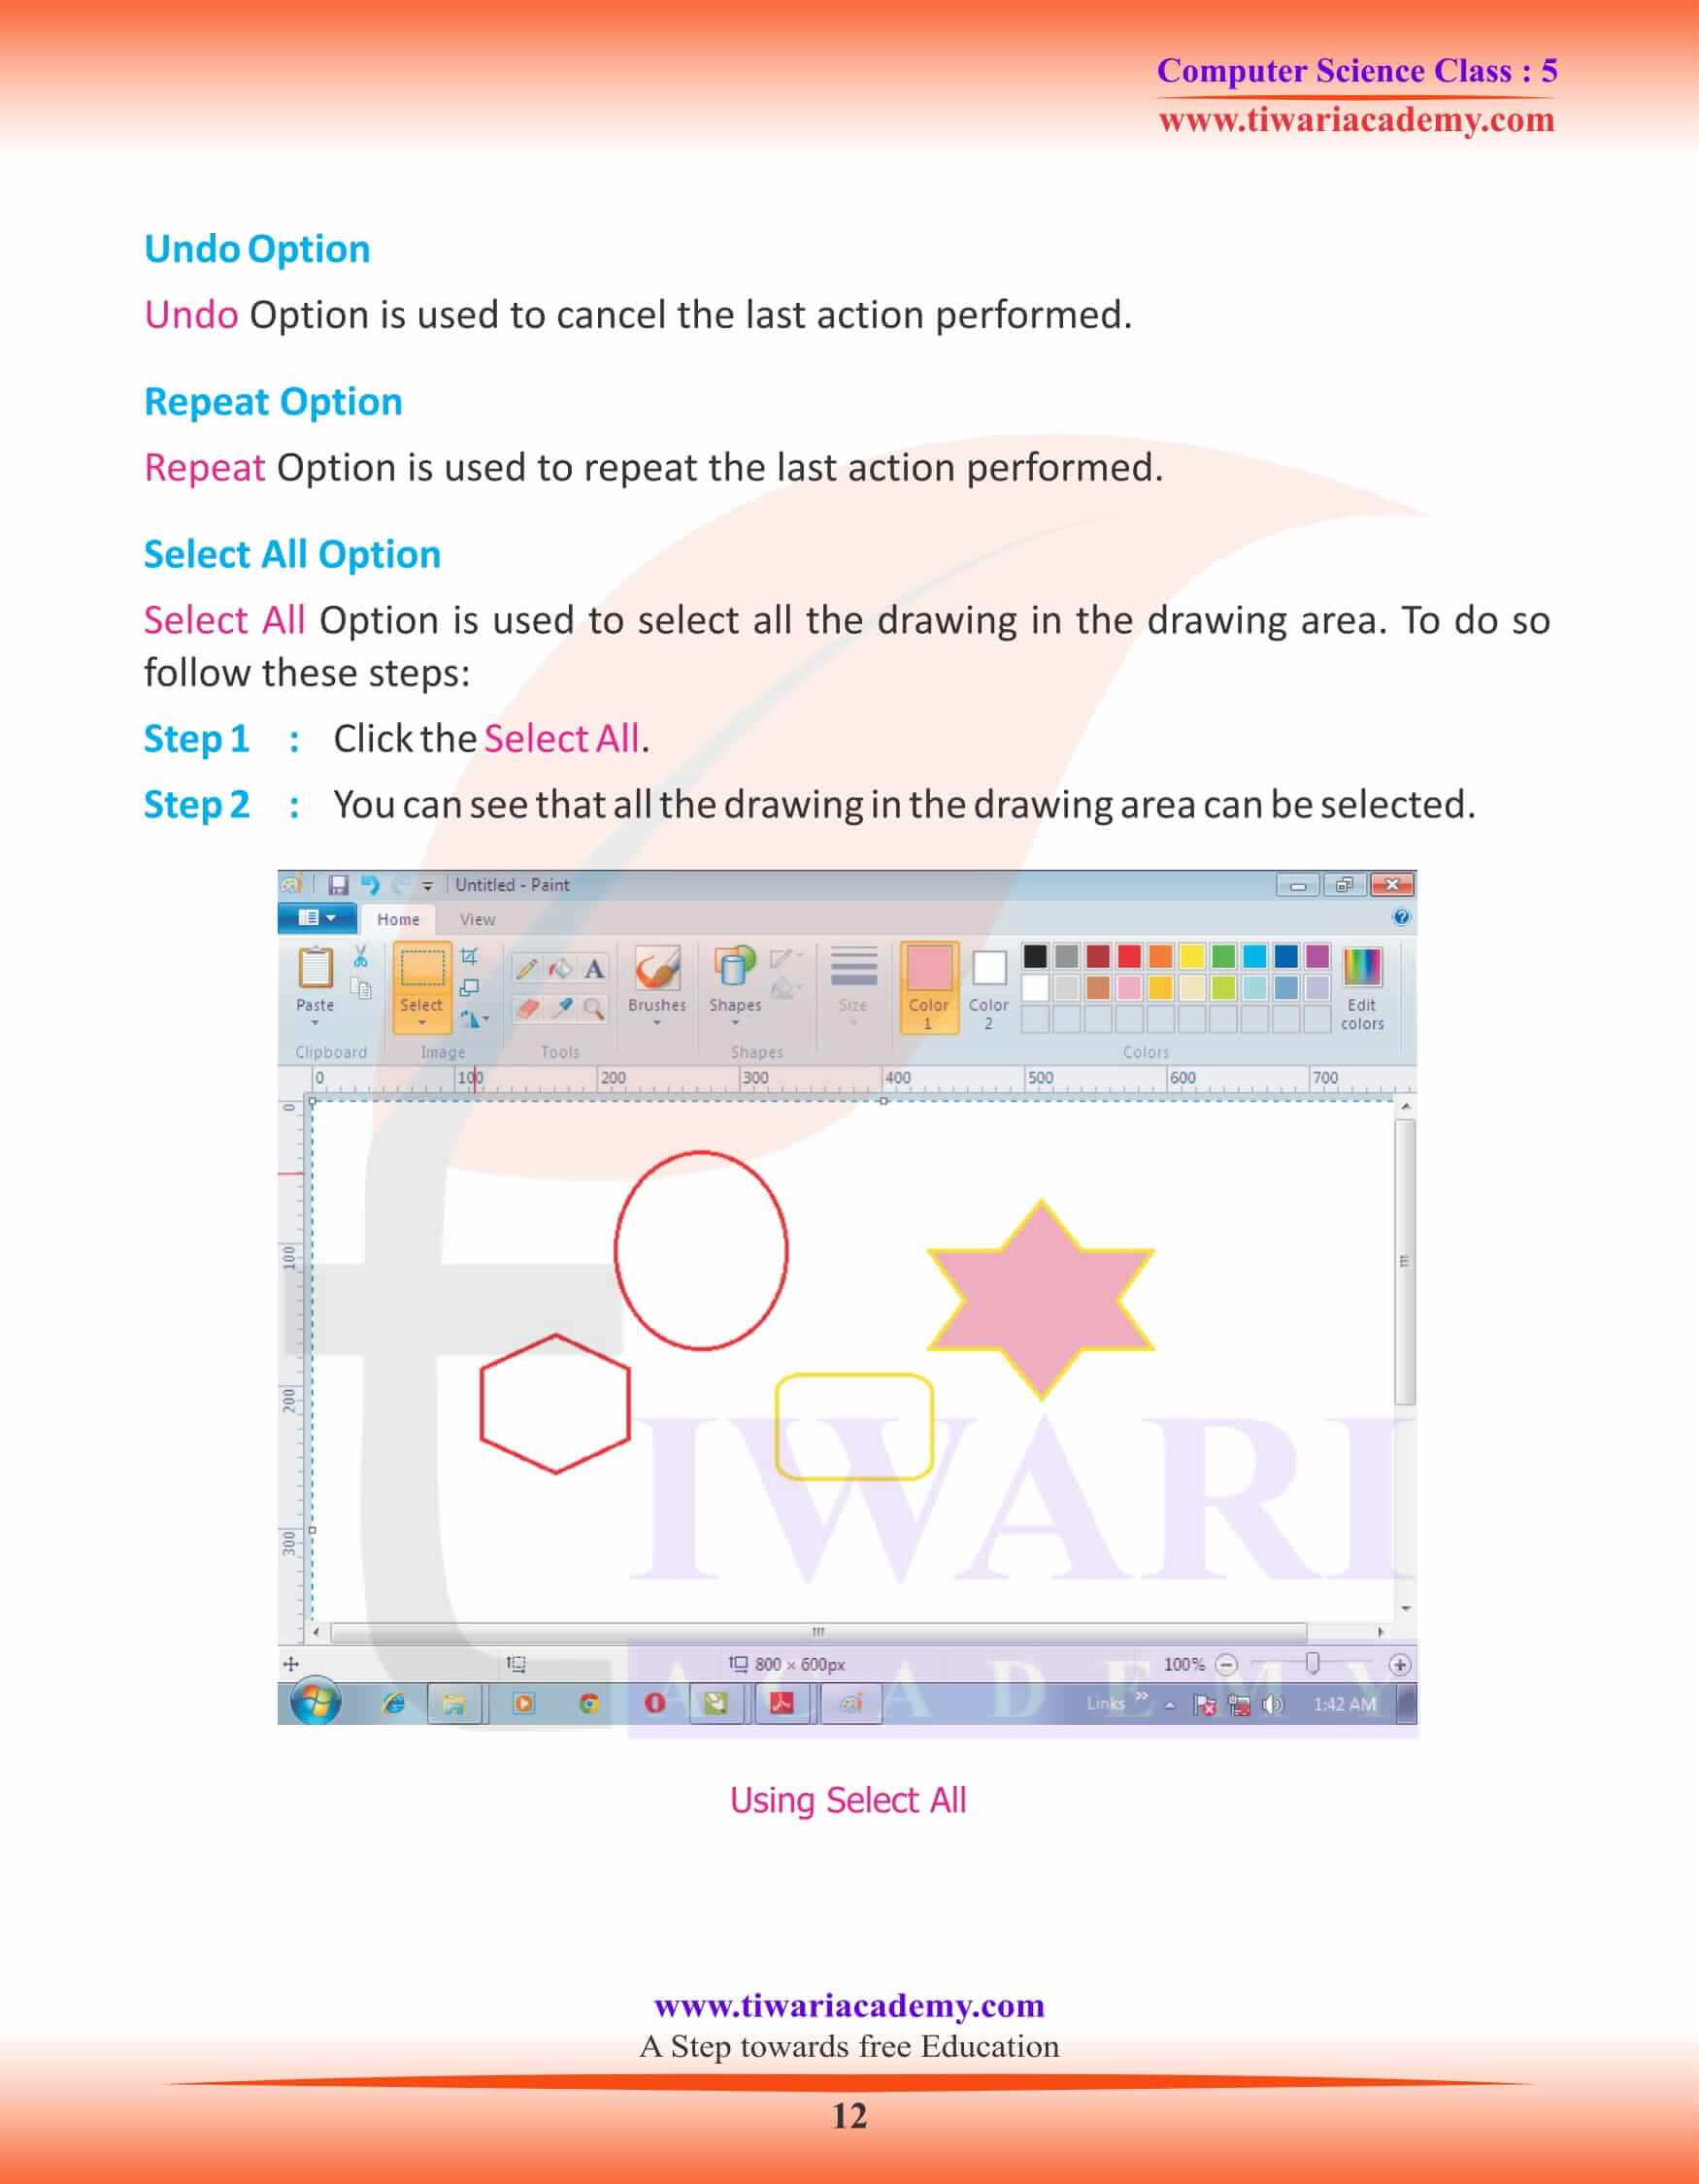
Copy Option
Copy Option is used to make a duplicate copy of the selected part. To make a copy of the selected part, follow these steps:
Step 1 : Select any part of a drawing.
Step 2 : Click the Copy.
Step 3 : Now click the Paste Option.
You can see a copy where the selected part will be pasted at the top left corner of the drawing board.
Undo Option
Undo Option is used to cancel the last action performed.
